Overview
Moodle quizzes can be used for formative and summative in-class tests and formal exams (including referrals) to evaluate student understanding of course material within a semester. This activity supports a wide range of question, feedback and layout types, however out of these, we recommend using multiple-choice questions which can be created inside and outside of the DLE.
In this article, we will show you how to set up a ‘Quiz’ activity for referrals or alternative assessments in your Moodle course.
How to add a Quiz activity to your Moodle course
To add a ‘Quiz’ activity to your Moodle course, please follow the steps in the following article.
Restrict Access
During regular in-class tests, we usually recommend leaving the ‘Restrict Access’ setting on default, however when it comes to referrals or alternative assessments, we recommend restricting the access to the activity to make sure that only those students will be able to complete the task who are supposed to. The ones who should not complete the quiz, will not be able to as the activity would be hidden from them. To do this, please follow the steps below.
For more information about restrictions, please visit the following help material.
Group setup
Before you would apply the restriction to the activity, you will need to create a group with the students who will be the referrals or alternative assessments. To do this, please follow the steps in the following article.
We recommend naming the group, for example, ‘Referral Test’, ‘Referral Exam’ for referrals, or ‘Alternative Assessment’, ‘AAs’ for alternative assessments and so on, to make sure you will recognise its purpose. This is going to be the group that you will use as a condition to restrict access to the quiz.
Changing the settings
Once you created the group and allocated the relevant students to it, you will then need to apply the restriction which you can do in the settings of the quiz. To do this, please follow the steps below.
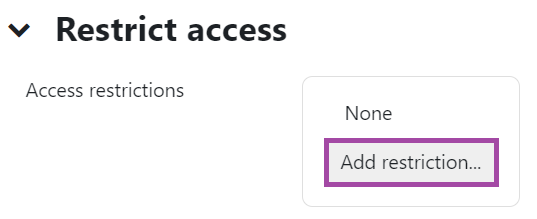
- Please navigate to the section in the settings of the activity where it says ‘Restrict access’.
- Once you are there, please click on the ‘Add restriction…’ button.
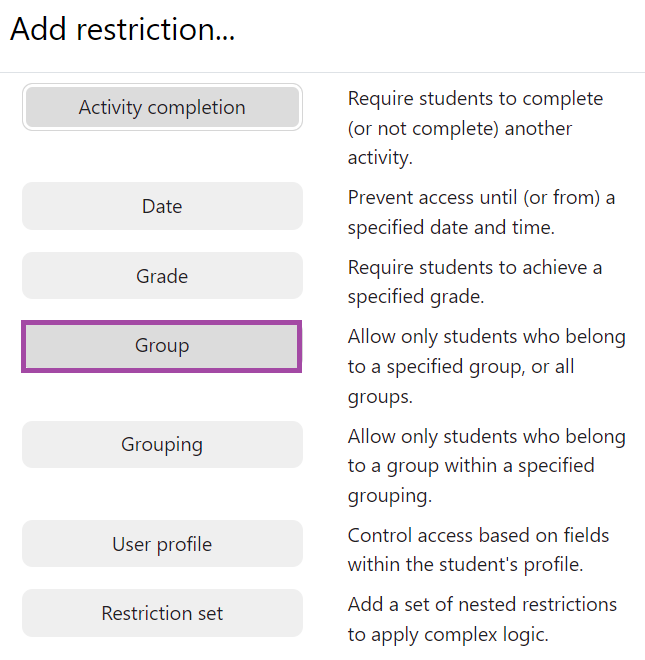
- A new window will pop up where you will need to select ‘Group’ as the restriction will be based on that.
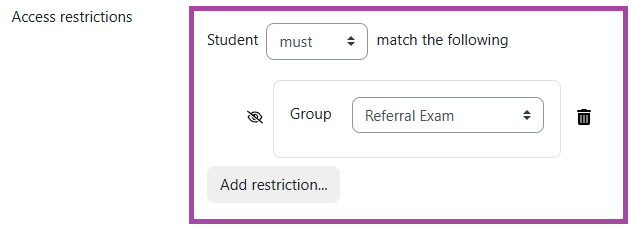
- Please make sure you set up the condition in the following way: ‘Student [must] match the following Group [Group name]’. Please also make sure you click on the ‘eye’ icon which will prevent the activity from being displayed for students who are not allocated to this group.
- Lastly, please click on the ‘Save and display’ or ‘Save and return to course’ button to finalise your action.