Why use groups?
You can create groups in Moodle for multiple purposes, such as:
- Creating a group submission point where your students will need to submit their work in groups.
- Allocating students to markers so that each marker will have a group of students they need to mark.
- Restrict access to a section, activity or resource based on the group which can be useful for referral/alternative assessments running as submission points or quizzes where only those students can access/engage with these resources who are part of the group.
You can either:
- Manually create groups and assign students to them as preferred
- Let the DLE/Moodle randomly allocate students into a number of groups you specify
Alternatively, you can use the ‘Group choice’ activity to allow students to put themselves in a group.
How to create groups
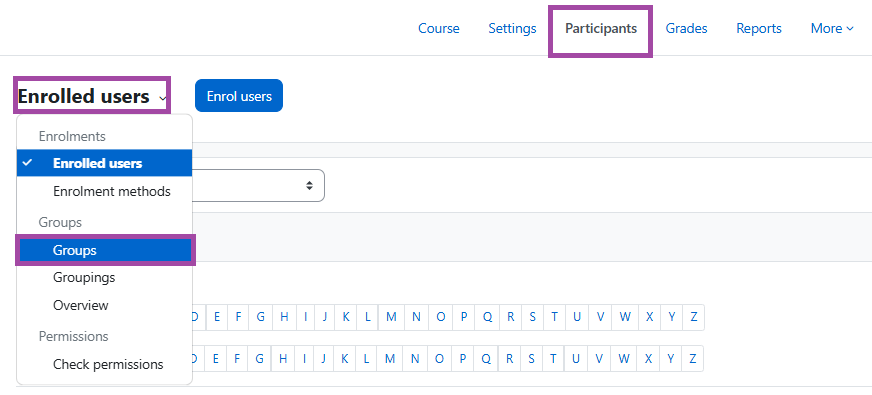
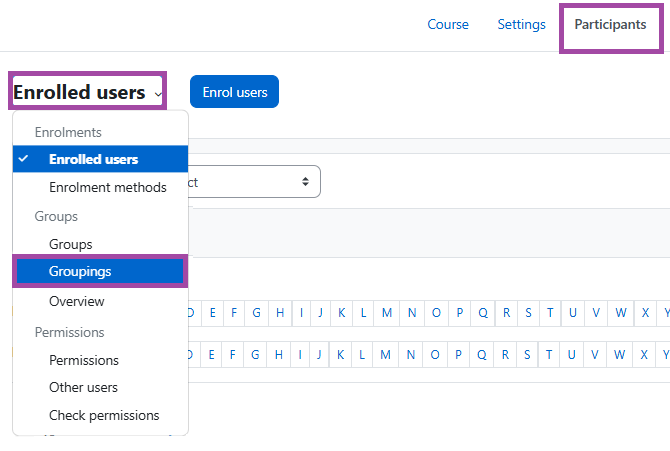
- Please navigate to your course page in the DLE/Moodle, and then select the ‘Participants’ menu from the secondary navigation bar.
- Once you are there, please click on the ‘Enrolled users’ drop-down box at the top of the participants page and then select ‘Groups’.
Manually create groups
To manually create groups, please follow the steps below:
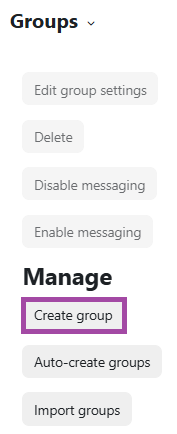
- Please click on the ‘Create group’ button to manually create a group.
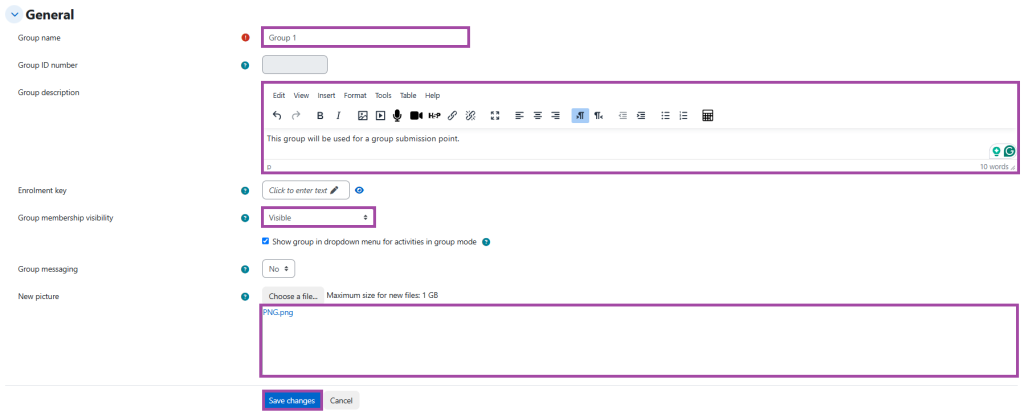
- In the settings, please enter a useful name for the group. You can also provide ‘Group description’ or a ‘New picture’ for the group, should you wish to. Once the setup is completed, please click on the ‘Save changes’ button.
Add students to the group
Once you created the groups, you will need to allocate students to these groups. To do this, please follow the steps below:
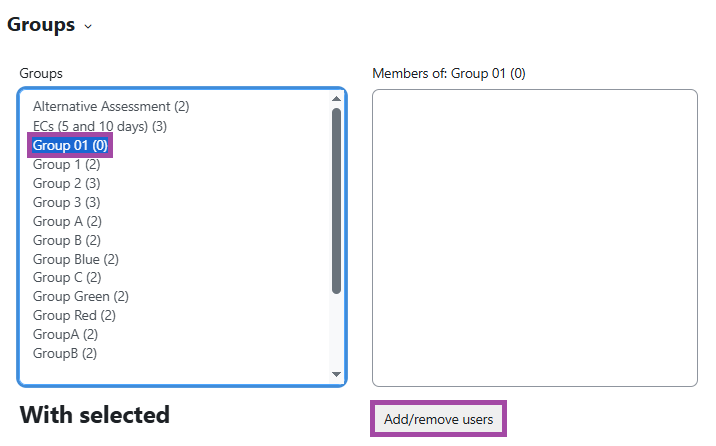
- Please select a group and then click on the ‘Add/remove users’ button.
- A new page will open where from the right window, you will need to select the students you wish to allocate to the group. Once selected, you can click on the ‘Add’ button to add them to the group. From that moment, they should appear in the left window. If you made an accidental mistake, you can select them from the left window and click on the ‘Remove’ button which is located under the ‘Add’ button.
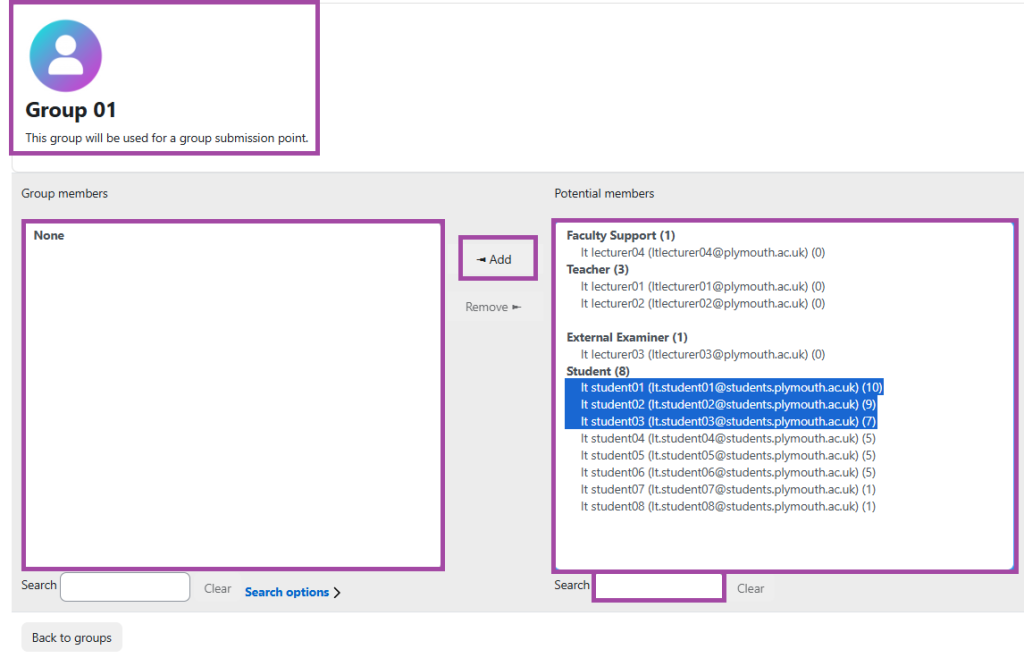
- Once you have added all of the students for the particular group, please click on the ‘Back to groups’ button. You will not need to manually save the process – it is auto-saved by the DLE.
Auto-create groups
To auto-create groups by the DLE, please follow the steps below:
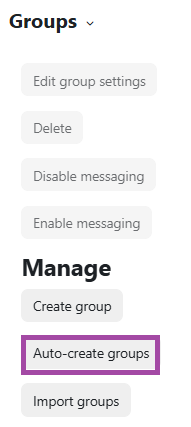
- Please click on the ‘Auto-create group’ button to automatically create groups by the DLE.
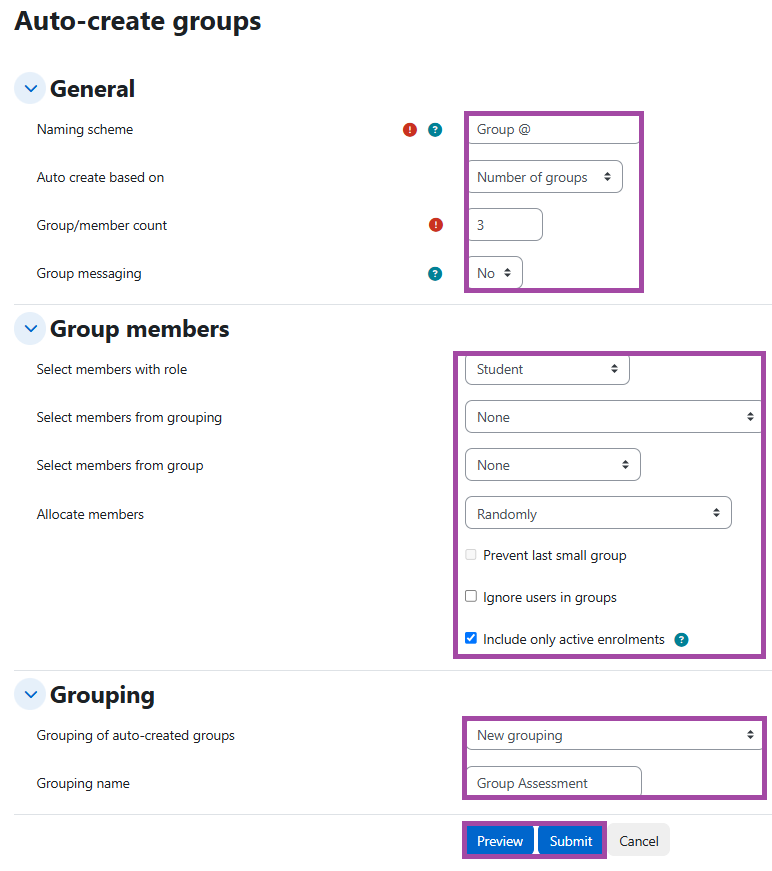
- In the settings, please enter a useful ‘Naming scheme’. You could use two formats to create groups:
- ‘Group @’ will create groups with the name scheme ‘Group A’, ‘Group B’, ‘Group C’, and so on.
- ‘Group #’ will create groups with the name scheme ‘Group 1’, ‘Group 2’, ‘Group 3’ and so on.
In this case, we will use numbering scheme so we entered ’Group @’ in the box.
- You can also specify:
- The number of groups you wish to create or the number of members you wish to allocate to a single group (’Group/member count’)
- Whether you wish to:
- Allocate students already allocated to existing grouping or groups (’Select members from grouping’ or ‘Select members from group’)
- Ignore students already allocated to existing groups (’Ignore users in groups’)
- Whether the allocation should be:
- Randomised
- Alpabetical based on first and last names or ID numbers (this may not be equivalent to student numbers)
- Whether to ‘prevent last small group’
- Whether you wish to include ‘Suspended’ students (please do not untick this box ‘Include only activate enrolments’)
- Whether you wish to create a new grouping/folder for these groups (which most likely you will need if you wish to use the groups for a submission point, marking allocation, etc). For further information about groupings, please see below.
Adding groups to a grouping
Create a grouping
A grouping is a collection/folder of groups within a course. When you wish to use groups, you will always need to refer to the grouping (where the groups are allocated to). This can apply, for example, for a group submission point, alternative/referral quiz or submission point, marking allocations and many more.
To create a grouping, please follow the steps below:
- Under the ‘Participants’ menu of your course, please click on the ‘Enrolled users’ drop-down list and select ‘Grouping’.
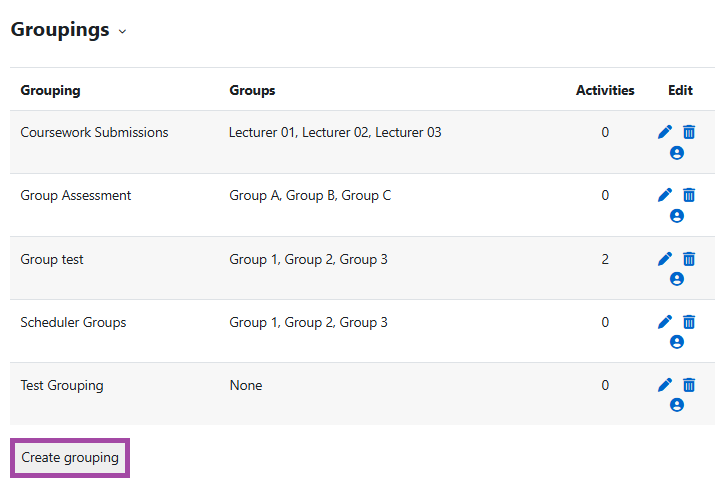
- Please click on the ‘Create grouping’ grey button at the bottom of the page.
- Please enter a useful name for the grouping. We usually recommend adding the purpose of the grouping to its title, e.g. if it is a group presentation assessment, you can then enter this in the box next to the ‘Grouping name’. If you wish to, you can also enter a ‘Grouping description’ for your tutors. Once the setup is completed, please click on the ‘Save changes’ button.

Add groups to the grouping
Once you created the grouping, you will need to allocate groups to this grouping. To do this, please follow the steps below:
- Please select the grouping and click on the user icon next to it (under the ‘Edit’ column).

- Using the same method as for manual student allocation, you will need to highlight the groups from the right-side window and add them to the left-side window, using the ‘Add’ button between them. You can also remove any group allocation with the ‘Remove’ button if needed.
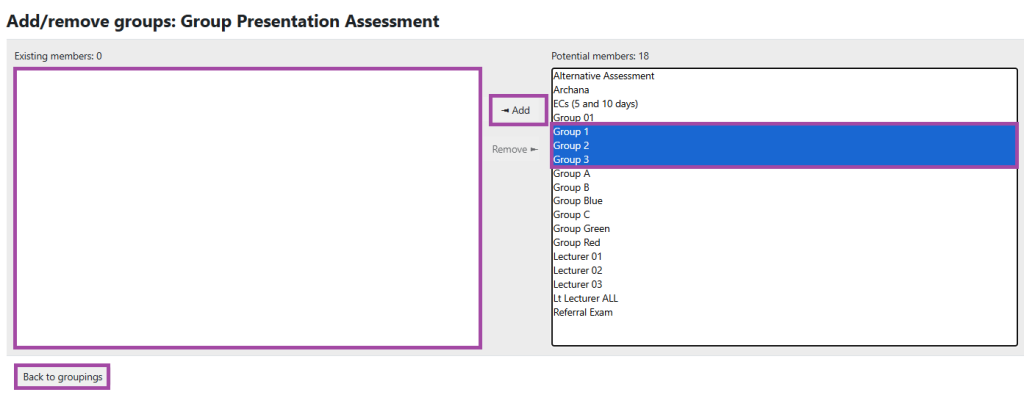
- Once you have added all of the groups for the particular grouping, please click on the ‘Back to groupings’ button. You will not need to manually save the process – it is auto-saved by the DLE.
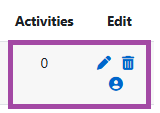
- On the grouping list, you can:
- Adjust the settings with the pencil icon
- Manage group allocations with the user icon
- Remove the grouping with the bin icon
- Track the amount of activities where this grouping (with its groups) have been used
- If no further actions is needed, you can now proceed with setting up the submission point, restrict access, etc.