Overview
Assessment activities, such as quizzes or assignments allow students to submit their work to be graded or assessed. Usually, you can check which student submitted their work by navigating directly to these assessment activities. However, for bigger cohorts, it might be difficult to identify the students who did not submit their attempts or files within the timeframe. This can be important when recognising students who may have applied for 5-day or 10-day extenuating circumstances. With the ‘Reports’ feature of Moodle, you can now track students, and submissions and utilise filters to define timeframes that would be of interest.
In this article, we will show you how to check for non-submissions in Moodle by using the ‘Reports’ menu.
How to check for non-submissions in Reports
To check for non-submissions in Moodle, please follow the steps below:
- Please navigate to the course page in the DLE (Moodle) where you would like to access this report.
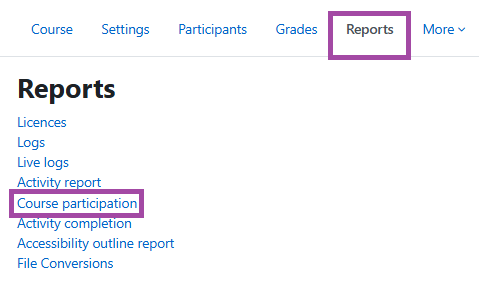
- Once you are on the front page of the course, please click on the ‘Reports’ in the secondary menu.
- A new page will open where you can select from a few options depending on what report you wish to access. In this case, you will need to select the ‘Course participation’ option, however, there are also other reports available here that may be useful to check in other circumstances, such as:
- Licences: This report can be useful to customise the licences for any uploaded file to the course. Please note, we do not suggest using this feature, as there are University policies about licences and intellectual properties available internally only.
- Logs: This report can be useful to track activities under a course for all users, including students and staff.
- Live logs: This report is essentially equivalent to logs but only displays the live logs, so the changes made to the course at the time of generating the report.
- Activity report: This report can be useful to look at views per activity across your Moodle site. Please note that it would not include the names of the students, but only the number of users and the number of views.
- Course participation: This report can be useful to track activities and engagement under an assessment activity. In this article, we will use this feature in the DLE (Moodle).
- Activity completion: This report can be useful if the content can be manually or automatically checked as being completed by the students. Please note, this feature will need to be set up for each activity or resource beforehand the report is available.
- Accessibility outline report: This report can be useful to get an overview about your course accessibility status. It will offer a detailed report about each activity/resource. For more information about accessibility, please visit the following DLE help course.
- Once you are on the ‘Course participation’ report page, you will need to use the following filters for the assessment and click on the ‘Go’ button at the end.
- Activity Module: This is where you select the assessment activity you wish to track under the course.
- Look back: You can select a timeframe you wish to cover in the report, for example, looking back for a week. If you do not want to use a timeframe, please leave the default option (’Choose’).
- Show only: This is where you can select the user role you wish to track. For non-submissions, this should be set to ‘Student’.
- All actions: Please leave it on default.
- Groups: If you wish to track a specific group for an assessment, you can then filter the group here.

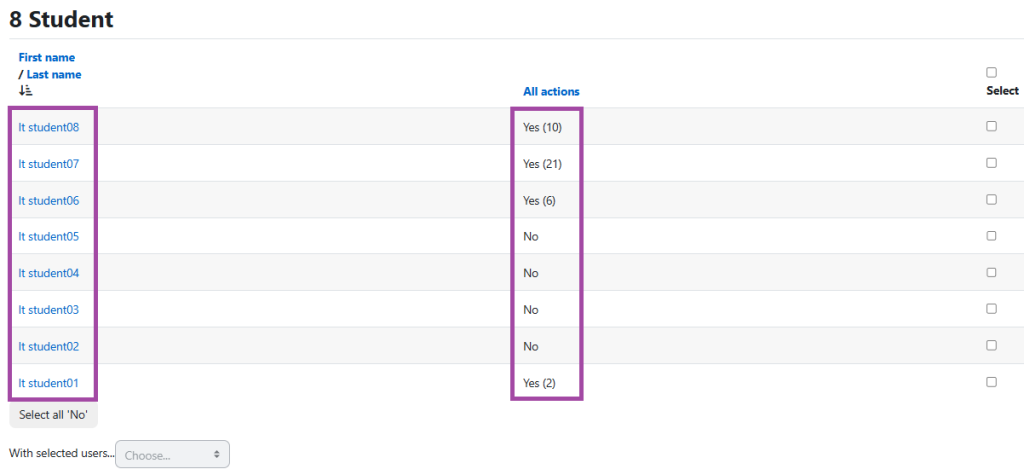
- Once the report is generated, you will see either ‘Yes’ or ‘No’ next to each student indicating whether they completed the assessment or not. If it is set to ‘Yes’, it means they made an attempt/submission, whilst if it is set to ‘No’ it means they did not (these are the non-submissions). The number in brackets indicates the number of attempts made or updated submissions.
How to send a message to non-submissions
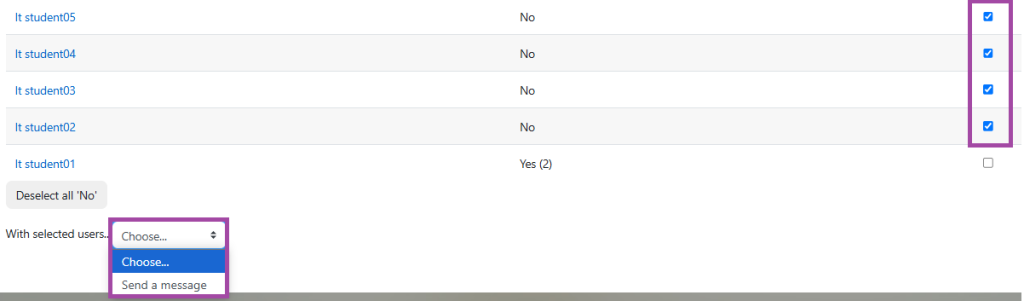
- If you would like to notify the non-submissions, you can then send a message by ticking the boxes next to their name, clicking on the drop-down list where it says ‘With selected users…’, and then selecting the ‘Send a message’ option.
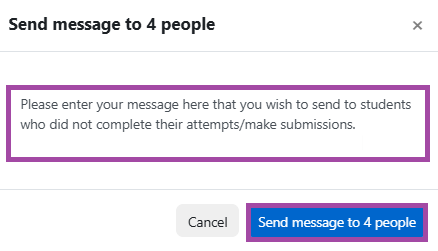
- A new window will pop up where you can enter the message you wish to send to these students. They will receive an e-mail notification about this from Moodle which may arrive in their ‘Other’ inbox if your inbox has a filter system.