Overview
Generally, creating a backup of a Moodle course is good practice once you (the course leader) are happy with the content. Each Moodle course has a recycle bin that contains deleted content for 3 months; however, for fear of accidental resource deletion, a backup ensures you can restore items over a longer period.
If you decide to implement a backup strategy for your course, please ensure you download and retain a copy offline, either storing these in your personal OneDrive or within a shared SharePoint site related to your programme or module.
How to make a backup
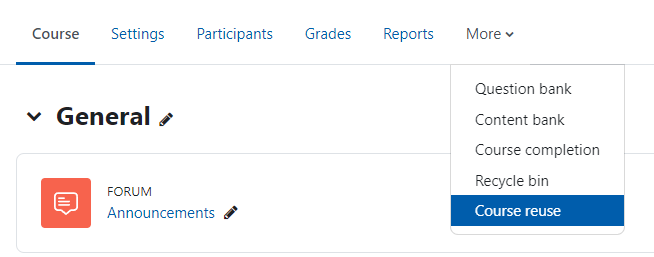
- From your Course page, click ‘More’ on the secondary menu.
- Select ‘Course reuse’.
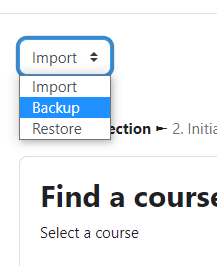
- Select ‘Backup’ from the dropdown menu on the left.
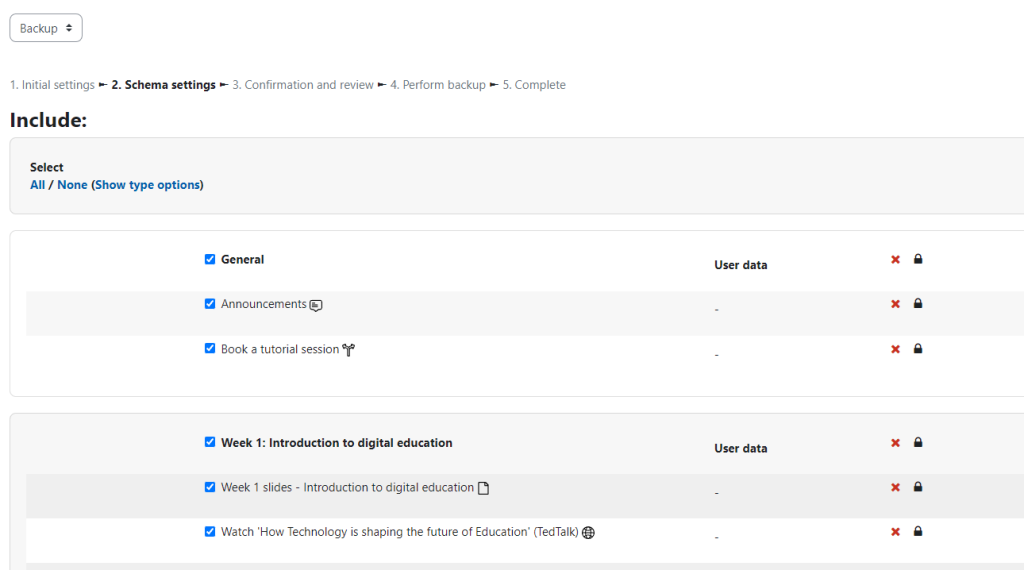
- Select the items you would like to back up. If you have done this before and are happy with the default backup settings, you can press the ‘Jump to final step‘ button. If not, click ‘Next‘.

- After clicking ‘Next’, you can select or de-select any individual activities. Click ‘Next’ again.
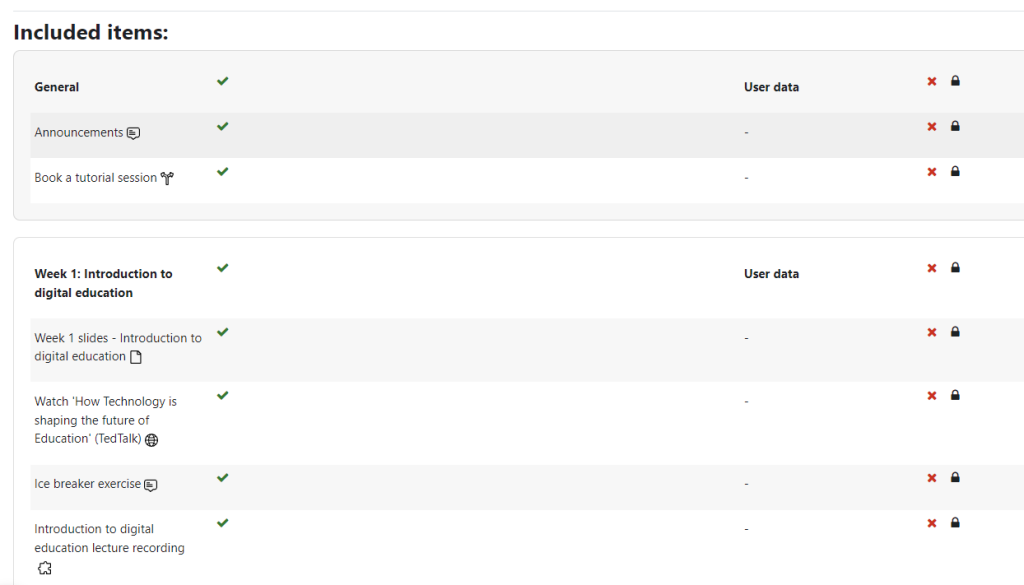
- The following page shows a list of items that will be included in the backup.
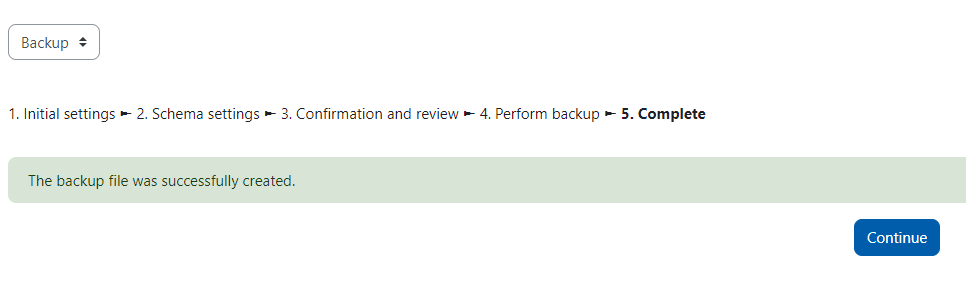
- When the backup is complete, you will see a message saying: ‘The backup file was successfully created’. Click ‘Continue‘.
Items which you cannot backup
Your backup file will include Moodle resources such as web pages, files you have
uploaded, folders, books, labels, images and any hyperlinks to videos or other
resources.
You will also have the structure of Moodle activities you have created, but you will
not be able to backup any user data.
So, for example, this means that your backup does not include user data such as:
- Student responses in quizzes
- Items posted in WIKIs or forums
- Items posted is surveys or polls
- Glossary entries need to done separately (see help guide on ‘Exporting & Importing glossary entries’)
- Activity completion details and/or restricted access settings are lost
- This list is not comprehensive, but these are key examples.
Downloading your backup (Recommended)
- Click the ‘Download’ button in the table to download your most recent backup.
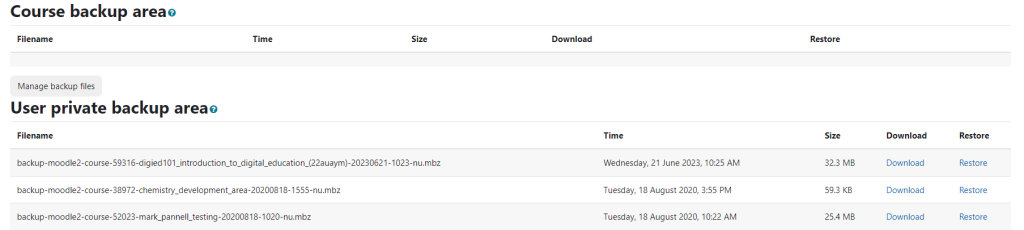
- Choose which folder to save your backup into and click ‘Save‘.
Deleting old backup files (Recommended)
You will need to manage your backup files so that the old ones you don’t need are
removed from the system. It is a good idea to keep one copy on the server as well –
older backups that are not required can be removed.
- On the secondary menu, select ‘More’
- Select ‘Course reuse’.
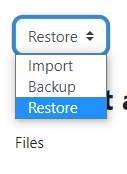
- Select ‘Restore’ from the dropdown menu
You have a User private backup area on the page with a list of your backup files
from all courses you have backed up.

Once you have downloaded your backup files to a local machine, you can remove
old ones.
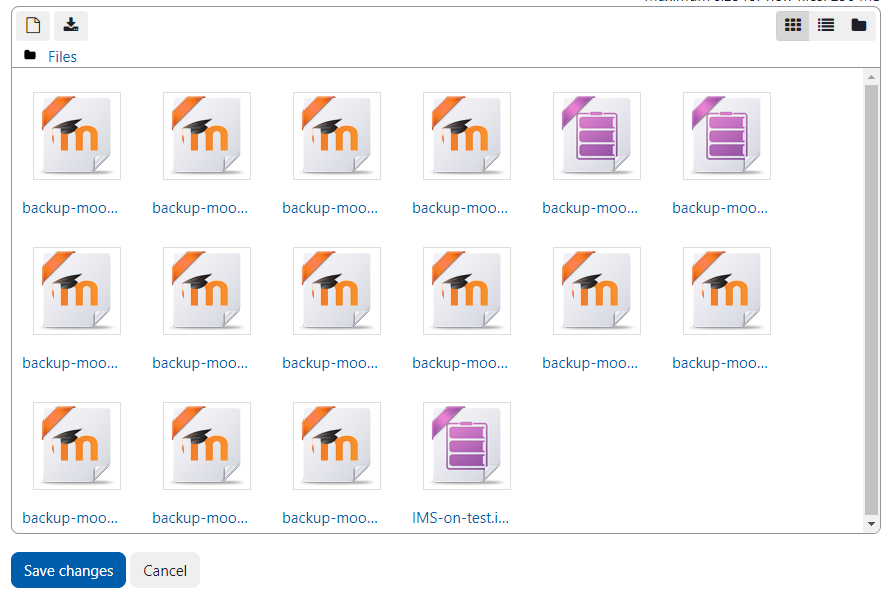
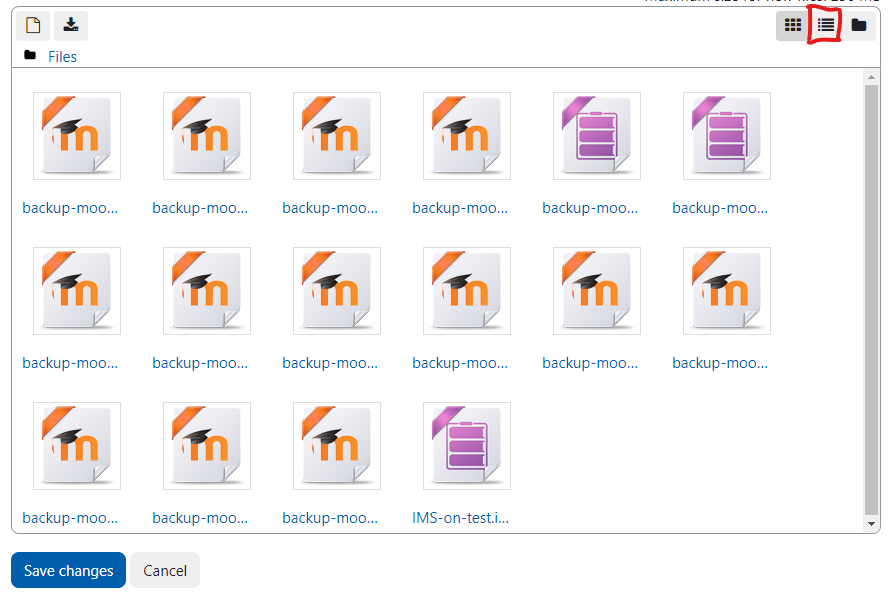
- At the bottom of the screen click the Manage backup files button. Files you have backed up from all of your courses will be displayed as icons.

Files you have backed up from all of your courses will be displayed as icons.
- Click the middle icon at the top right to display them with file details so you can see the names:
- To delete a backup file, click on the file and then click Delete.
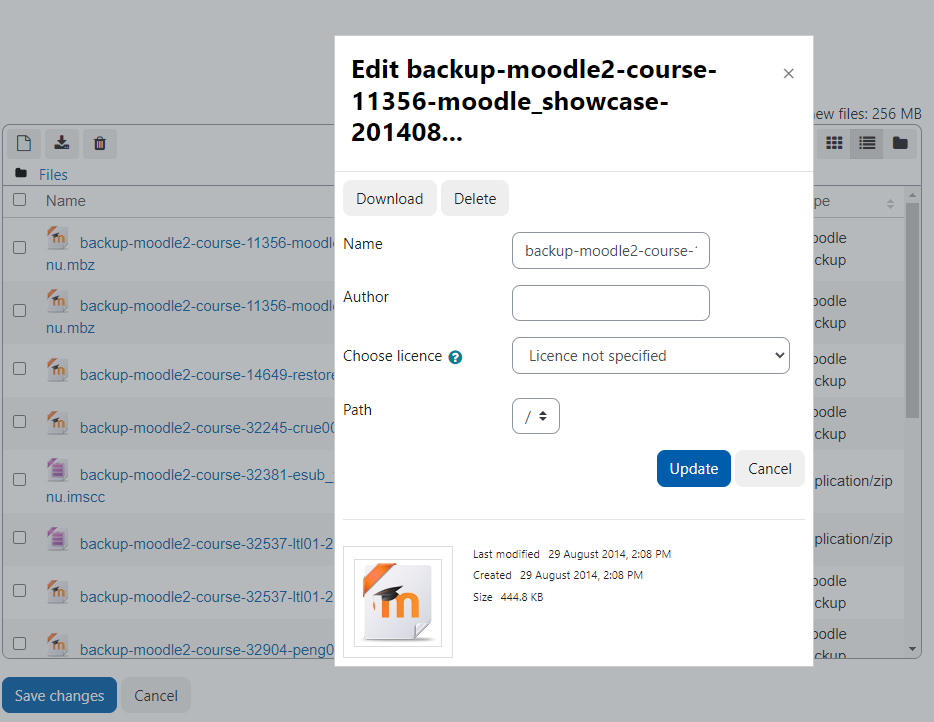
- It will ask if you want to delete it – click OK to confirm.