Overview
PebblePad is the University provided web-based ePortfolio and Personal Learning system. The system is available to all staff and students and can be used independently for Personal and Professional Development, or as part of assessed activities within the curriculum.
PebblePad ATLAS is the institutional space to which learners (organised into groups or Sets on Workspaces) submit work from Pebblepad for tutor feedback, peer review, or validation.
This article explains how to add Externals (that is; Examiners or Mentors form outside the institution) to an ATLAS. workspace.
How to add an external user to a workspace in PebblePad ATLAS
To add an external user to a workspace in PebblePad ATLAS, please follow the steps below:
- Sign in to your Moodle account.
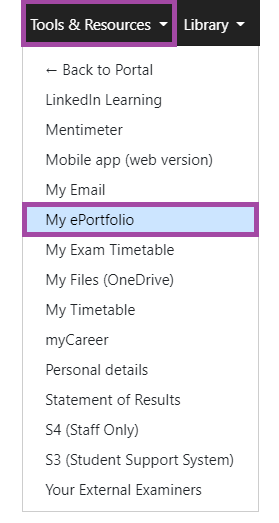
- Through the navigation bar appearing on the top left side of the screen, select ‘Tools and Resources’, and then select ‘My e-portfolio’ from the drop-down menu.
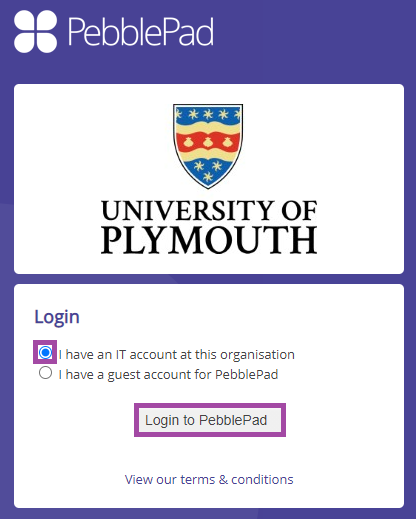
- You will then be directed to the PebblePad website and required to log in with your academic IT account.
- After logging in, select the blue ball icon (on the top left side of your screen) to be directed to PebblePad ATLAS.

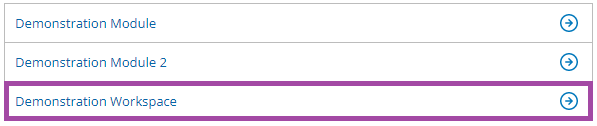
- A list of the workspaces you have access to should then appear on your ATLAS homepage. Please select the one to which you intend adding external users.
- Please click on the ‘Management’ menu and then select the ‘Externals’ sub-menu in the navigation bar.

- A new page will then open with the following options.

- ‘Search for an external’ – with this button, you can search for a specific external user who has already been added to PebblePad ATLAS, and then add them to your workspace.
- First, select ‘Search for an external’
- then enter the name of the user in the search bar,
- select the user from the list of suggestions,
- and then click on the ‘Save’ button.

- ‘Create an external’ – This allows you add a new external user to PebblePad ATLAS, and then to your workspace.
- First, select ‘Create an external’
- then select between two options on the type of account you would like to create.
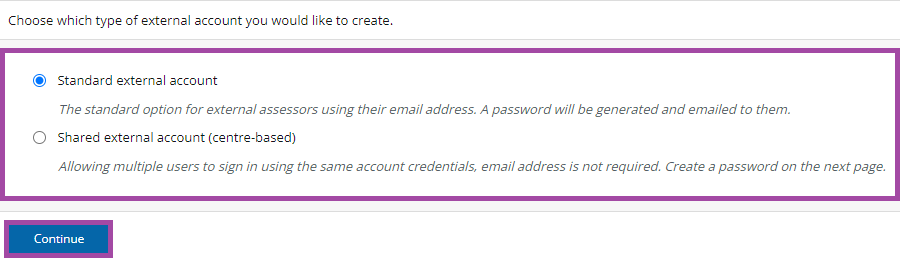
- Click on the ‘Continue’ button.
- A new page will emerge for you to enter the details of the new external user.
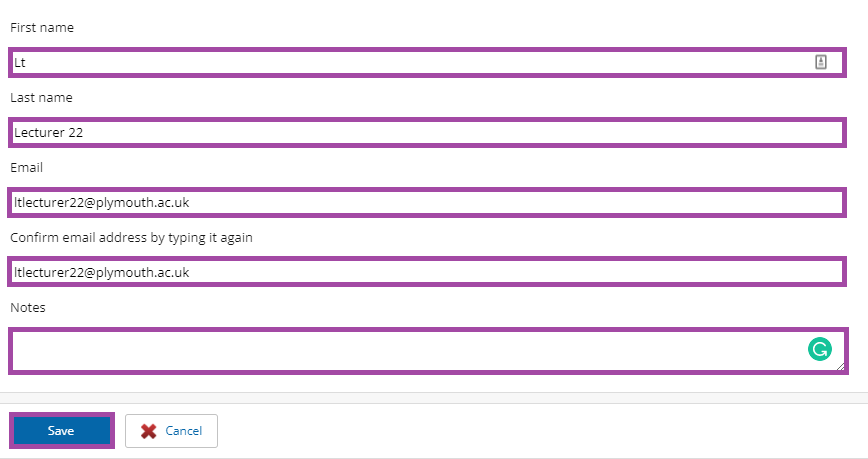
- Click on the ‘Save’ button to finalize your action.
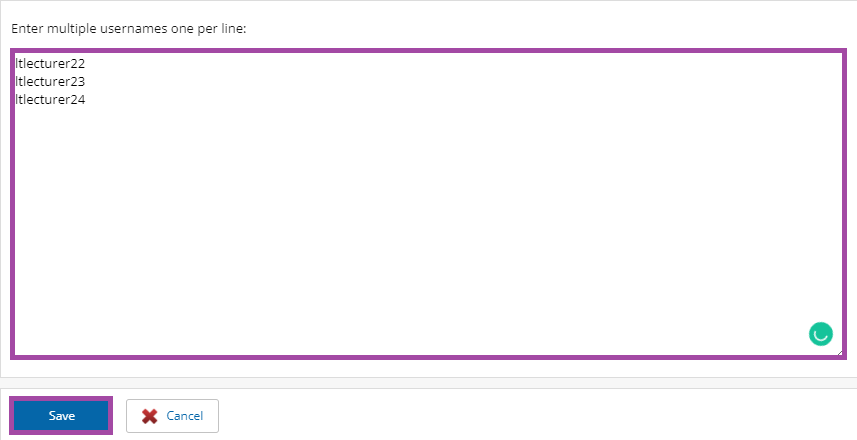
- ‘Add a batch of externals’ – This allows you add multiple external users (already within PebblePad ATLAS) to your workspace.
- First, select ‘Add a batch of externals’
- Enter the usernames of the users you wish to add.
- Click on the ‘Save’ button to finalize your action.
- ‘Remove selected external(s)’ – With this, you can remove an external user(s) from your workspace in PebblePad (ATLAS).
- First, tick the box next to the user(s) you wish to remove, and then click on the button. You will be asked to confirm your decision.

- Remove batch of externals’ – You can remove a batch of external users from your workspace in PebblePad (ATLAS).
- To do this, first, select ‘Remove batch of externals’
- In the page presented, enter the usernames of the people you wish to remove. Then, proceed like you would for adding a batch.
- ‘Modify permissions’ – user permissions in the PebblePad ATLAS workspace can be personalized through this option.
- Ensure you assign roles to each external.
