Overview
A workbook is a binder that contains multiple template pages. So, while a template is single-page, a workbook is multi-page and many of the pages will be made up of templates. Workbooks are often used to facilitate a series of activities or an activity that runs over a longer timeframe, like a work placement.
In this case, you might want to lock certain pages within the workbook to make sure your students cannot edit the content anymore, once they have been assessed. You can also unlock these pages anytime if, for example, you would like to temporarily lock them for your students, as they might need to update their content in the future, for example, if they would re-sit your module.
How to lock pages in a PebblePad workbook?
How to set up this feature in a PebblePad workbook?
To set up this feature in a PebblePad workbook, please follow the steps below:
- Sign in to your Moodle account.
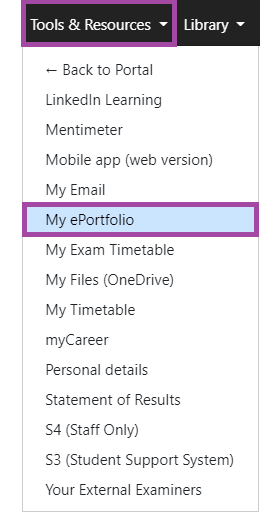
- You will see a navigation bar appearing on the top left side of the screen. Click on ‘Tools and Resources’ and then select ‘My e-portfolio’ from the drop-down menu.
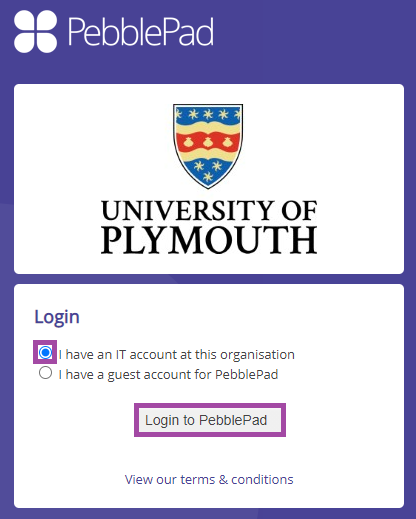
- You will be directed to the PebblePad website where you need to log in with your academic IT account.
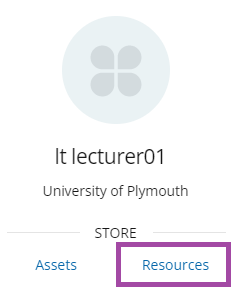
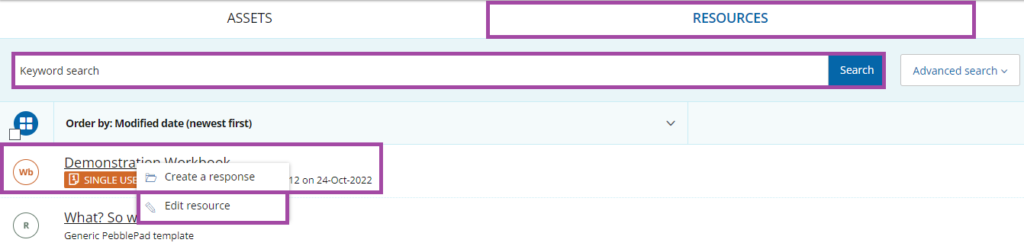
- You will be directed to your PebblePad Dashboard where you would need to click on ‘Resources’ under your profile in order to find your workbook as you would need to modify some settings within it to turn on the locking/verification feature.
- You will be directed to your PebblePad ‘Resources’ where you would need to search for your workbook by using the search bar or scrolling down on the list. Once you found it, please click on its title and select ‘Edit resource’ from the popped-up drop-down list.
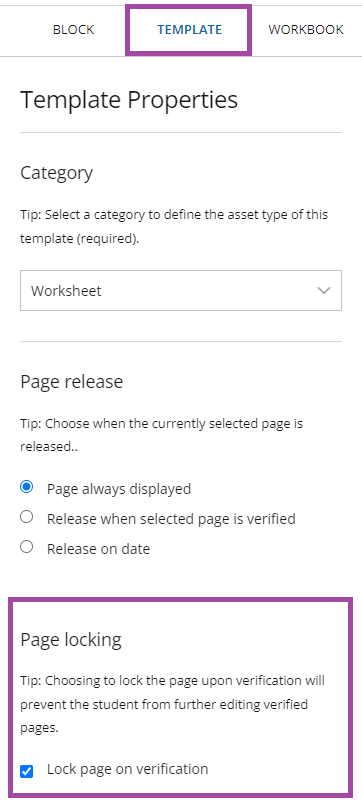
- Once you are in your workbook, please select a page where you would like to use the locking/verification feature. If you would like to apply these changes to multiple pages, then you would need to repeat the same steps below on each of the pages. Once you selected a page, please click on the ‘Properties’ button that appears at the top-right corner.

- Once you are in ‘Properties’, please select the ‘Template’ sub-menu and scroll down to the ‘Page locking’ section where you would need to tick the option ‘Lock page on verification’. This will then allow the assessors to lock the page once they assess a student submission within PebblePad (ATLAS).
- Once you applied these changes, please click on the ‘Save’ button to finalise your action.

How to use this feature in a PebblePad workbook submission (ATLAS)?
To use this feature in a PebblePad workbook submission to make sure your students can no longer edit a page, please follow the steps below:
- Please navigate to the PebblePad (ATLAS) workspace, where your student submissions are stored (’Submissions’ menu). In this case, the workspace is called ‘Demonstration Module’ as we are demonstrating the process.

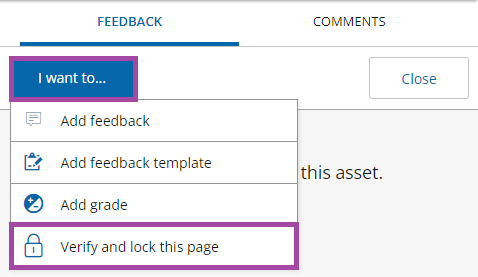
- Please open one of your student submissions and navigate to the page where the locking/verification feature is being used. Once you opened it and provided feedback, please click on the ‘I want to…’ button in the right-hand side panel and select the ‘Verify and lock this page’ option from the popped-up drop-down list.
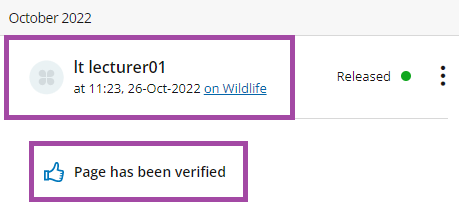
- You will see a confirmation message about this process within the same window where it will tell who and when locked the page. The status should be automatically changed to ‘Released’. Please note, this status only refers to the locking/verification feature and therefore has no impact on the status of the provided feedback, therefore, you will need to separately release that.
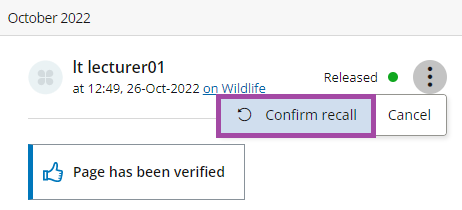
- If you would like to temporarily lock the page, as your students will need to edit this page in the future, then you would need to click on the three dots and select ‘Recall’ to unlock the page when it is needed.

- You will also need to confirm your action before the page gets unlocked again (’Confirm recall).
Student perspective
Once you lock a page in a PebblePad workbook submission, your students will no longer be able to edit the content on that specific page – all areas/sections will be grayed out.