Overview
Moodle allows you to ask for student submissions (such as essays, presentations, or projects) by using the ‘Assignment’ activity. Once the deadline for the submission point has passed and you are ready to mark the uploaded files, you can then select between two main methods to add your grades and feedback:
- Online, using the ‘Grade’ button
- Offline, downloading all the student submissions and the grading worksheet
In this article, we will show you how to grade student submissions offline by downloading the uploaded files and the relevant grading worksheet from Moodle.
Access the submissions
First, you will need to navigate to the Grading table of the submission point by opening the activity in your browser and then clicking on the ‘Submissions’ menu in the secondary navigation bar.
Bulk download the submissions
Download the submissions
Once you are in the Grading table, you will need to download the student submissions. This is what we call ‘bulk download of files’ in Moodle. To do this, please follow the steps below.
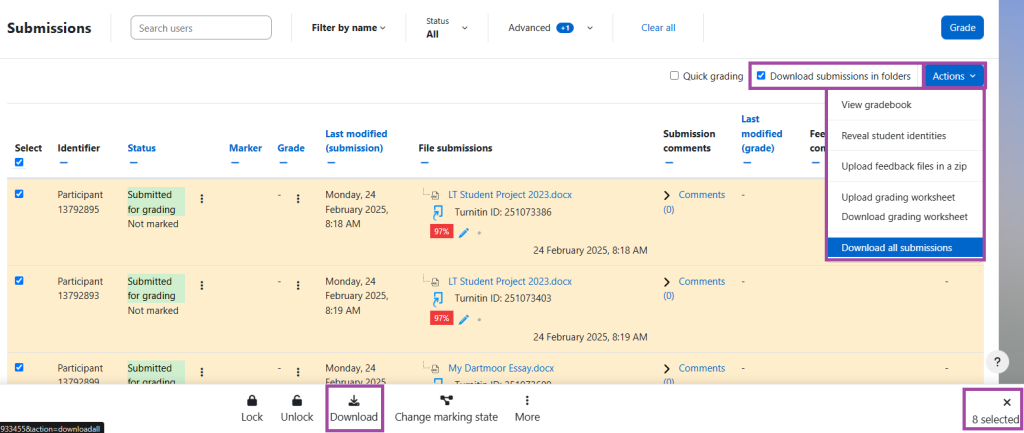
- Please select the student submissions you wish to download (if you want all of them, please tick the box next to the ‘Select’ column) and then click on the ‘Download all submissions’ option from the ‘Actions’ drop-down list (top-right corner). Alternatively, you can click on the ‘Download’ button at the bottom of the page and then confirm your action. Please note, we recommend using this alternative method if not all submissions you wish to download; otherwise, please use the ‘Actions’ drop-down list.
Extract the ZIP folder
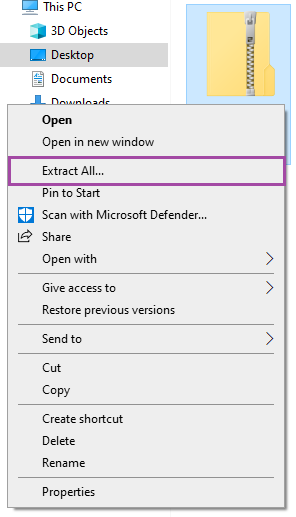
- The ZIP folder containing the student submissions (each in a separate folder) will be downloaded to your machine (usually it lands in the ‘Downloads’ folder which you can access in your File Explorer). The name of the ZIP folder will contain the name of the module and the submission point. Please note, the folders (with the name of the students or the participant numbers generated by Moodle, for example, ‘Participant_12556284’) and the files (that would be the student submissions) will need to be extracted to your machine from the ZIP folder in order to access them.
Download the grading worksheet
Once you downloaded all the student submissions and extracted the ZIP folder to your machine, you will also need to download the grading worksheet in order to add the grades to your students. This file is going to be an Excel spreadsheet. To do this, please follow the steps below.
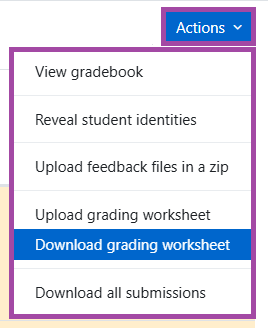
- Please navigate back to the Grading table of the submission point by clicking on the ‘Submissions’ menu in the secondary navigation bar and then click on the ‘Download grading worksheet’ option from the ‘Actions’ drop-down list that appears at the top-right corner.
- The grading worksheet will be downloaded to your machine (usually it lands in the ‘Downloads’ folder which you can access in your File Explorer). The name of the Excel spreadsheet will contain the name of the course and the submission point. You will not need to extract the file.
Mark the submission
Provide feedback
Once you downloaded all the necessary files, you can then open each student submission to access the content. Please note, each student submission will be located in a separate folder whose titles will be identical to the participant numbers provided by the DLE/Moodle, for example, ‘Participant_12556284’ (if the submission point is set to anonymity) or the name of the students (if the submission point is not set to anonymity). As such, your feedback can be added:
- Inside the student paperwork by opening each submission and then adding the annotations as needed – in this case, please make sure you only save the file but not save it as a new file so that the file extension will remain the same
- Outside the student paperwork by creating additional files in each student folder which can be Word documents, PDF files, presentations, and many more.

Add the grades
Once you provided feedback to each student submission (inside the files or as additional feedback files), you will also need to enter the grades in the grading worksheet. For this, you will need to open the downloaded Excel spreadsheet where in the ‘Grades’ column you can then enter the appropriate grades.

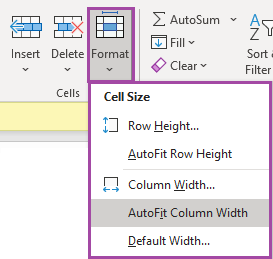
- If the columns in the grading worksheet are not properly displayed, please highlight the entire table (shortcut CTRL + A), and then click on the ‘AutoFit Column Width’ option from the ‘Format’ drop-down list which will expand the size of each column for a better view.
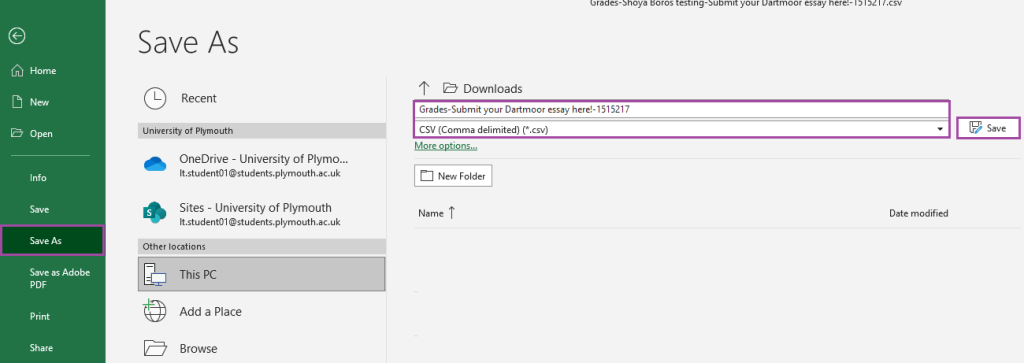
Once you entered the appropriate grades, you will need then just simply need to save it without creating a new file, as the Excel spreadsheet has the correct file extension that can be uploaded back to Moodle.
Bulk upload the feedback
Once you have completed the entire marking process, you will need to upload back the provided feedback, including the student submissions. This is what we call the ‘bulk upload of files’ in Moodle. To do this, please follow the steps below.
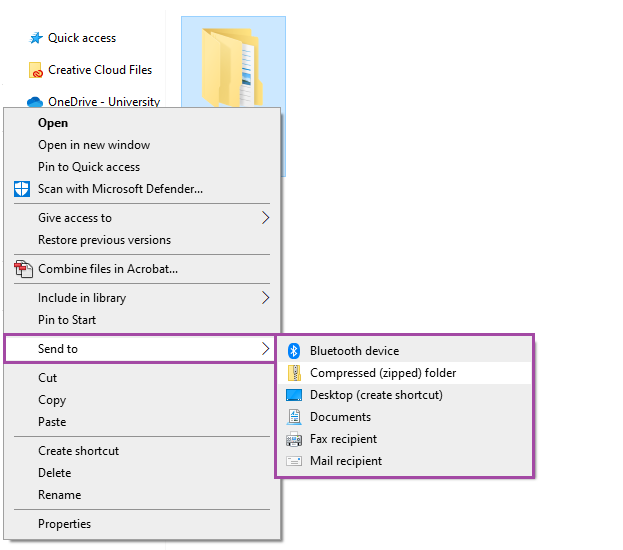
- Please navigate to the folder on your computer where you have been saving the submissions and feedback. Right-click on the main folder, select the ‘Send to’ and then the ‘Compressed (zipped) folder’ options from the pop-up window.
- To check the file size, right-click on the compressed ZIP folder, and then select the ‘Properties’ option from the pop-up window. A new window will open where you can check the ‘Size’ of the file.
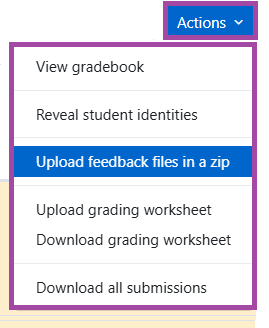
- Once you compressed the folders and checked the file size, please navigate back to the Grading table and then select the ‘Upload feedback files in a zip’ option from the ‘Actions’ drop-down list.
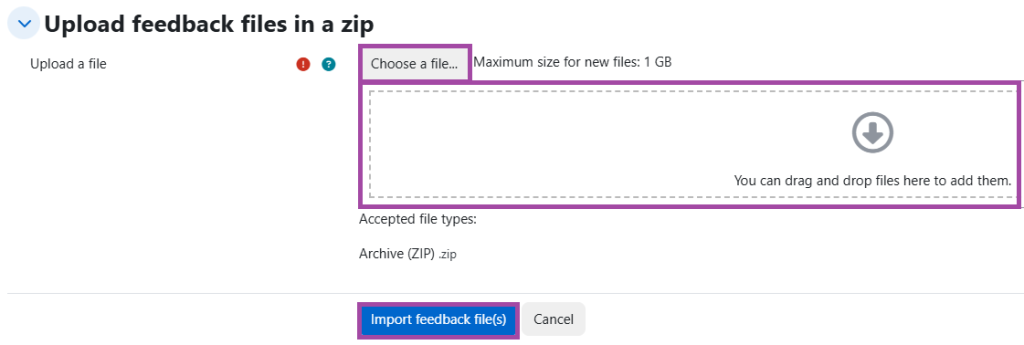
- You can then either choose the zip file(s) using the File picker of Moodle or drag and drop these file(s) into the ‘Upload a file’ field. To finalise your action, please click on the ‘Import feedback file(s)’ button.
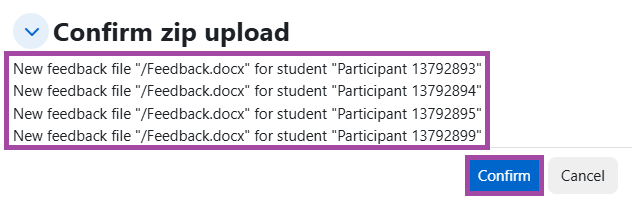
- The next screen will show you the number of files uploaded/updated where you will need to click on the ‘Confirm’ button to complete the process. You may also need to click on the ‘Continue’ button after it.
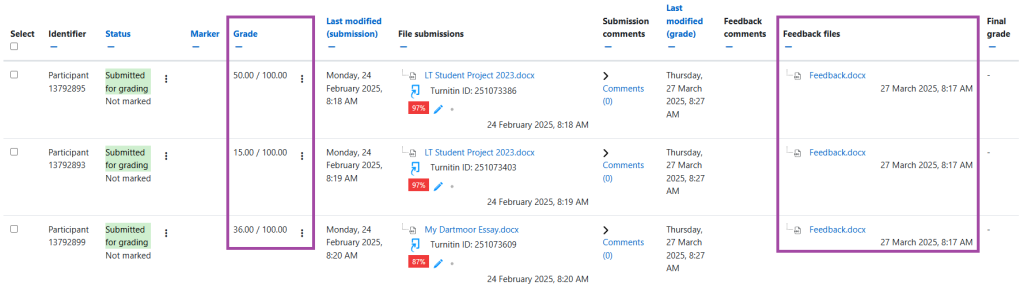
- You will be directed back to the Grading table where the feedback files should appear under the ‘Feedback files’ column.
Upload the grading worksheet
Once you have completed uploading back the student submissions and feedback, you will also need to upload back the grades that are entered in the grading worksheet. To do this, please follow the steps below.
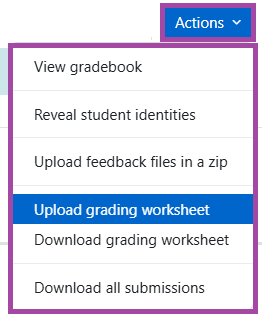
- Please navigate to the Grading table by clicking on the ‘Submissions’ button and then select the ‘Upload grading worksheet’ option from the ‘Actions’ drop-down list.
- Just as before, you can then either choose the Excel spreadsheet by using the File picker of Moodle or drag and drop the file into the ‘Upload a file’ field. Once the file is selected, please make sure you use ‘UTF-8’ for ‘Encoding’, ‘Comma’ for ‘Separator’ and you also tick the box where it says ‘Allow updating records that have been modified more recently in Moodle than in the spreadsheet.’

- To finalise your action, please click on the ‘Upload grading worksheet’ button.
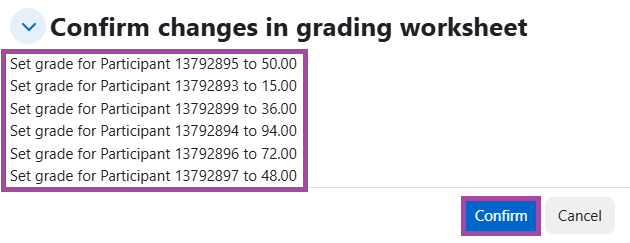
- The next screen will show you the number of grades uploaded/updated where you will need to click on the ‘Confirm’ button to complete the process. You may also need to click on the ‘Continue’ button after it.
Final look
Once you have completed uploading back all the necessary files, the Grading table should include the added grades and feedback. If the grades have been already moderated, the next step would be to release this information to your students.