Overview
A ‘Module Box’ is a block on the right-hand side of the every Moodle course page. The purpose of this block is to provide an easy and familiar way to deliver all module materials for staff and External Examiners, all from one location within the DLE (Moodle).
A Module Box can contain:
- module handbooks, guides, and action plans;
- student sample work as files or as links to the grading table/grading page (which will be stored for 7 years);
- feedback on student paperwork;
- student results on ‘Quiz’ activities,
- and many more.
Module Boxes are also secure by default and only visible to those with ‘Teacher’, ‘Non-Editing Teacher’, ‘External Examiner’, or ‘Faculty support’ roles. Students will not be able to access these, as they are hidden from them. If you are unable to access the Module Box, and unsure you have the correct role, please liaise with your contact at the University if it has to be adjusted.
How to edit the Module box
To edit your Module Box so you can share module materials with your External Examiners, please follow the steps below.
- Sign in to your Moodle account and select the course.
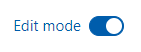
- Click on the ‘Edit mode’ button that appears at the top-right corner.
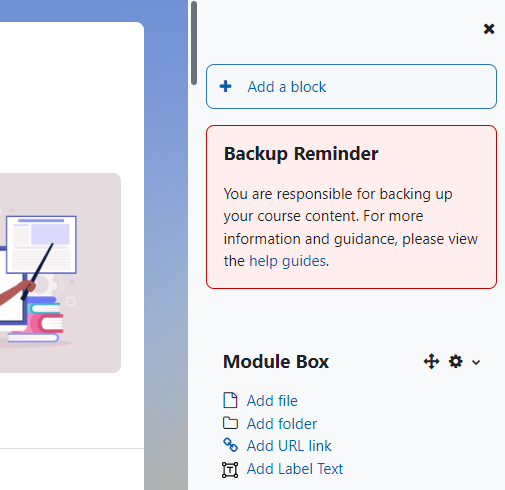
- Once you have done that, you should see by default the block appearing on the right side of your screen.
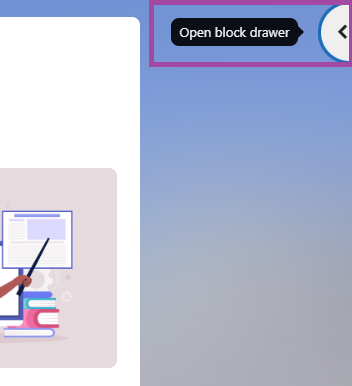
- If this is not visible in may be hidden and may required clicking on the arrow in the top right of the course to open the block draw.
- If you do not see it as it has been previously removed, please visit the following supporting material to learn how to add it back to your module/DLE page.
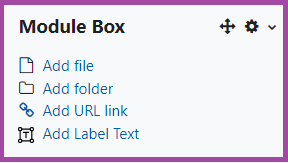
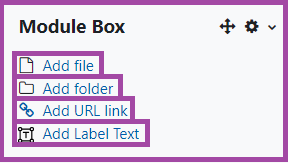
- In the Module Box you will have a few options to choose from as you can:
- upload files from your computer or OneDrive (such as Word documents, PDF files, etc) – this could be module handbooks, guides, action plans, and many more;
- create folders to allocate the uploaded files for the purpose of structuring the module materials – for example, a folder that would contain multiple student submissions and feedback templates.
- share URL links that would direct the External Examiners, for example, to submission points, sample submissions, or feedback templates. It could also be a link to results/student responses of a ‘Quiz’ activity.
- add ‘Label’ texts to create headings/titles which can be used for breaking the content into sections, or to add extra information to the block.
How to upload files
- To upload files to your Module Box, first click on the ‘Add file’ button.
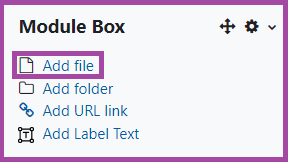
- You will be directed to the file picker box to select or drag and drop the file from your computer. You will also need to enter a useful name for it. This name is what it will appear as in the Module Box block. After uploading the file, ensure you click on the ‘Save changes’ button to save the process.

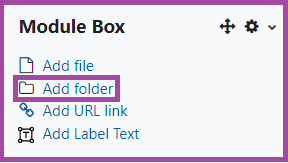
How to create folders
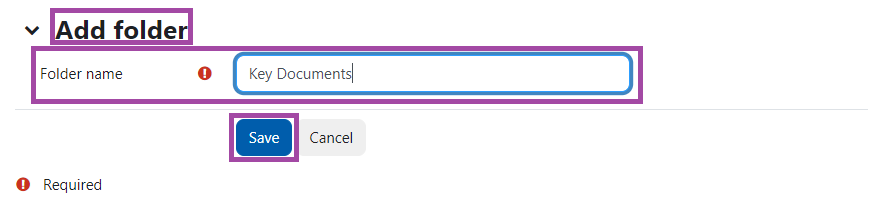
- To create folders in your Module Box, please click on the ‘Add folder’ button.
- You will be directed to a new page to enter a useful name to the folder. Once this is done, please click on the ‘Save’ button to save the process.
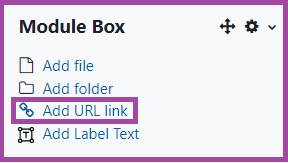
How to share URL links
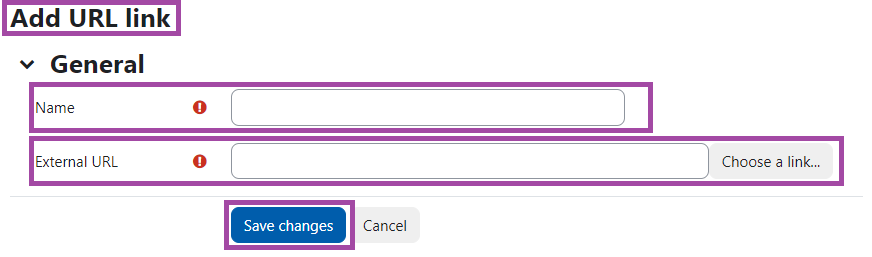
- To share URL links in your Module Box, please click on the ‘Add URL link’ button.
- You will be directed to a new page to then copy-paste the URL link you wish to share with your External Examiners. You will also need to enter a useful name for it. After doing this, please click on the ‘Save changes’ button to save the process.
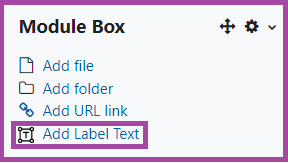
How to add ‘Label’ texts
- To add ‘Label’ text to your Module Box, please click on the ‘Add Label Text’ button.
- You will be directed to a new page where you will need to enter a useful name to the Label text which would be the section title; to help break your content. Once you have done this, please click on the ‘Save’ button to save the process.

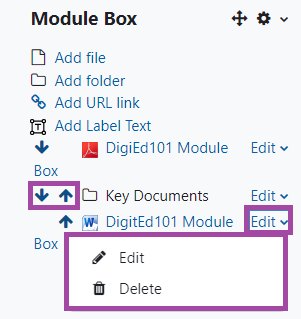
Re-arranging, editing, or removing items
Once you finish editing your Module Box, you can also:
- re-arrange items by using the arrows to either point up or down as required.
- keep editing them, for example, to change their names; or
- remove them if you accidentally uploaded, for example, a file or a folder.
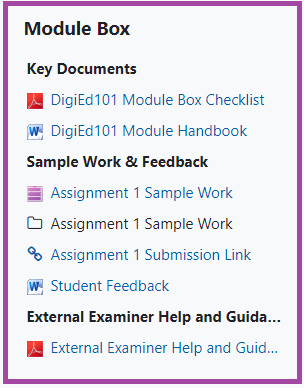
End result
The end result of your Module Box should be similar to this one. You might have different files, links, or folders to share, depending on the advice from the Program Leader or the Module Box policy provided by the School or the Faculty Office.
Troubleshooting steps to do if your External Examiner is having problems accessing the Module Box
Please check the following troubleshooting points below.
| Have they been added as an External Examiner to the DLE page/module? | To check whether the External Examiners have been added to the DLE page/module, please navigate to the ‘Participants’ menu. If they do not appear on the list, then they would need to be enrolled in the module. To do this, please visit the following supporting material. The role you will need to provide for them is named ‘External Examiner’. |
| Can the External Examiners see/access the DLE page/module but not the Module Box? | If the External Examiners can access the DLE page/module but not the Module Box, then most likely it is due to enrolment issues. As such, if your External Examiners have not been added to the module, they will still be able to see/access the content in ‘read-only’ view. In this case, they can access most of the materials, but not the ‘Assignment’, ‘Quiz’, or ‘Forum’ activities, nor the Module Box. To resolve the issue, you will need to enroll them with the ‘External Examiner’ role. |
| Do the External Examiner use their UoP e-mail address and password when they are trying to log into the DLE (Moodle)? | Sometimes External Examiners may accidentally use their home institution’s email address. If they are using their University of Plymouth login credentials and perhaps using an incognito window, then they should be able to log in as needed, however, for any password, username, or account issues, these will need to go to the main IT Service Desk. |