Overview
Using and combining the different online resources such as Zoom, Panopto, Moodle and Xerte can help produce a structured learning experience for the users.
Within this page there are videos, instructions and guidelines on how to:
- Embed Xerte into Moodle
- Add Tracking to Xerte questions
- Add a Xerte SCORM package to Moodle
Xerte and Moodle
Xerte can be added to Moodle through three different ways:
- It can be embedding and used within an iframe allowing the student to have interactive content without leaving the Moodle system.
- It can be added as a URL, which will take the student to a new web page,
- It can be packaged up as a SCORM package and embedded within Moodle allowing the teacher to view scores and results from the users who have interacted with the resource.
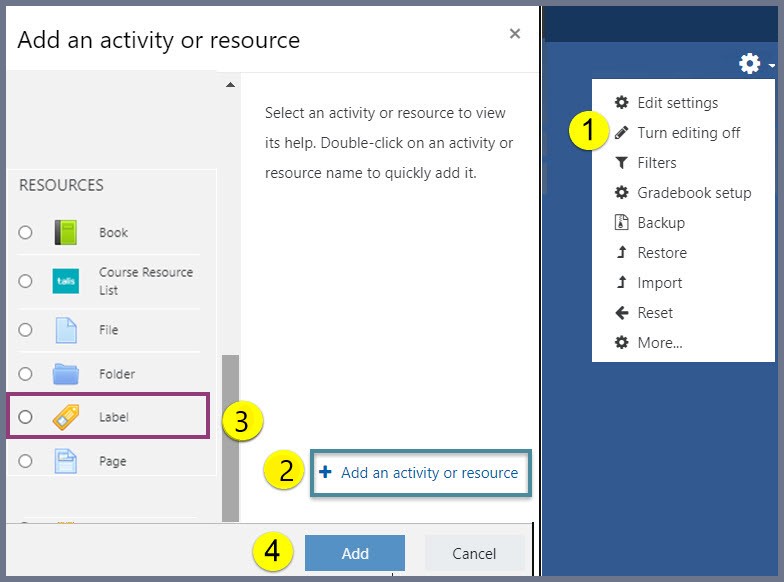
Embedding to Moodle
- Click the ‘Turn editing on’
- Click ‘Add activity’
- Chose ‘Label’
- ‘Add’
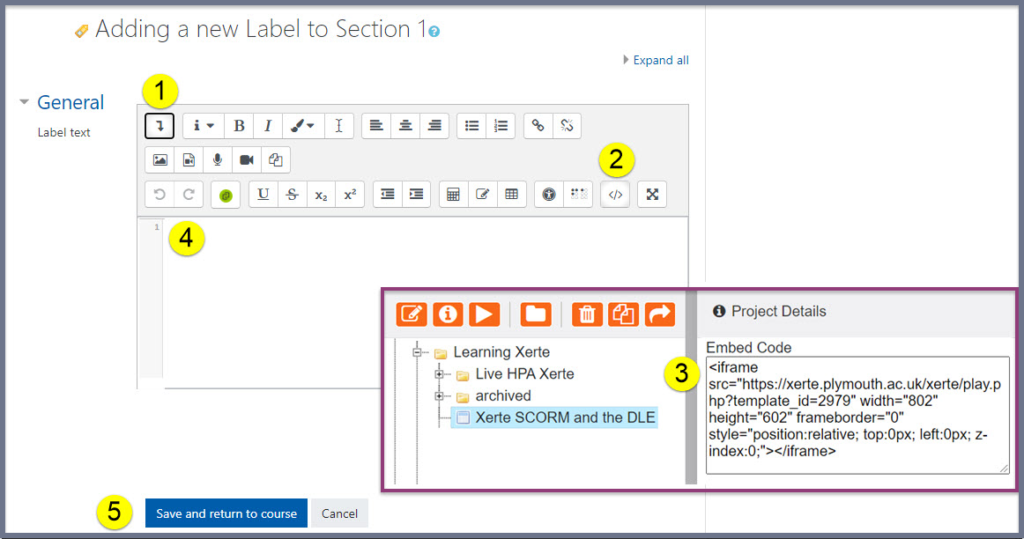
- Use the arrow to view all icons.
- Click ‘HTML’ icon.
- Copy the Embed code from the Xerte resource.
- Paste the code into the HTML box.
- Save – check the resource on Moodle.
Setting up Tracking in the quiz
- In Xerte, Click the home page
- Click ‘Tracking’
- Set the Tracking for the Quiz
- Set the Pass Score
- Set the page timeout
- Set the Tracking Category
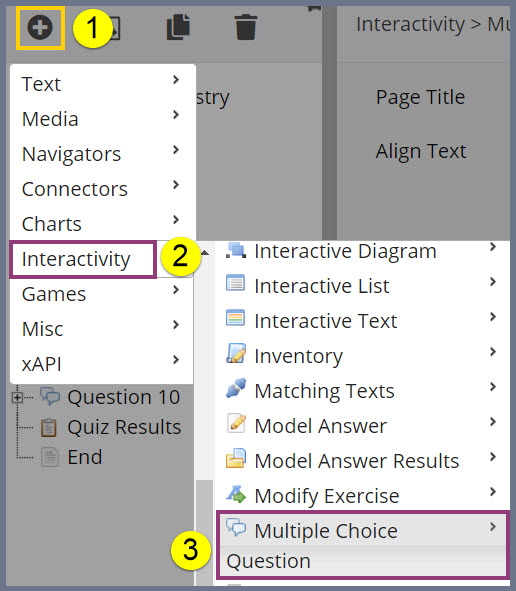
Add a Question
- Click the add
- Click ‘Interactivity’
- Click the Question type you wish to have
Setting up the tracking for each Question
- Click the question you want the tracking on
- Click ‘Tracking’
- Click ‘Tracking Score weight’ for the question
- Complete the ‘Tracking Label’
- Set the Tracking Group
- Set the Tracking Score Weight
- Set the Tracking Category
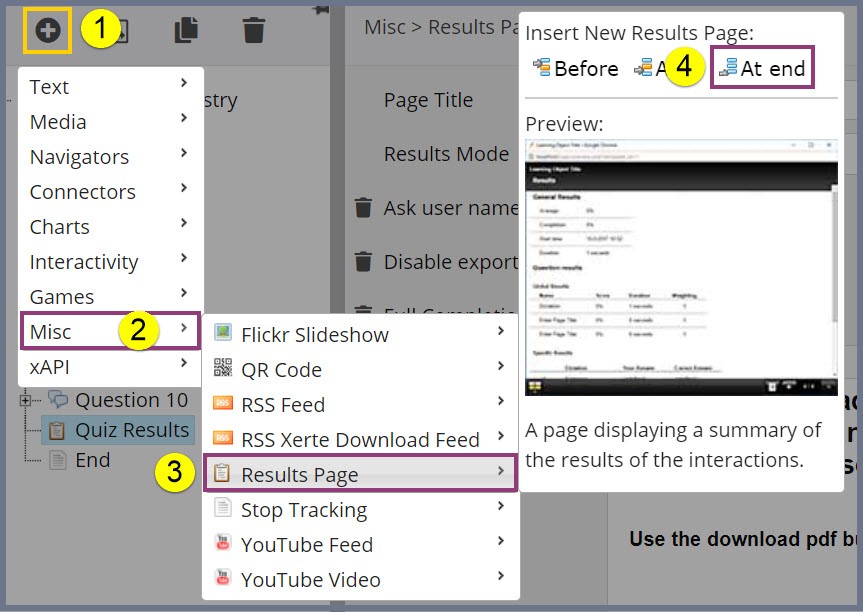
Add a Results page
Note: When changing question types Xerte forces a separate results page for each different type this can get in the way when trying to complete a quiz.
Hide the results pages that appear between different question types and only show the last results slide when all questions have been answered.
- Click the add
- Select ‘Misc’
- Click ‘Results Page’
- Click ‘At end’ (of the questions)
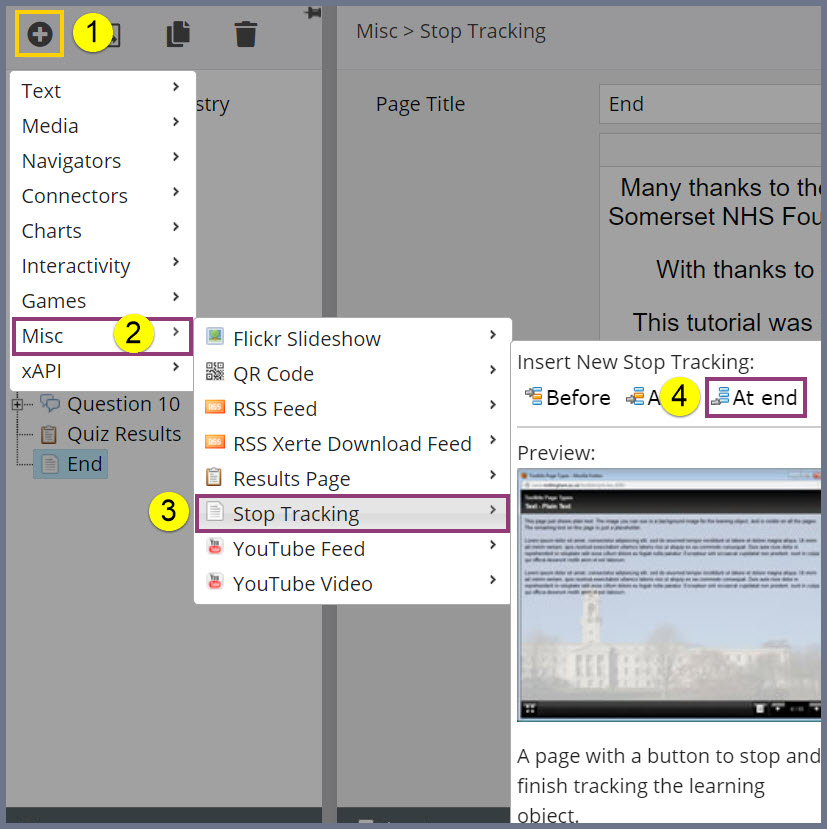
Add a Stop Tracking page
Note: At the end of the quiz you need to add a Stop Tracking page, this contains a button the user clicks; which sends the data to the DLE. Without this, tracking will not work.
- Click the add
- Select ‘Misc’
- Click ‘Stop Tracking’
- Click ‘At end’ (of the quiz)
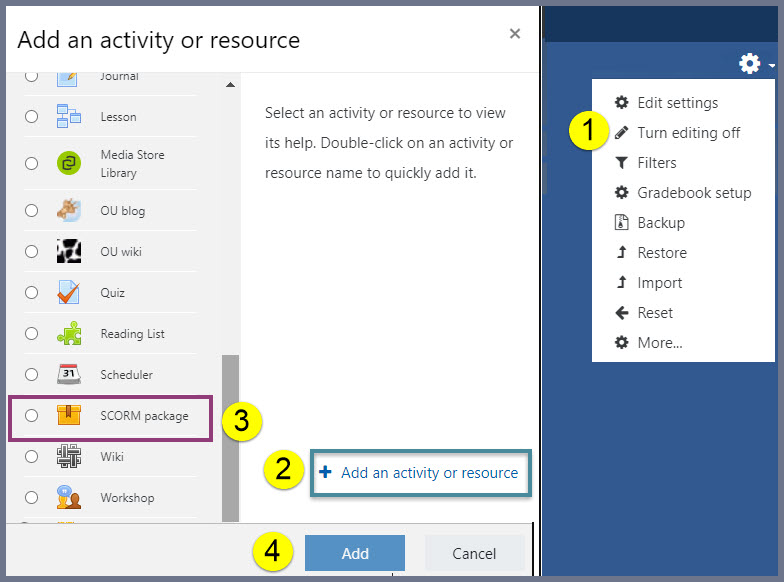
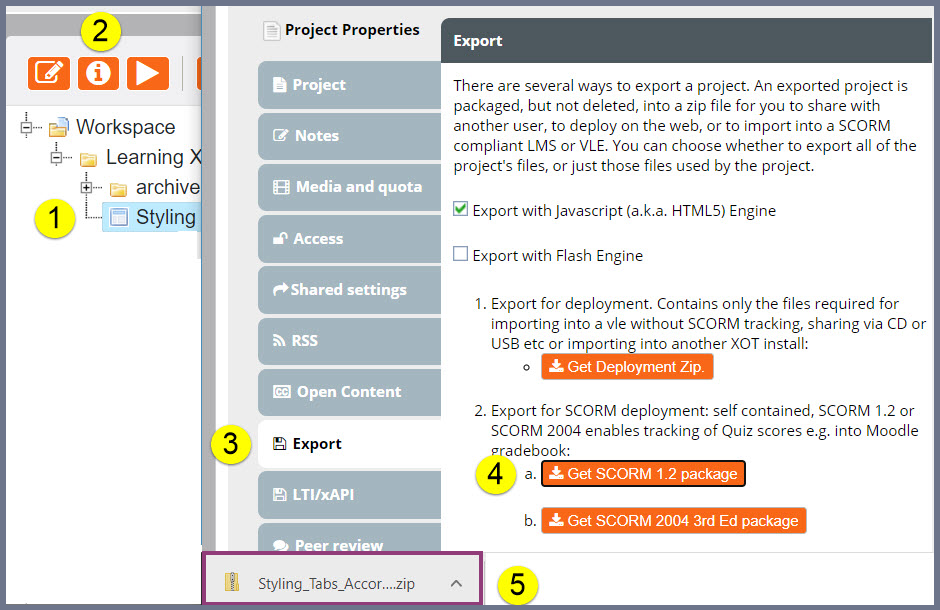
Adding a Xerte SCORM package to Moodle
- Click the Xerte resource
- Click ‘i’ Properties
- Click Export.
- Click SCORM 1.2 package — Wait do not close down the ‘i’ Properties window
- You may have a Download shown at the bottom or be asked ‘where to save this SCORM package’
- Click the ‘Turn editing on’
- Click ‘Add activity’
- Chose ‘SCORM Package’
- ‘Add’