Overview
Tutors and students can create quality interactive learning resources using the following tools that are available within Xerte. It is best practice to create interactive resources in Xerte Toolkit, and embed them into the bootstrap.
This articles highlights the following interactive learning resources;
- HotSpot The interaction with Hotspots allows you to mark up an image with regions. When selected, each region will take you to another page or popup a window that can hold information, sound, videos, URLs and external webpages.
- Quizzes Can be formative assessments comprising of a series of question with single or multiple answers.
- Interactive Documentation A form based interaction where the user downloads a copy of their responses
Hotspot
Hotspot Connectors
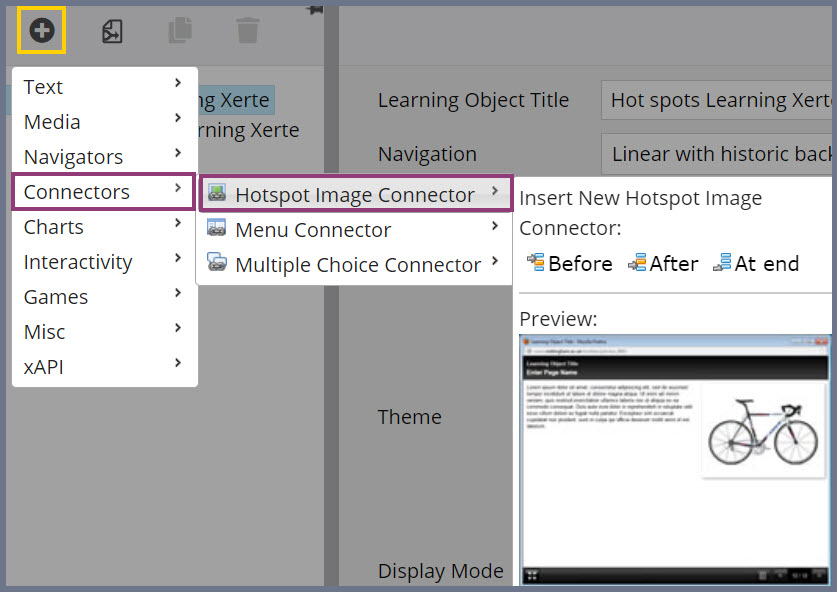
- Click the + (Add) icon.
- Select ‘Connectors’ from the options in the drop down menu
- Click ‘Hotspot Image Connector’.
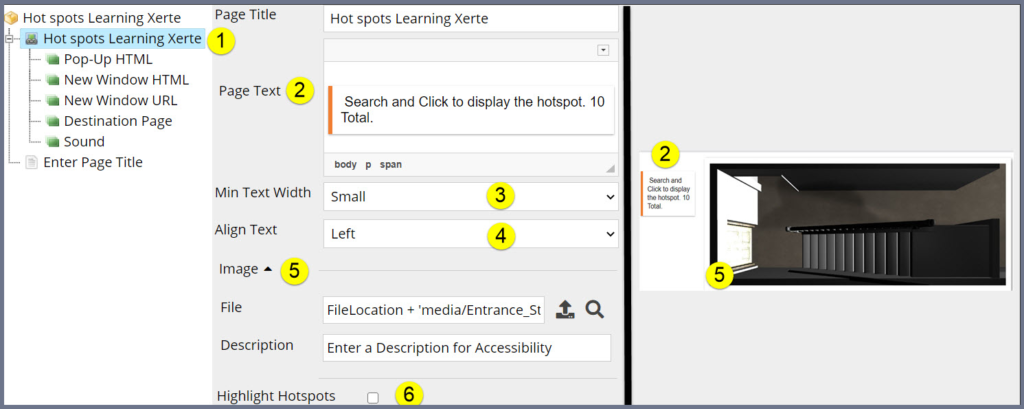
Setting up the Hotspot
- Go to the Hotspot home page
- Use the ‘Page Text’ to give directions
- Define the ‘Min Text Width’
- Define the ‘Text alignment’
- Upload an image to be used for the background of the hotspots interaction
- ‘Highlight Hotspot’ can be used to show where the hotspots are
Adding Pop-Up HTML
- Click the Hotspot page
- Click on the Edit hotspot image – add the hotspot
- Add ‘New Pop-Up HTML’
- Add a disruption
- And/or an image

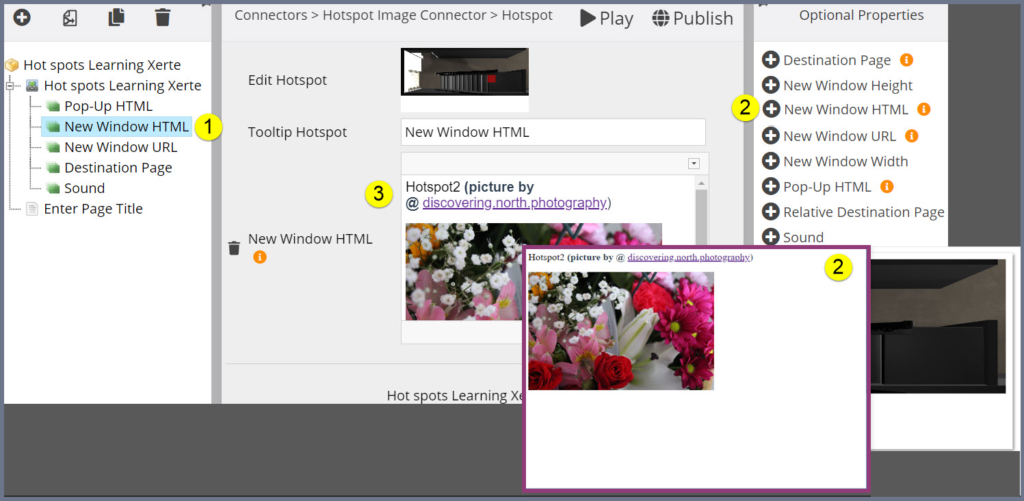
Adding a Window HTML
- Click the Hotspot page and ‘Edit Hotspot’ image.
- Add ‘New Window HTML’
- Add a disruption
- And/or an image
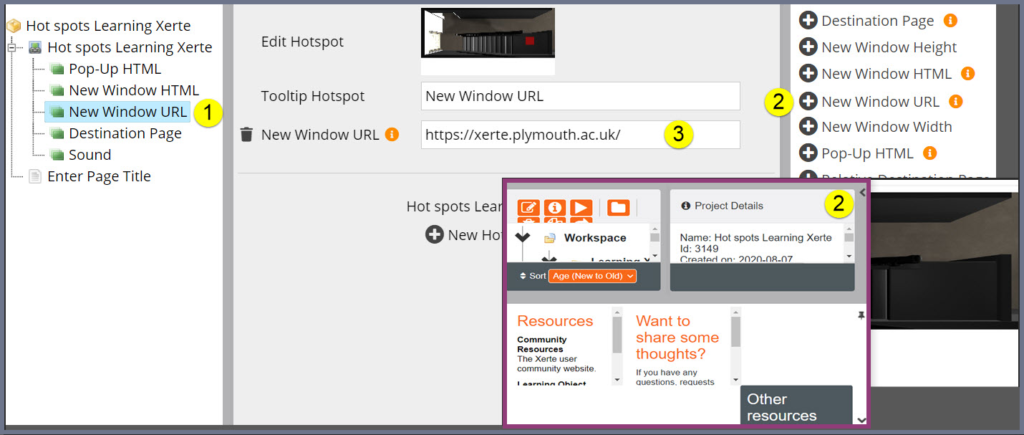
Adding a Window URL
- Click the Hotspot page and ‘Edit Hotspot’ image.
- Add ‘New Window URL’
- Add the URL – the popup window will show the URL page
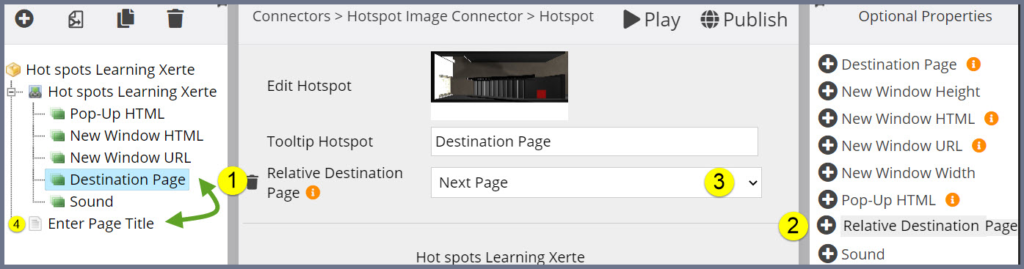
Adding a Destination Page
- Click the Hotspot page and ‘Edit Hotspot’ image.
- Add ‘Relative Destination Page’
- Select the ‘Relative Destination Page’
- Once click the hotspot will navigate to that page
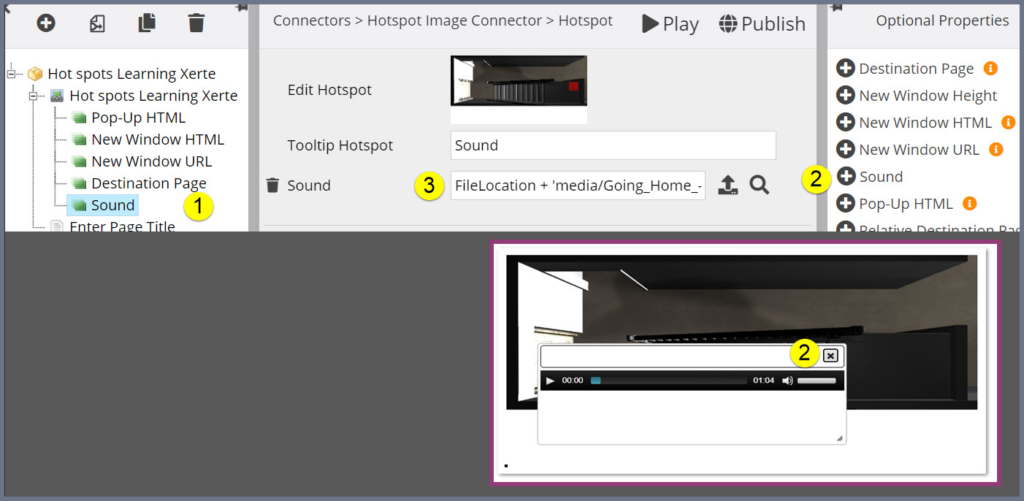
Sound
- Click the Hotspot page and ‘Edit Hotspot’ image.
- Add ‘Sound’
- Upload the sound you wish to use
Quizzes
Adding a quiz activity
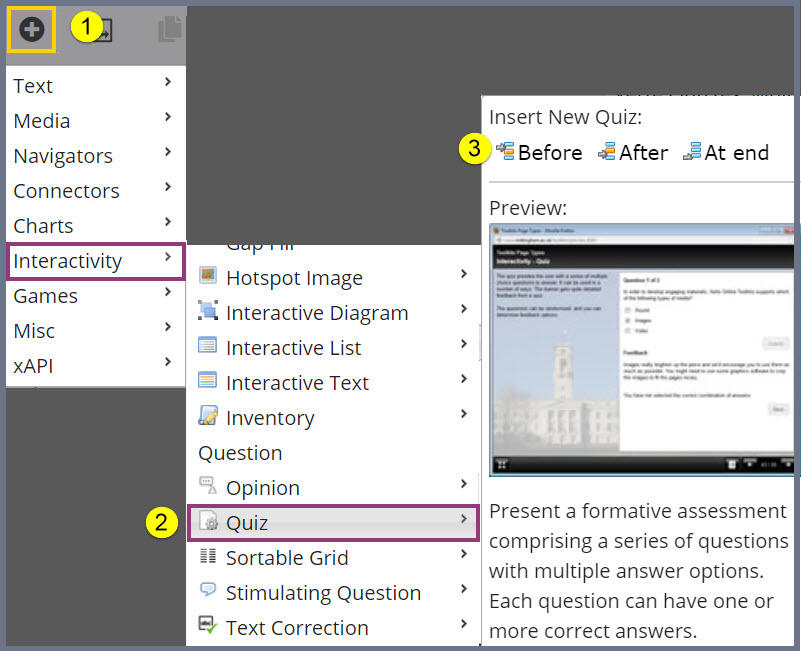
- Add Interactivity
- Select ‘Quiz’
- Click Before or After (select which position the quiz should be located; Before, After or at the of the resource)
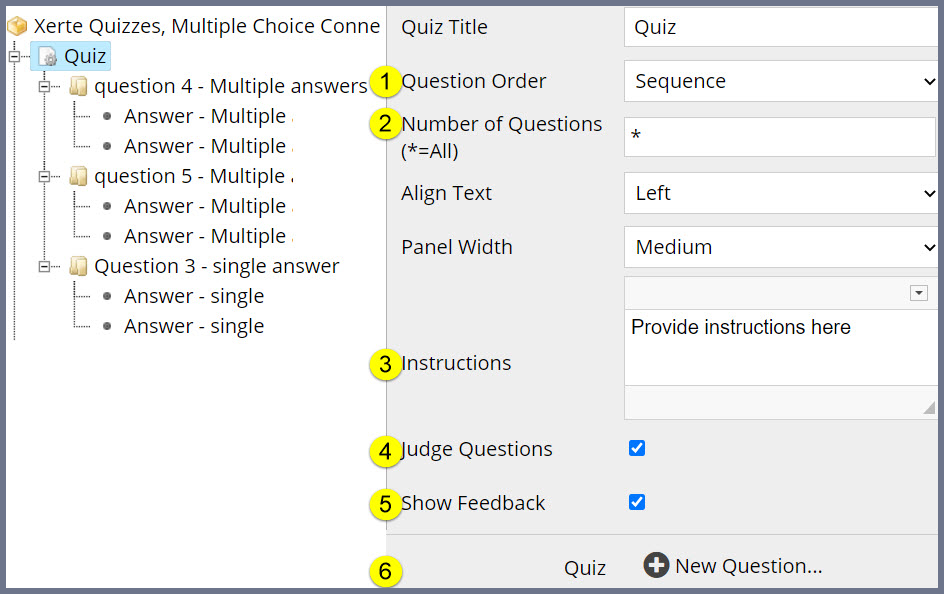
Setting up the Quiz
- Define if you wish to have the quiz questions in Sequence or Random
- ‘Number of Questions’ – Reflects how many questions you wish to show.
- Instructions – Reflects what you need to tell the user in order to complete the quiz
- Judge Questions – Gives the user a score at the end of the quiz
- ‘Show Feedback’ – Shows the user feedback you have provided.
- Add a ‘New Question’
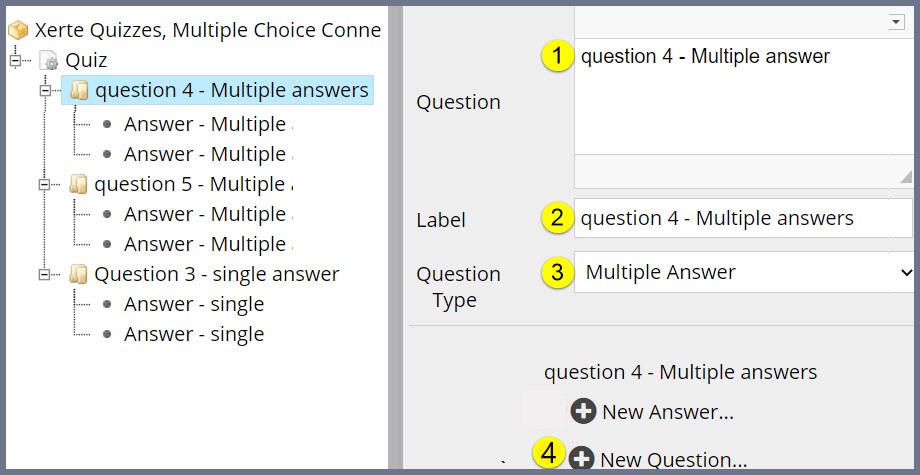
Setting the Question
- Add the question
- Add the question label – This is good practice and enables you quickly find the question you are looking for.
- Define the question type (multiple or single answer questions)
- Add a ‘New Question’
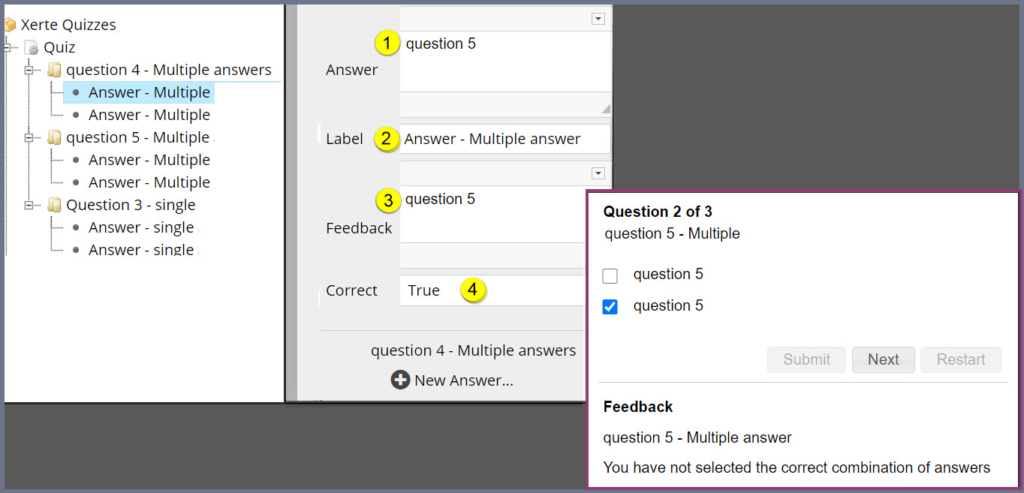
Setting the Answers
After selecting + New Answer,
- Enter an ‘Answer’ to the question
- Complete the answer ‘Label’
- Provide Feedback
- Select if this is the correct or not correct answer
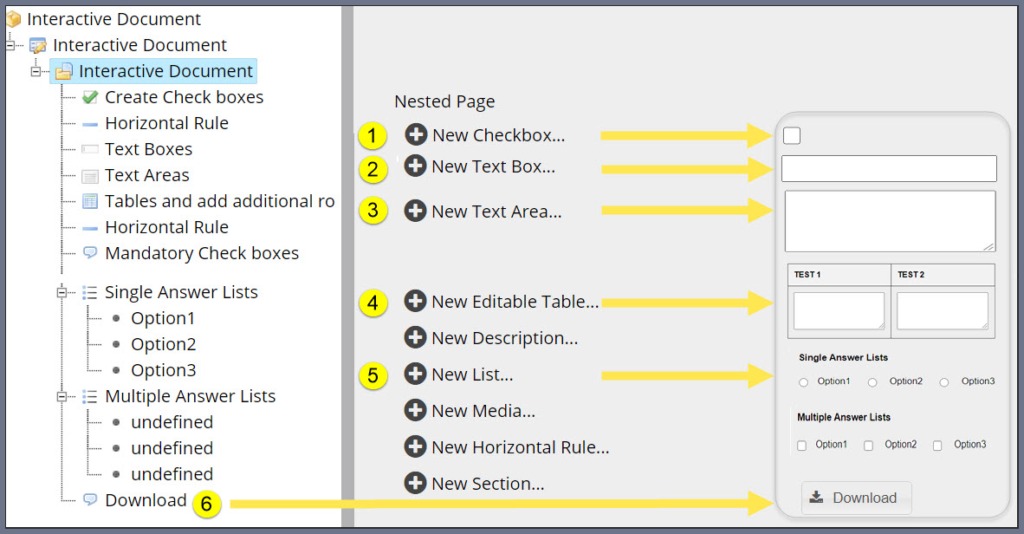
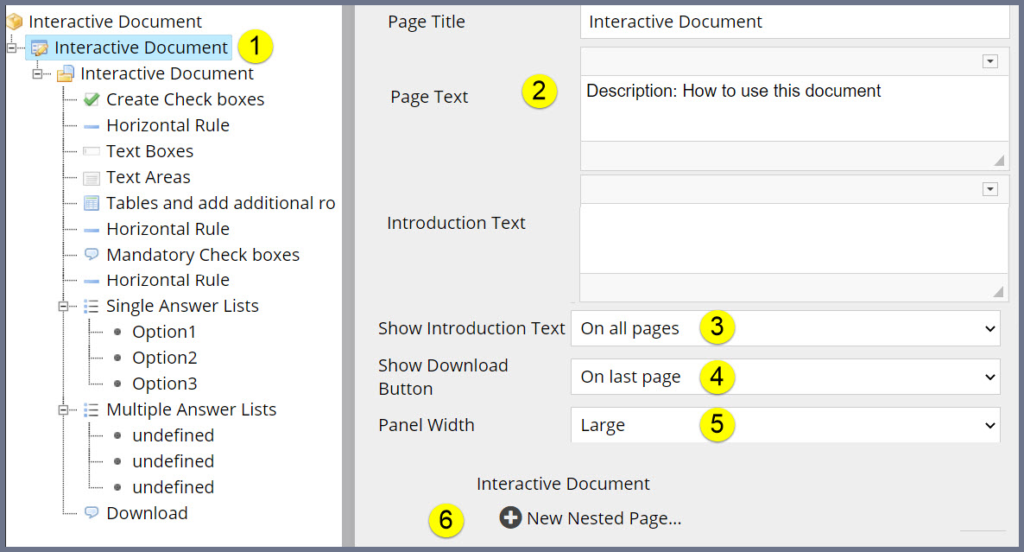
Interactive Document
Create the Documentation
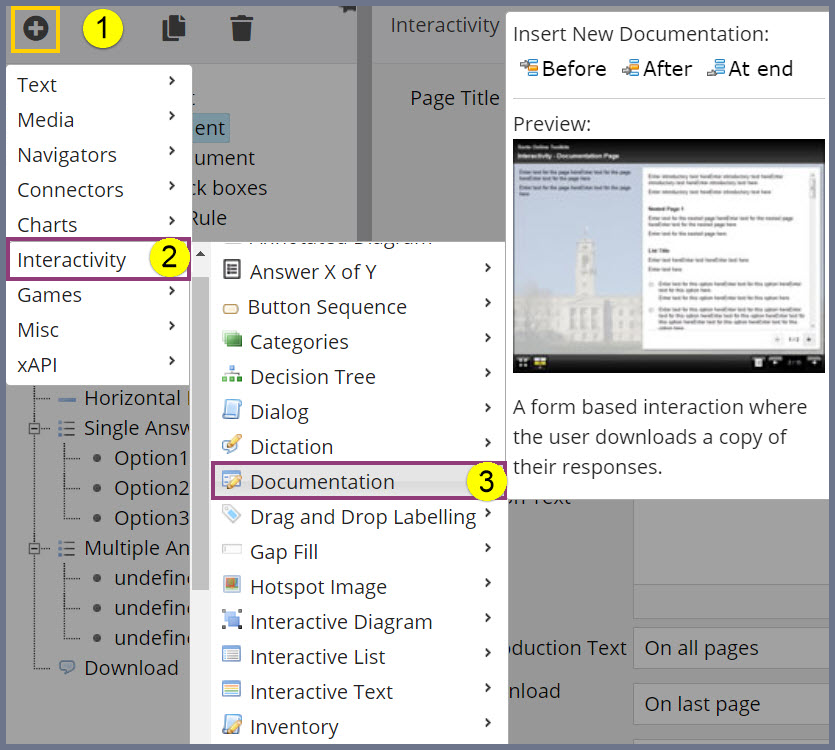
- Click the + (Add) icon.
- Click ‘Interactivity’
- Select Documentation. and choose the position you wish to insert it in (Before, After or At end)
Setting up the Interactivity Documentation
- Select the created ‘Interactivity Documentation’ page
- Enter a description/instruction for how to use the page, as well as an introduction text
- Define where you would like the text to be shown
- Define where you want the Download button
- Decide the Panel Width
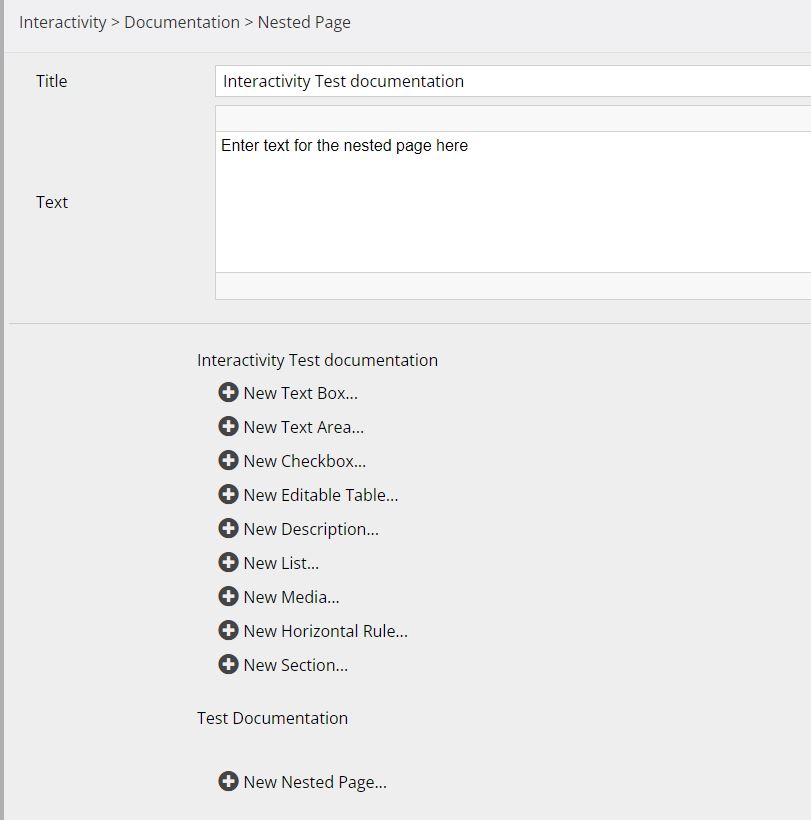
- Add a ‘New Nested Page’.
Choose an activity
After creating the Nested page, you will need to proceed to choosing an activity from the list of available options, which include;
- Checkboxes – This can be used to ask a question or part of a checklist
- The text box allows the user to create single line notes
- Text area allows more than a couple of words
- The editable table can be used to create section areas for data entry
- Lists can be created with multiple or single answers
After setting up the desired activities in the document, the ‘download button’ (6) allows save the document in a personal storage location.