
If you are using Teams for Teaching and recording the sessions, but you are not using the timetabled Teams links, you will need to upload your session recordings manually to Panopto following the steps below.
Off timetable recordings will be in the shared area of OneDrive for anyone that was a Co-organiser in the meeting. Any of these colleagues can move the recording to Panopto providing they are a teacher on the module DLE course. Recordings will need to be approved once they are in the Panopto module folder.
Selecting a folder
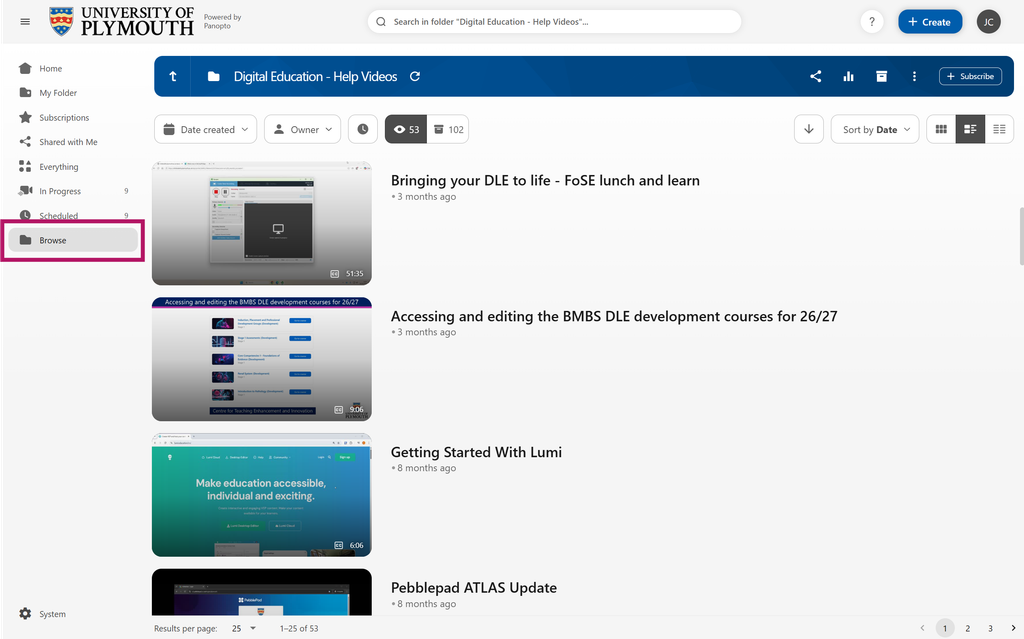
- Once logged in to Panopto, navigate to the folder you wish to add the content to by clicking ‘Browse’ from the left hand menu.
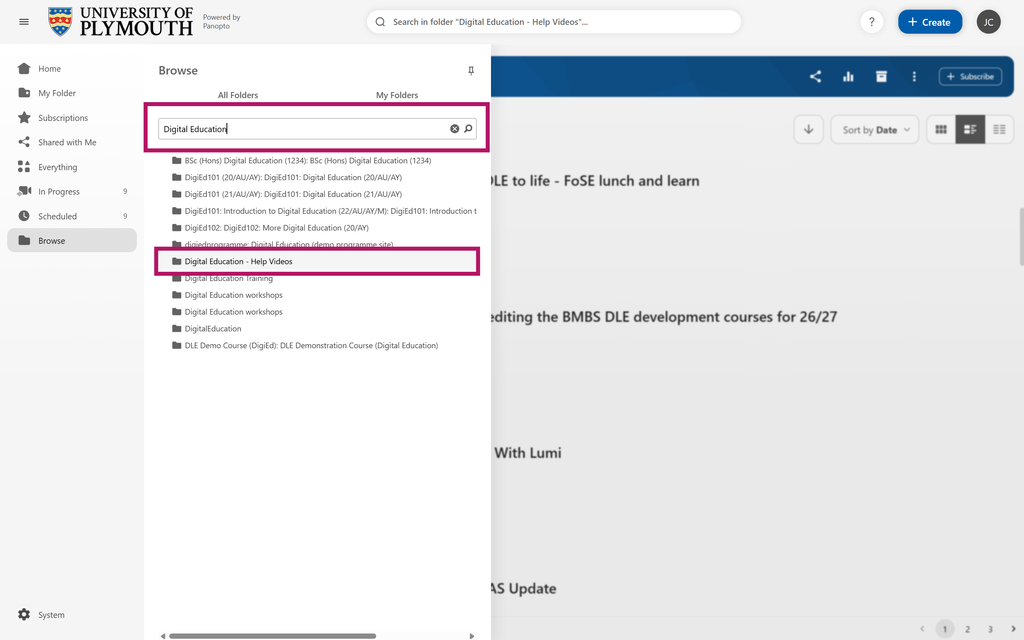
2. Then, you can either type the name of the folder that you are looking for
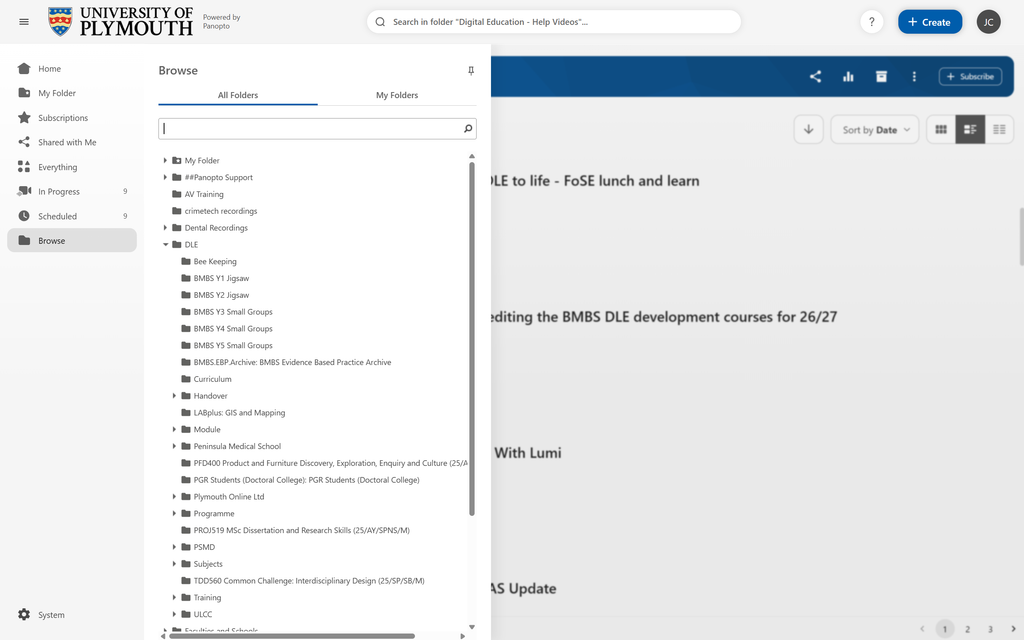
or use the dropdown menus to search for your folder.
Selecting and uploading the content to the selected folder
Once in the folder that you want to upload to
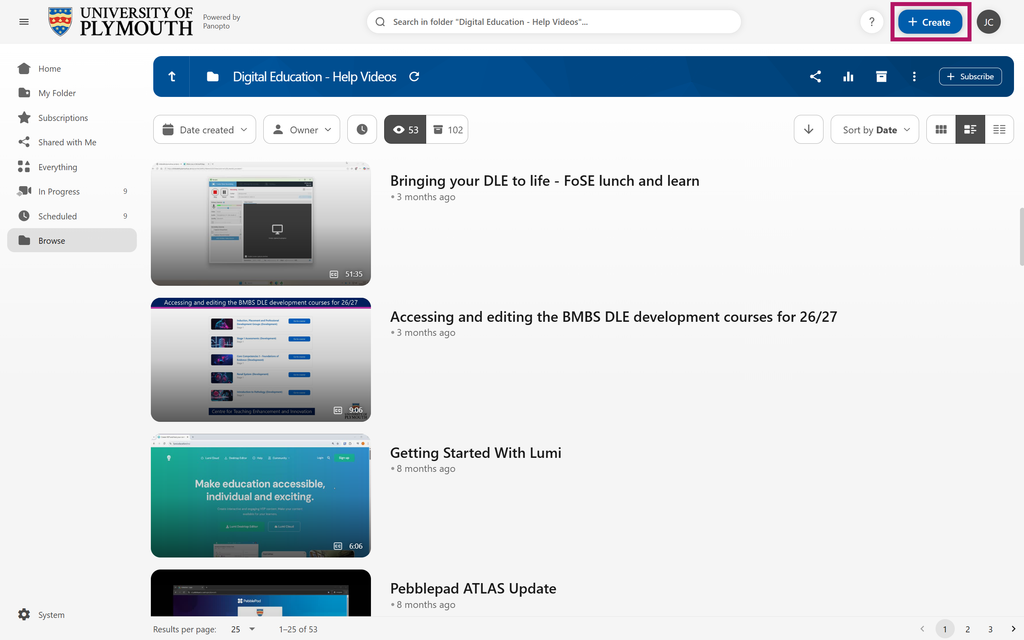
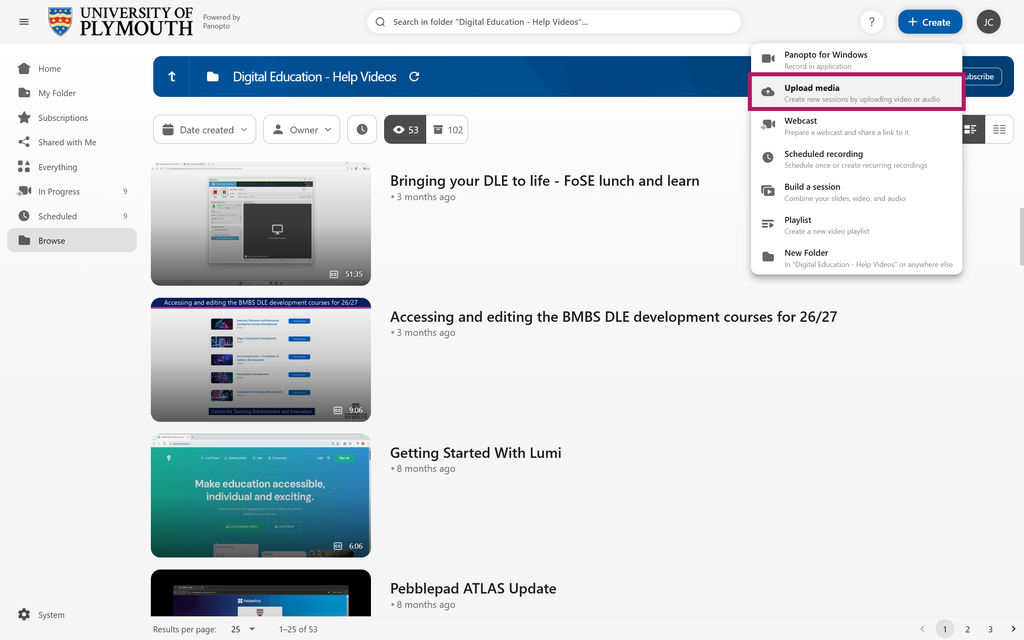
- Click on the blue Create button
- Select Upload media
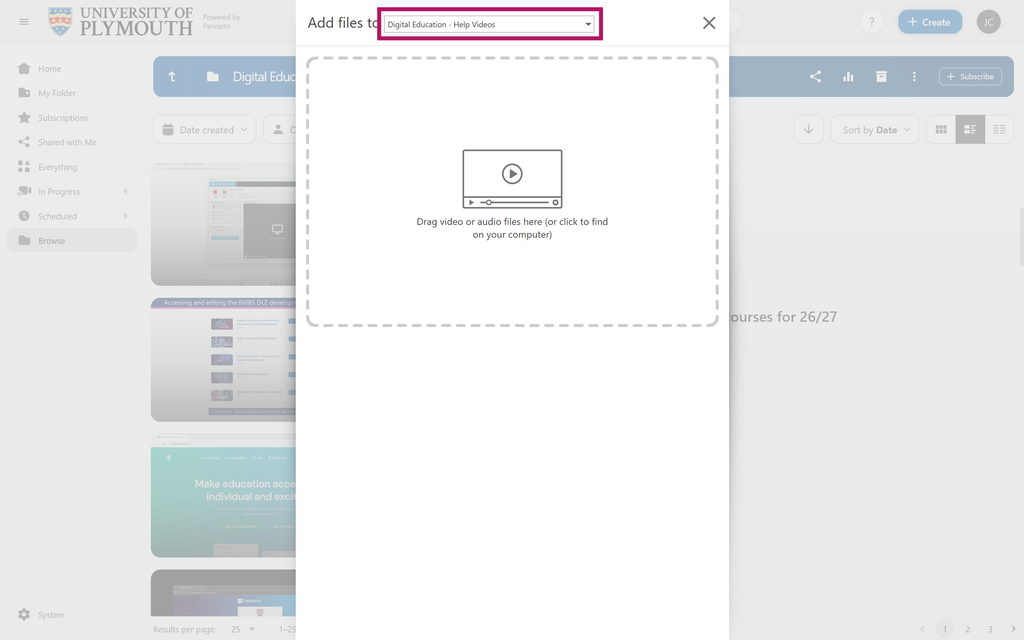
- Ensure that you are in the correct folder. If not, you can select the folder from here by typing the name or clicking down through the folders.
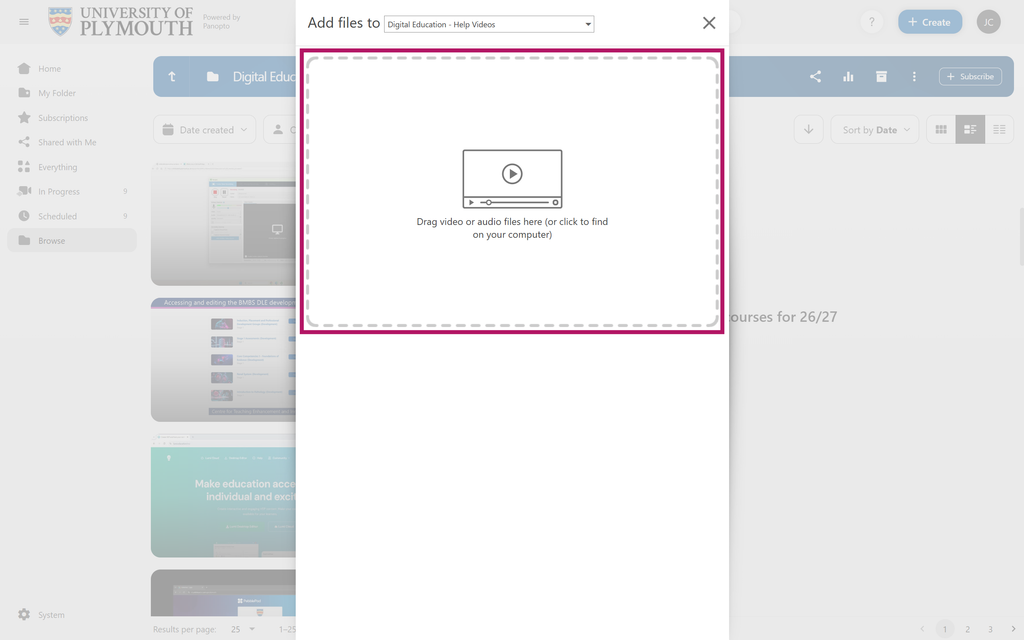
- You can either drag your video file from its folder and drop it into the highlighted area, or if you would prefer, you can click in the highlighted area and find your video file on your computer.
- The video will then upload. Once it has uploaded, it will process. The longer your video is, the longer this will take.
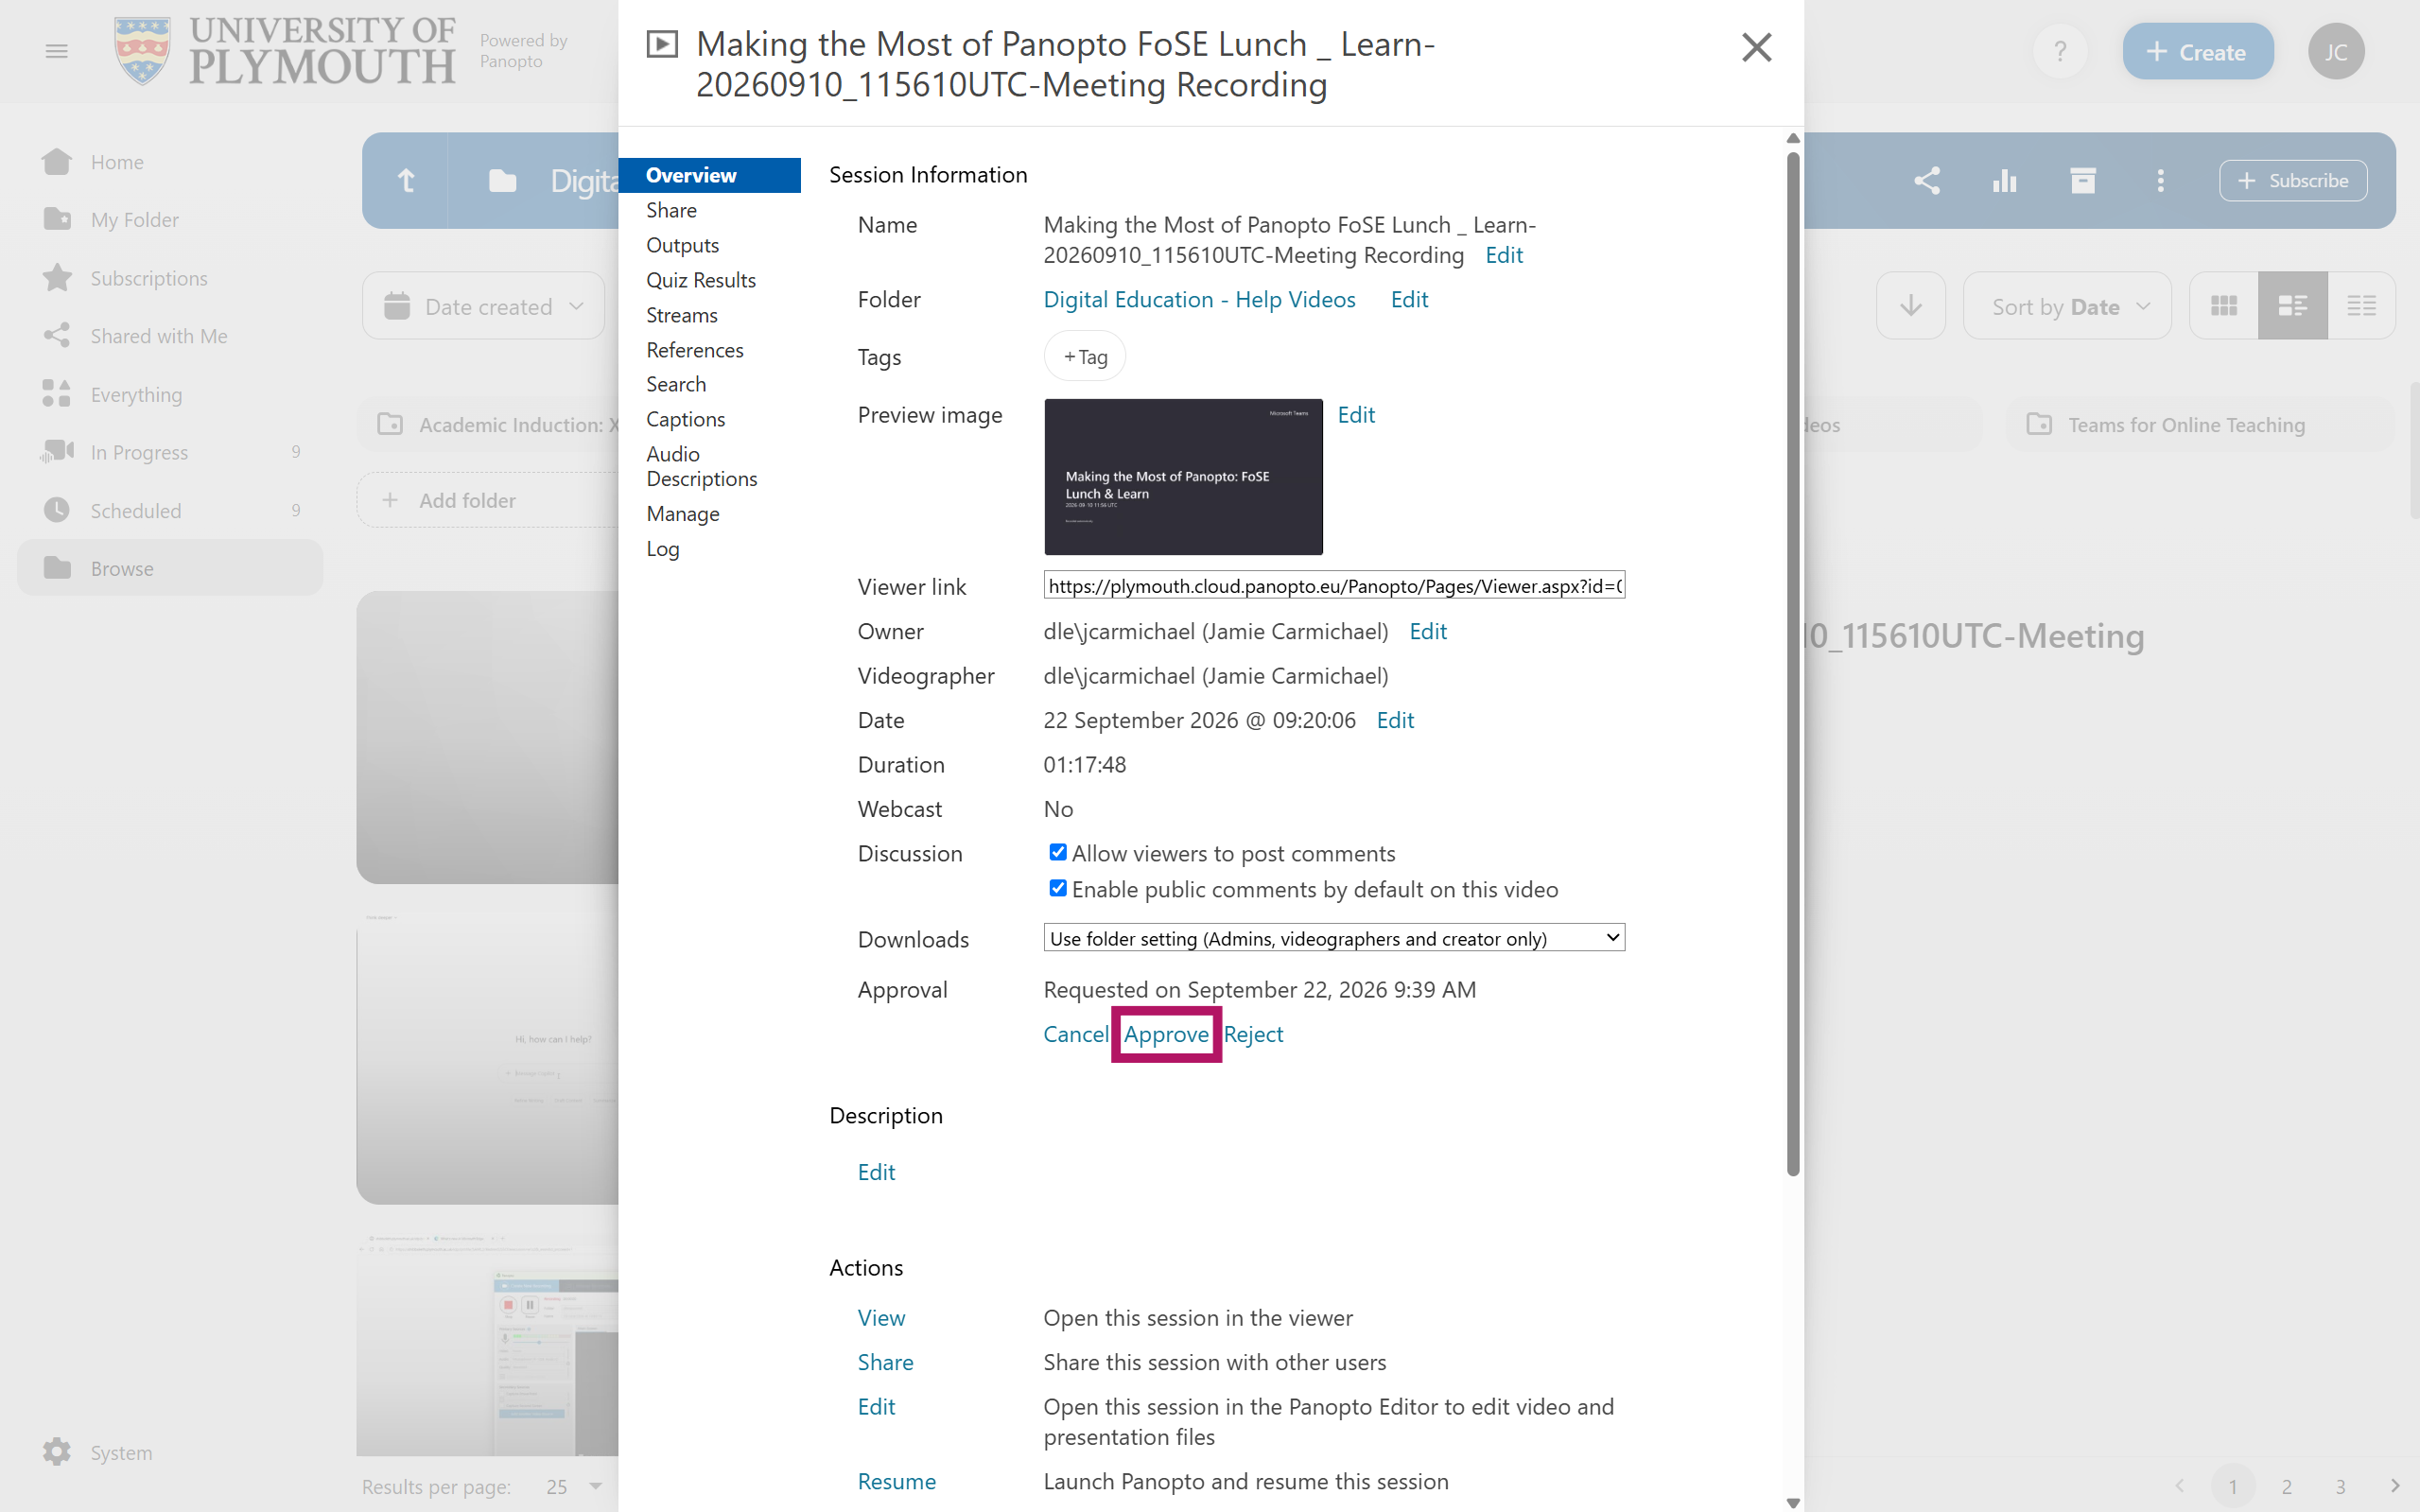
- Once it has finished processing you will need to approve the video so that your students can see it.
- Click the cog icon on the video thumbnail
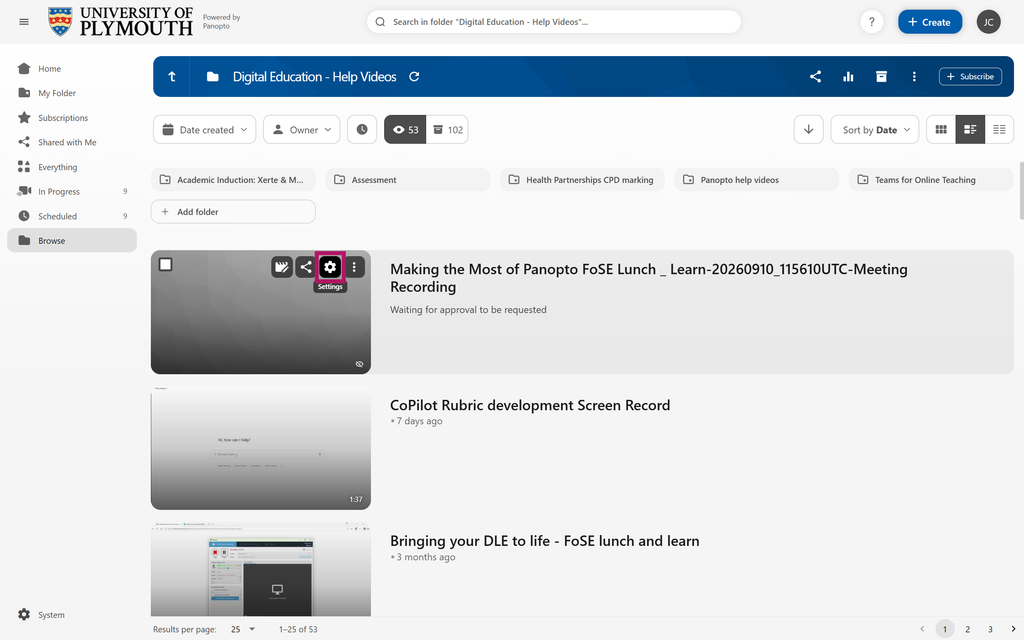
- Click Approve
Supported file types
Supported media types: .avi, .mp4, .m4v, .mpg, .wmv, .mov, .qt, .asf, .3gp, wma, .mp3.
