Overview
Group choice allows students to select one or more groups they wish to be a member of in a space. Following their choice, they are automatically enrolled into the group(s) of their choice. These groups can then be used to give access to restricted or group specific activities.
Before you start…
Make sure you have previously set up the groups in Moodle (see Creating Groups in Moodle)
How to set up a Group Choice activity in a Moodle course
To add a ‘Group Choice’ activity to your course, please follow the steps below:
- Sign in to your Moodle account and select the course where you would like to add the ‘Group Choice’ activity.
- Click on the ‘Edit mode’ button and then select a section where you would like it to be located.

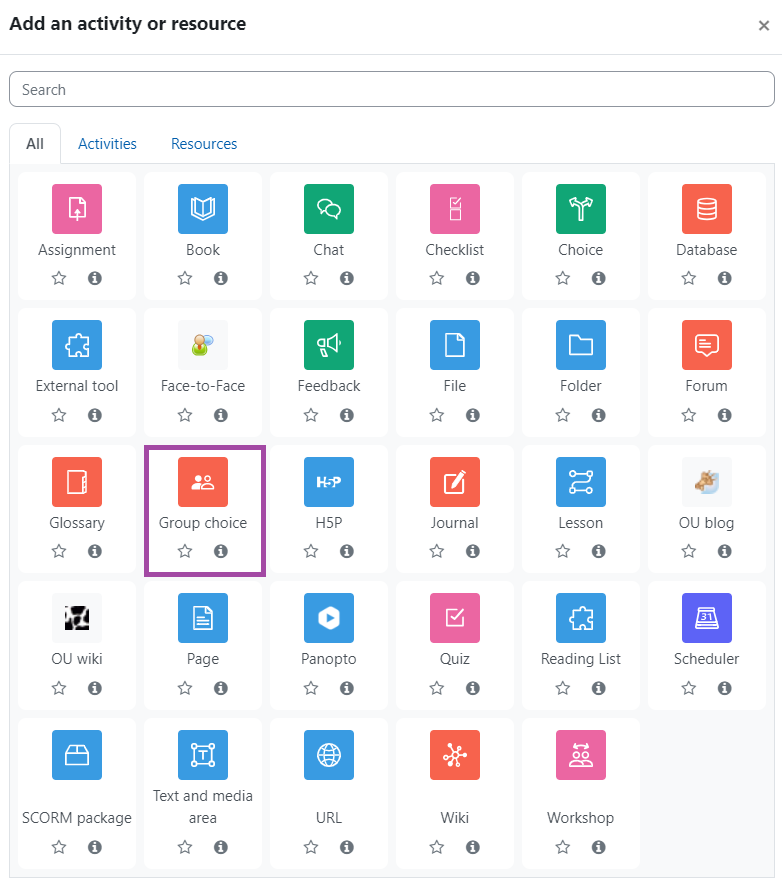
- Click on the ‘Add an activity or resource’ button and then select ‘group choice’ from the popping-up window.
- You will be directed to the settings of the activity where you can change the following things.
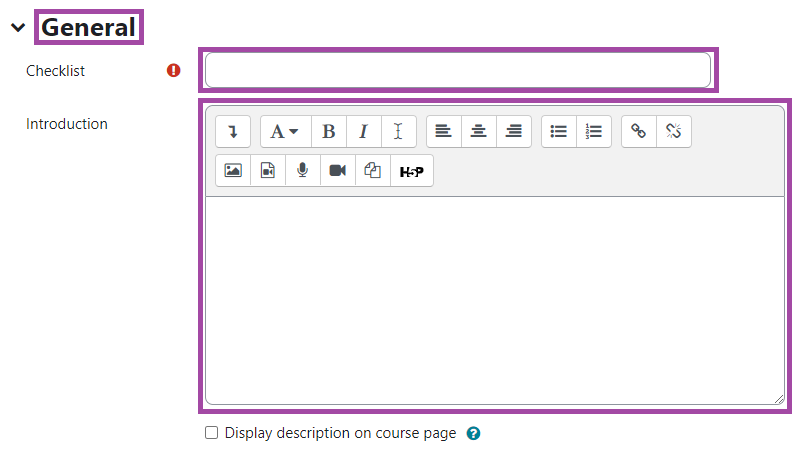
General
In the ‘General’ section, you can give a useful name and description to the activity. You can also decide whether you would like the description to be shown on the course page.
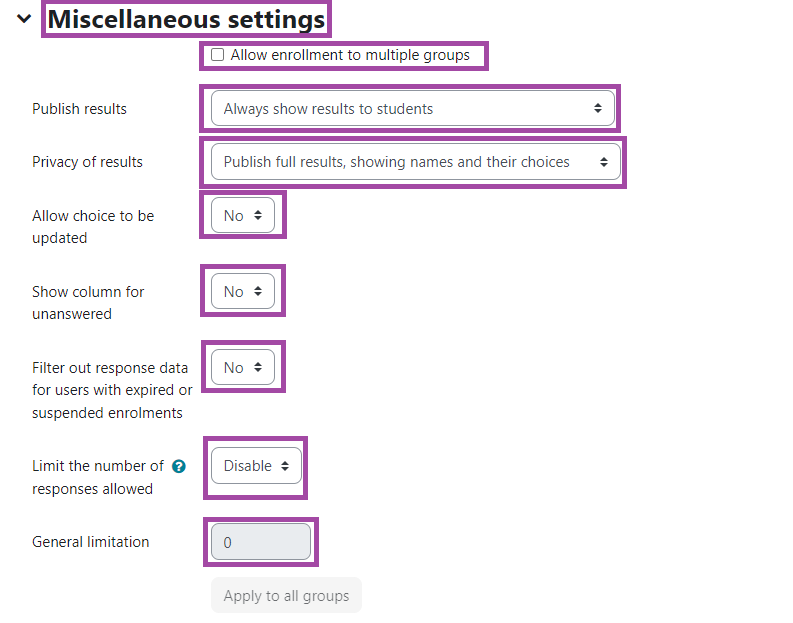
Miscellaneous settings
In the ‘Miscellaneous settings’ you can decide:
- Whether students are allowed to enroll into multiple groups
- when you would like to show the results to the students. This can be either; to show the results to students after they answer, show results to students only after the choice is closed, always show results to students or not to publish the results to students;
- whether the results should stay anonymous or the names of the students would be displayed as well;
- Whether they can update their choice;
- whether the column for the unanswered questions should be displayed;
- whether the responses from ‘expired’/’suspended’ students should be visible; and
- Limited the number of responses allowed.
- General limitation will limit the amount of participants in each group.
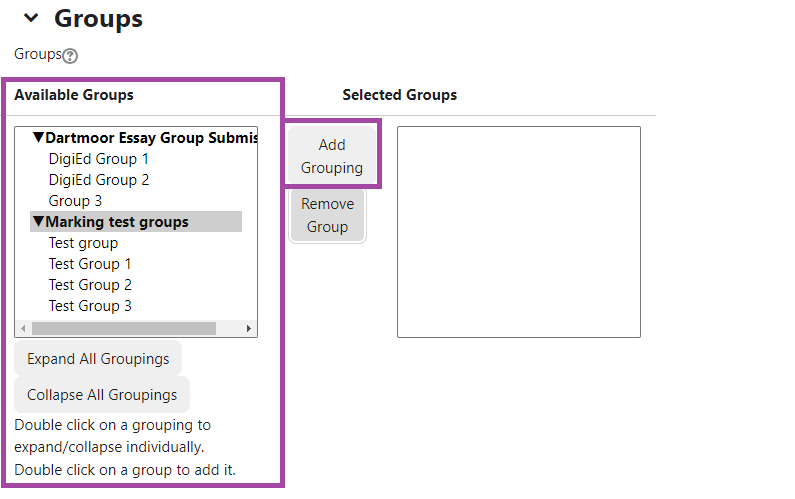
Groups
Within this section you can specify which groups participants can be allocated to:
- The list on the left displays all ‘Available Groups’ and groupings. To add one or more groups, select these from the ‘Available Groups’ list and select ‘Add Group’. The selected group(s) will display on the ‘Selected Groups’ list on the right.
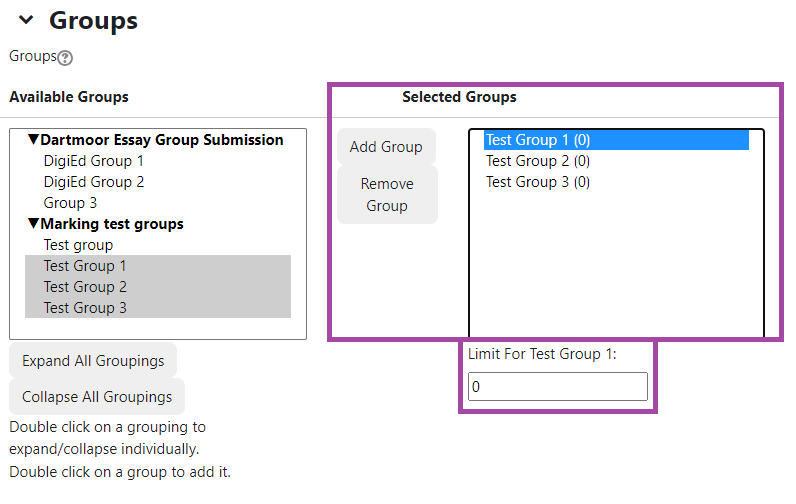
- If a limit for the number of students in each group has been set (under ‘General limitation’ in the ‘Miscellaneous settings’), the limit will be displayed between brackets next to the group under Selected Groups.
- If ‘Limit the number of responses allowed’ is set to Enable, a limit for each individual group can be set by selecting the Group name in the Selected Groups column and entering the maximum number of participants in that group in the ‘Limit for Group: input field’.
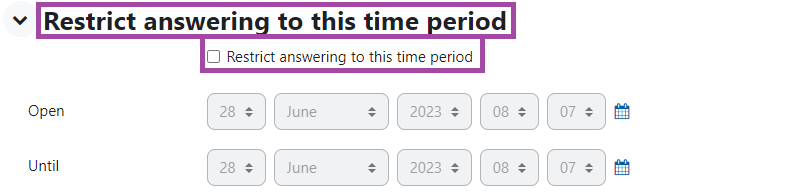
Restrict answering to this time period
In the ‘Restrict answering to this time period’ section, you can decide to restricting the group choice activity to a limited time period.
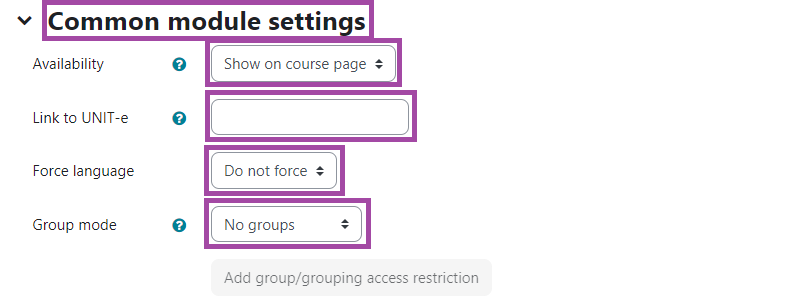
Common module settings
- In the ‘Common module settings’ section, you can decide whether you would like the activity to be shown to the students.
- The ‘Link to UNIT-e’ setting refers to transferring the released grades to the student record system (UNIT-e), therefore, this option has to be turned off (left on default) as this activity is not part of a summative assessment.
- By default, Moodle detects a user’s language from their browser setting. The ‘Force language’ can be used if you want to force a language instead.
- The ‘Group mode’ can be useful for you if you would like to allocate the students to different lecturers for the checklist.
- Please keep in mind that in this case, we recommend using the ‘Separate group’ option from the drop-down list
Restrict access
In the ‘Restrict access’ section, you can add restrictions in terms of accessing the checklist as a student which can be based on date, grade, group, grouping, or user profile.

How to view the responses of the Group Choice activity in your Moodle course
After you have clicked ‘Save and return to course’ or ‘Save and display’ you will be able to view the ‘Group Choices’ activity.
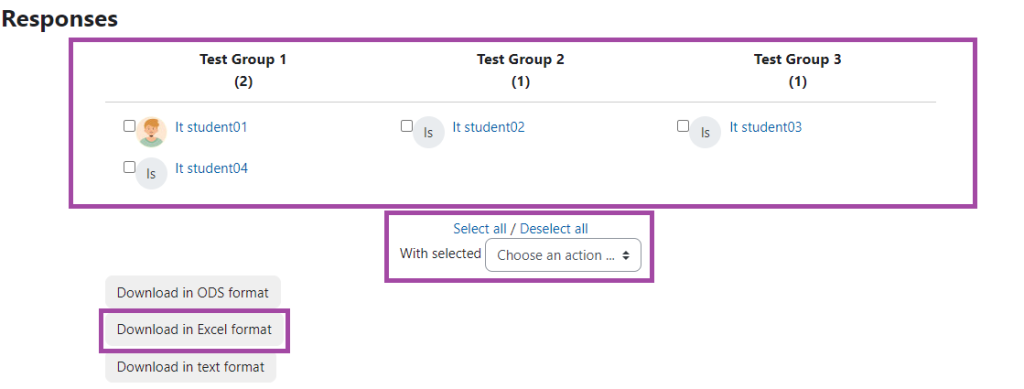
You can view student responses by clicking on the ‘Responses’ in the secondary menu.
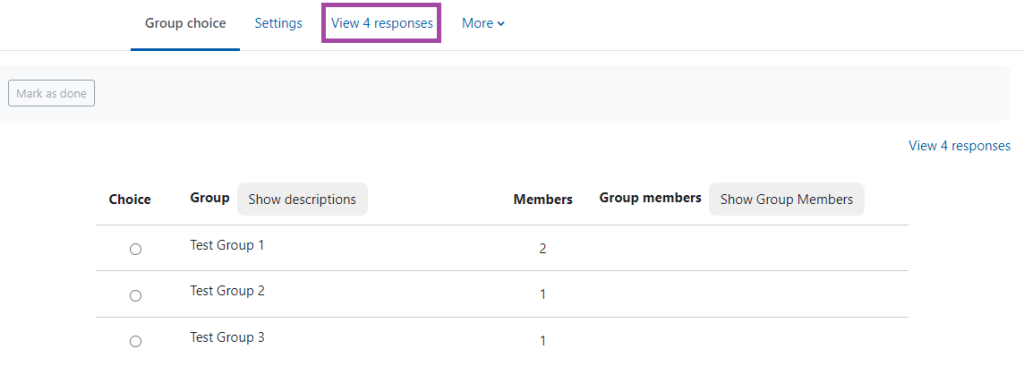
This will then open up a table on a new page where you could see the number of the responses, and the student responses based on the provided group options.
You can always overwrite their selections by using the drop-down list where it says ‘Choose an action’, or download the table for example, as an Excel spreadsheet.