Overview
If your students need to submit a video or audio, we recommend creating a video submission point for this purpose. This will allow students to submit files up to 5GB.
How to enable video or audio submissions
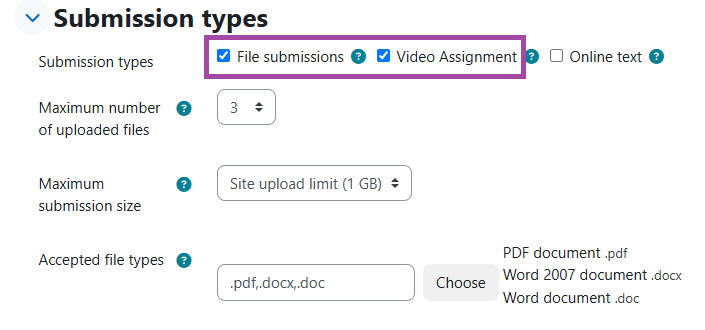
To do this, follow the instructions for creating an online submission, but in addition tick the ‘Video Assignment’ box in the ‘Submission types’ section.
- If students only need to submit the media file and no other supporting files, you can untick the ‘File submissions’ box but please ensure students are aware of this. Otherwise, please keep both boxes ticked, so they can use:
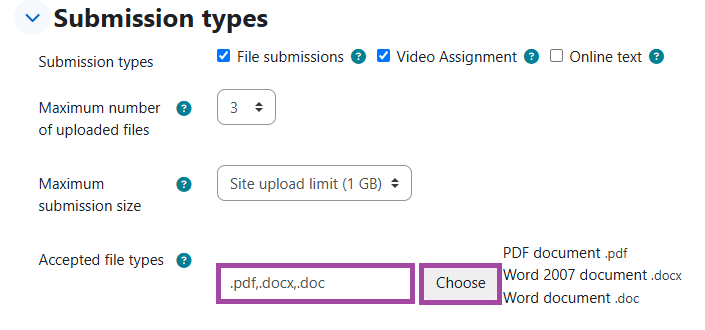
- The ‘File submissions’ box for regular submissions (e.g. Word document, PDFs, PowerPoint presentations)
- The green ‘Choose Media’ button to upload the video submission with the maximum file size limit of 5GB
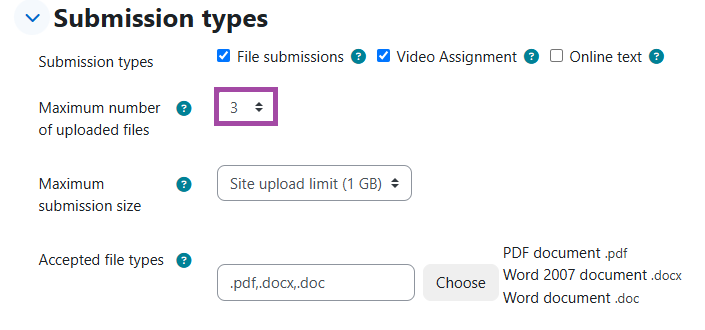
- For the regular file submissions, please restrict the ‘Maximum number of uploaded files’ from 20 to a lower number, depending on how many supporting files you accept from your students. In this case, we restricted it to 3.
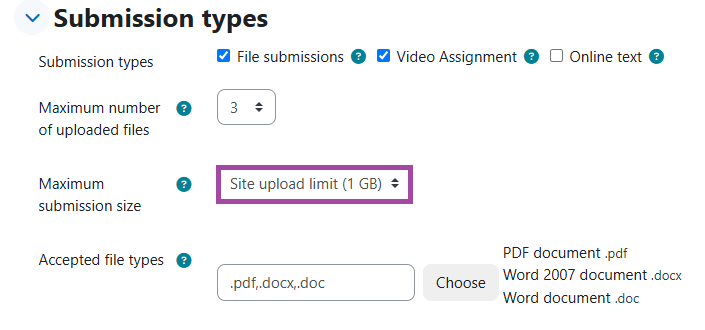
- You can also increase the ‘Maximum submission size’ for regular submissions (e.g. documents, presentations, etc) up to 1GB. This might be needed if PowerPoint presentations or other heavy files need to be submitted. To do this, please follow the steps outlined in this help material.
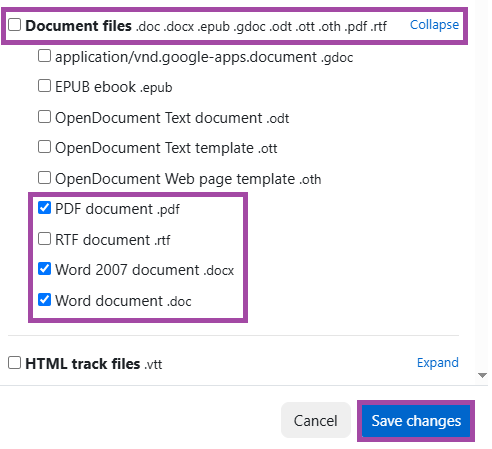
- Please ensure the ‘Accepted file types’ is configured for the file types you expect your students to submit. In this case, we restricted it to documents only.
Students view of media submission
When students are about to submit their video (and supporting files if permitted), they can follow the instructions outlined on this help page. It also includes essential information about:
- How to prepare for a video recording
- How to record a video file
- How to edit a video file
- Recommended video file types and codec they need to use
- Many more
Please share this help page with them for this assessment type.
Once they click on the activity in the DLE, they will need to click on the ‘Add submission’ blue button to upload their files.
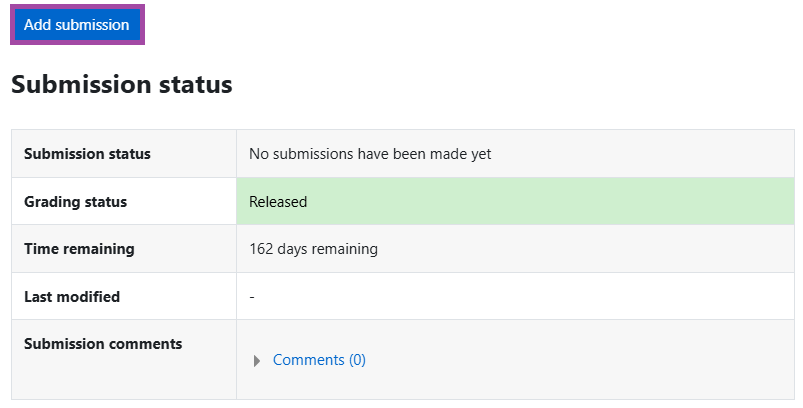
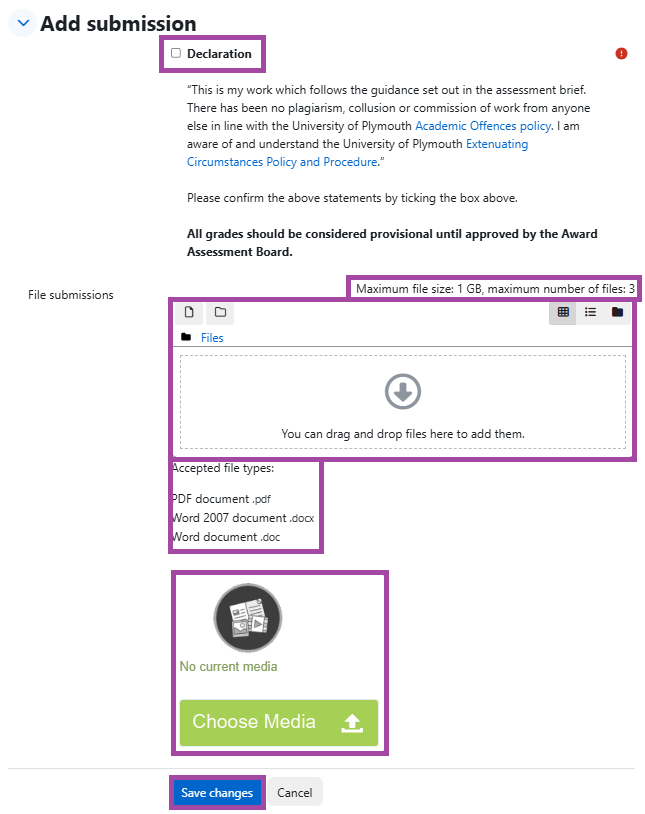
After this, they will be presented with the following page where they need to:
- Tick the ‘Declaration’ box
- Upload their video using the ‘Choose Media’ green button
- Upload their supporting files (if permitted) via the ‘File submissions’ box.
Once the file(s) are uploaded, they need to click on the ‘Save changes’ button to finalise their action.