Overview
Moodle allows you to send out notifications about the latest news of your course or start a discussion about a specific topic with your students by using the ‘Forum’ activity.
In this article, we will show you how to add a group announcement activity to your course in Moodle.
How to add a group announcement activity to your course in Moodle
To add a group announcement activity to your course in Moodle, please follow the steps below:
- Sign in to your Moodle account and select the course where you would like to add an ‘Announcement’
- Click on the ‘Edit mode’ button and then select a section where you would like it to be located.

- Click on the ‘Add an activity or resource’ button and then choose ‘Forum’ from the popping-up window.
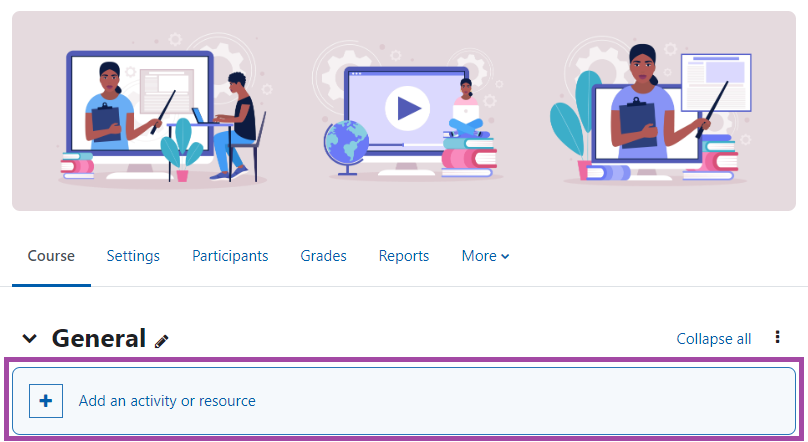
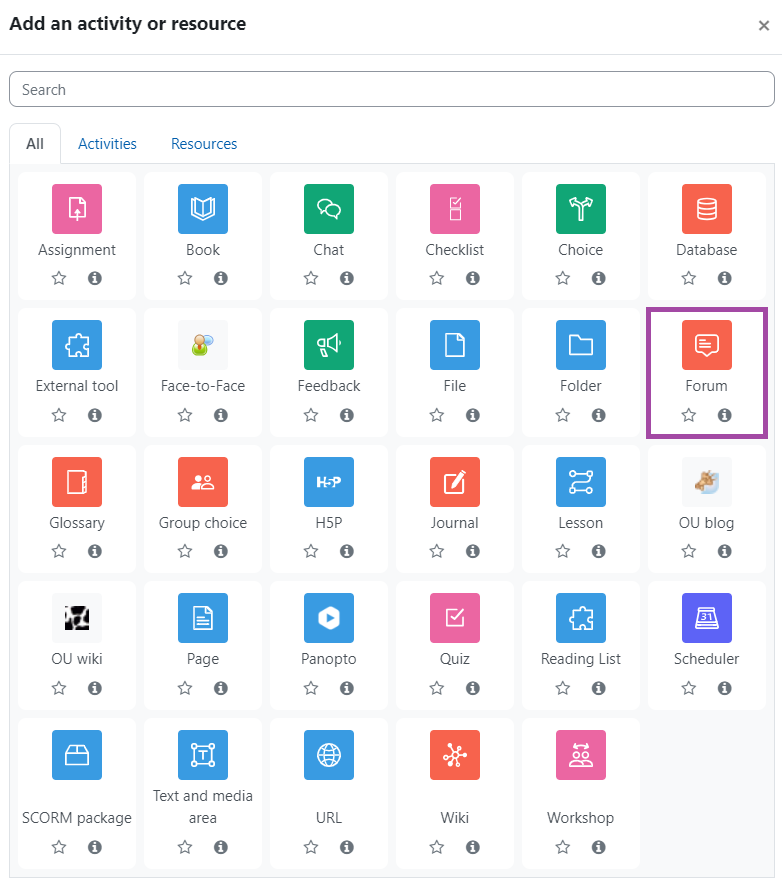
- A new page will open where you can set up your new announcement activity.
How to set up a group announcement activity in Moodle
To set up a group announcement activity in Moodle, please follow the steps below.
General
In the ‘General’ section, you can give a useful name and description to the activity. You can also choose whether you would like the description to be shown on your course page or not.
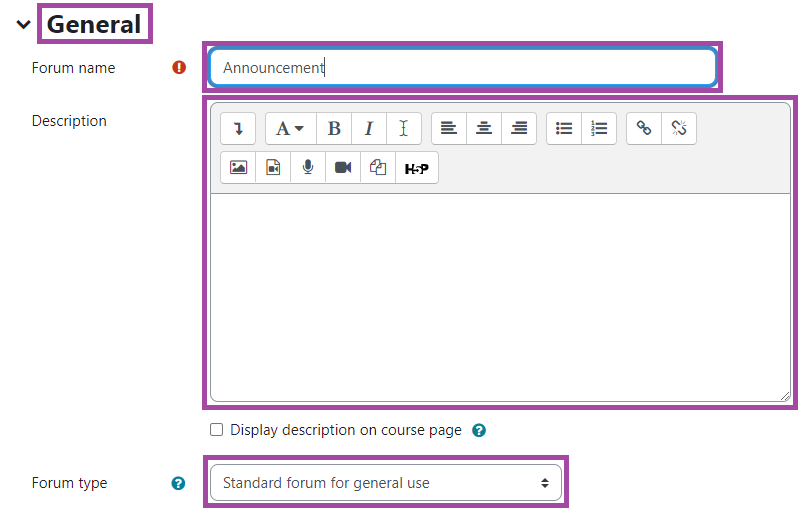
In the ‘General’ section you can also select the type of forum, however for announcements it is recommended to keep with the default ‘Standard forum for general use’.

Availability
In the ‘Availability’ section, you can add time restrictions to the announcement activity.
You can define how long the students can post by setting a ‘Due date’ for the announcement.
You can also define a final deadline for the activity by setting a ‘Cut-off date’ for the announcement.
Please keep in mind that in order to do this, you need to tick the boxes where it says ‘Enable’.

Attachments and word count
In the ‘Attachments and word count’ section, you can decide whether you would like the students to be able to upload files and if yes, then you can also define the file size limit.
You can also define the number of attachments that the students are allowed to upload.
Lastly, you can define whether you would like to have a display set up for the students for word counting.

Subscription and tracking
In the ‘Subscription and tracking’ section, you can decide whether you would like to add a subscription to the announcement activity and if yes, then you also need to select a subscription mode.
- Optional: The students can choose whether they would like to subscribe to the announcement or not.
- Auto: The students are automatically subscribed to the announcement, however, they can unsubscribe if they wish to.
- Functional: The students are forced subscribed to the announcement and they can not unsubscribe.

In addition, you can also decide whether you would like students to be able to track which announcements they have already read and which are the ones that they have not which will be also automatically highlighted by the DLE.

Discussion locking
In the ‘Discussion locking’ section, you can decide whether the announcement should be locked for the students after a specific period of time in case they have not been posted anything. Please keep in mind that they will be able to unblock the activity if they make a new post.
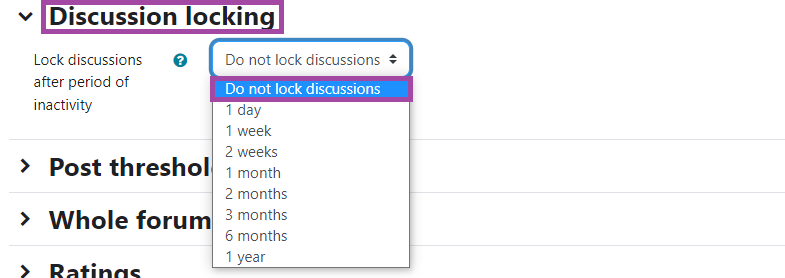
Post threshold locking
In the ‘Post threshold locking’, you can set up the number of posts the students can make in a certain period of time. If they reach the upper limit that was set by you, then they will get blocked from posting for a couple of minutes.

Whole forum grading
In the ‘Whole forum grading’ section, you can set up points or grades for the posts that were made by the students. Please keep in mind that the DLE will not be able to review the quality of the answers but it will give marks to the students based on the fact whether they posted under the announcement activity or not.

Ratings
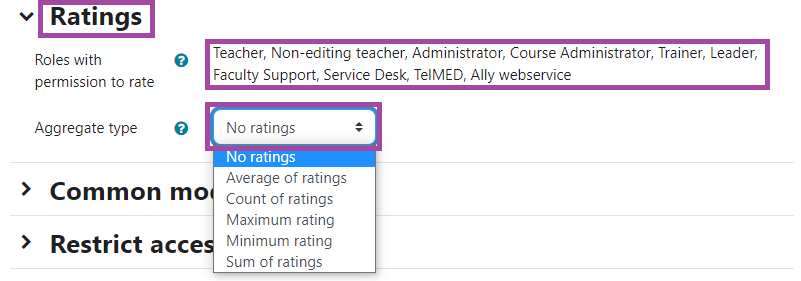
In the ‘Ratings’ section, you can decide whether you would like to rate the student posts or not. The following users would be able to do this task: ‘Teacher’, ‘Non-editing teacher’, ‘Student’, ‘Administrator’, ‘Course Administrator’, ‘Trainer, Leader’, ‘Faculty Support’.
You can also define how the final rate out of all rates would be calculated which can be ‘Average’, ‘Count’, ‘Minimum’, ‘Maximum’ or ‘Sum’.
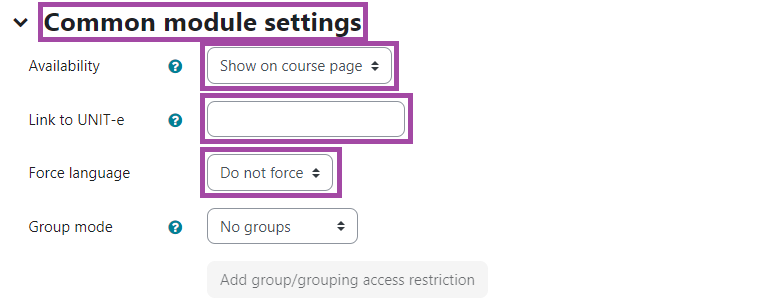
Common module settings
In the ‘Common module settings’ section, you can decide whether you would like the activity to be shown to the students or not.
With the ‘Link to UNIT-e’ you can transfer the released grades to the student record system, which has to be turned off in case you would not like to give grades to the student posts.
By default, Moodle detects a user’s language from their browser setting. The ‘Force language’ can be used if you want to force a language instead.
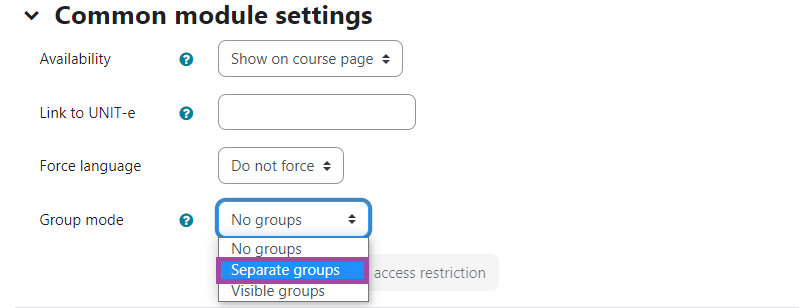
The ‘Group mode’ is the place where you can turn an individual announcement activity into a group announcement activity.
There are two options you can choose from. If the ‘Visible groups’ has been selected from the drop-down list, then the students would have the right to select between the groups where they would like to post, while with the ‘Separate groups’ they would have a separate announcement area, therefore, they would not able to select between these groups. We recommend using the second option.
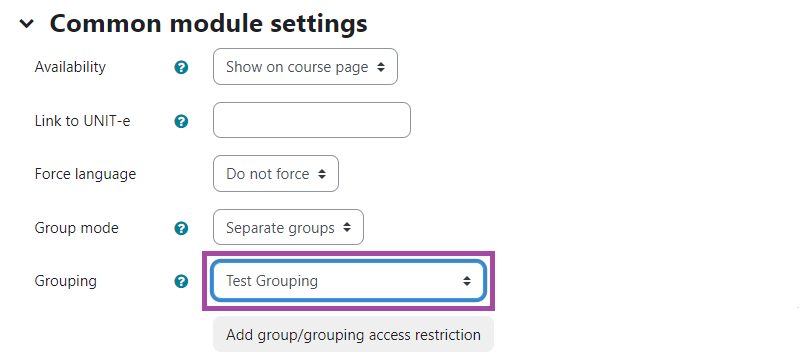
A new setting will appear which is going to be called ‘Grouping’. As your groups are located into categories, also known as ‘Groupings’, you need to select one of them so the DLE knows which particular groups you wish to use for this activity.
Please read the following article if you would like to know more about how to set up groups and groupings in the DLE.
Restrict access
In the ‘Restrict Access’ section, you can add restrictions in terms of accessing the announcement activity as a student which can be based on date, grade, group, grouping, or user profile.

Last steps
As your last step, save the process by clicking on the ‘Save and display’ button.

A new page will open up which is going to be the dashboard of your announcement activity. You will see that a new option appeared with which you will be able to post an announcement (‘Add a new topic’) to a specific group. You need to select a group from the drop-down list before you make the new post.

The ending result should look as in the attached screenshot.

