Please note that:
- All Lectern PC’s now have Panopto installed on the desktop.
- From the 1 September 2022, all new Moodle courses will be automatically provisioned and will have the Panopto block automatically added to the course page.
AV Support Materials
All AV (Audio Visual) guidance for recording in teaching spaces, can be found in this SharePoint site:
Recording sessions using Panopto
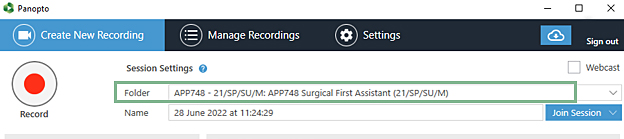
- Open Panopto from the desktop and sign in.
- Choose the module folder you want the recording to go to, by searching the module code or using the dropdown.
- Configure your recording settings
- Select your Video source
- Select your Audio source
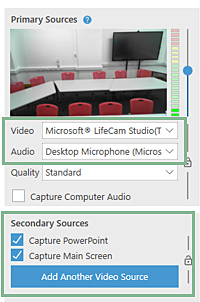
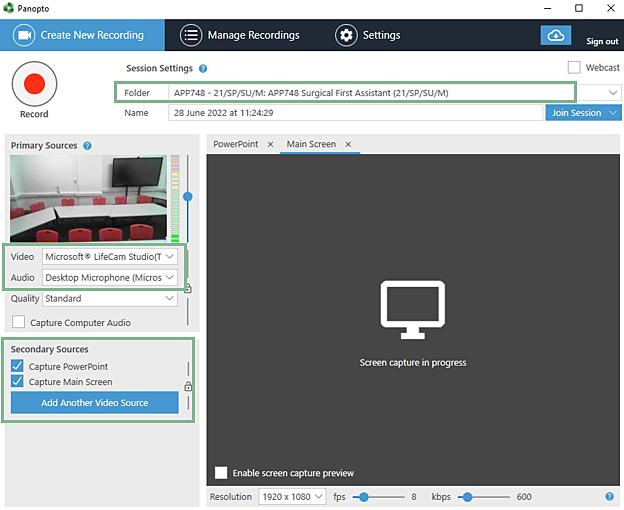
- Select whichever ‘secondary sources’ you wish. If using PowerPoint you will select ‘Capture PowerPoint’.
- Tell your students that you will be recording this session and that it will be published on the module page.
- Hit Record once you are ready.

- You can pause recording at any point, for instance if a student doesn’t wish their question to be recorded.

- Stop recording when you have finished.

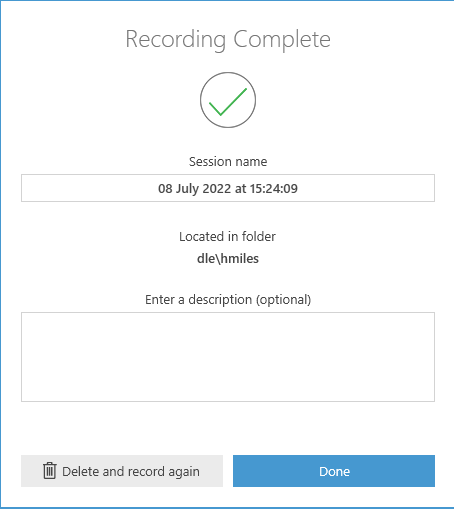
- When you press Stop, a ‘recording complete’ message appears.
Add any additional title information and a description if you wish and click ‘ Done’
- A list of recordings, including your most recent recording will now appear as it sync’s the recording to the cloud.
- Click on ‘ Manage recordings’ tab or ‘View’ to look at your Panopto online recordings.
- It may take some time for the blue ‘Resume, Share, Edit and View’ options to appear as your recording uploads.

- In Panopto online you will see your recording.
- Once the recording has uploaded, you will be able to edit/move folders/ approve in ‘settings’.
- For a student to view the recording you must have approved it.
- For recordings to appear In the Panopto Block on the module page you must have recorded into the correct module folder or moved it into the correct module folder after recording.
- For guidance on how to Approve a Panopto Video: Approving Panopto videos for students access
- For guidance on how to move and copy video’s in Panopto: Moving and copying content in Panopto
- For guidance on how to edit a video in Panopto: Editing videos with the Panopto Editor
Recording sessions using the timetabled Zoom links
Zoom links will remain in place for those schools who have requested this.
The Zoom meeting will need to be started at the beginning of every session with the Zoom session URL which you have been provided with. Zoom will now load up on the PC and your session is now live and remote students will be able to connect. Sharing your screen will still be necessary whether some students are remote or not. If you are using a presentation tool such as PowerPoint or demoing content on screen, screen sharing must be enabled for the recording to capture this. If your Zoom session was booked via the timetable, then the session will begin recording automatically. However, if the session was created by you or a colleague, you will have to start the recording manually. Do this by clicking Record from the bottom menu, and then select Record to the cloud. The session will now start now recording.
At the end of the teaching session, please stop the recording. The system will then process the recording and upload the Zoom meeting to Panopto for student to view later.
You do not have to wait in the room whilst this is processing. Additionally, the tutor leading this session will have the recording in their ‘Meeting recordings’ folder within Panopto. This tutor will need to move the video to the relevant module folder and then approve the video. This will make it available to students via the DLE. Please see Digital Education’s ‘Moving and copying content in Panopto’ help article for more detail.