Panopto allows tutors to edit their videos before being released to students with a simple web-based interface. The Panopto Editor lets users create multiple versions, called ‘edits’, of recorded sessions. The original edit called default is created automatically, and contains the entire recording. Tutors can modify default or create additional edits without affecting the original session content.
Editing a session
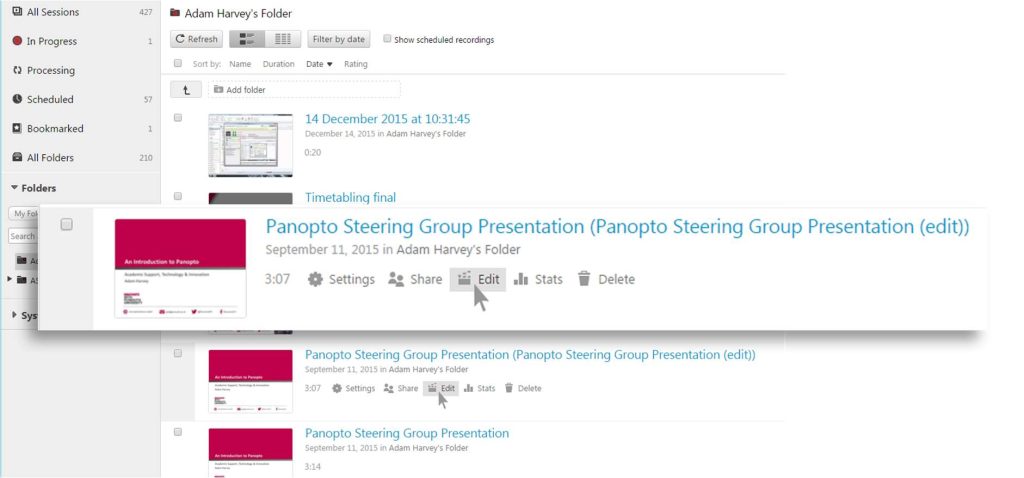
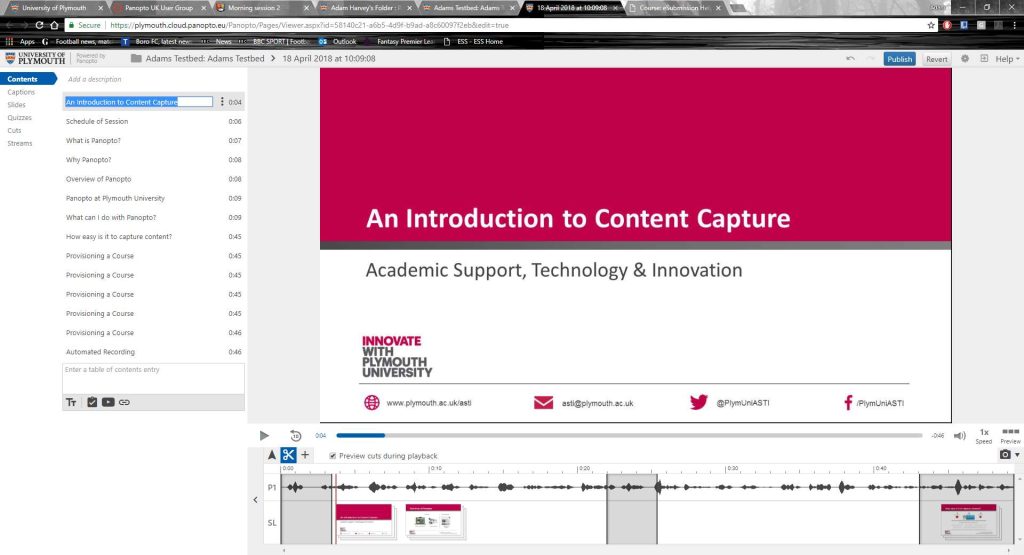
Log in to Panopto and hover over the video you wish to work on and click the Edit icon and label that appears.
By default, the entire recording is an already selected segment. A segment is the selected portion of video that you want to keep.
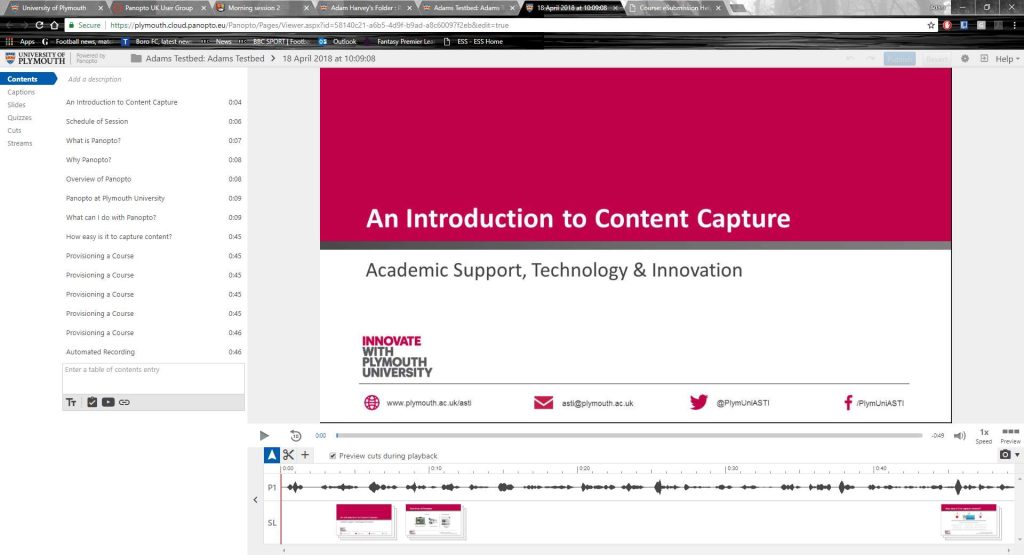
To remove the beginning and end of a recording, select the scissor icon and grab the dark grey handles on either end of the time line and drag it inward to the point at which you want the recording to begin or end.

As you can see here, the beginning and ending are amended, and eliminated portions are greyed out.
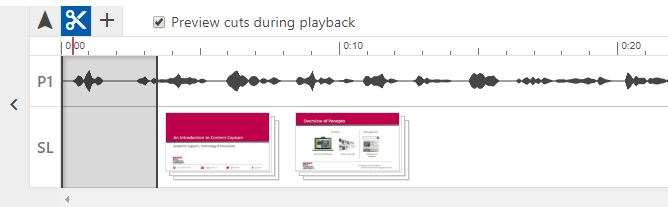
To delete middle portions of your presentation, select the scissors icon and move your cursor to the section of the presentation you’d like to remove.

Then click and hold the left mouse button at the point you which to start the cut and then drag the mouse to the right to extend the cut. Release the mouse button to set the end point.

When completed, the segment can be adjusted by dragging the handles in either direction.
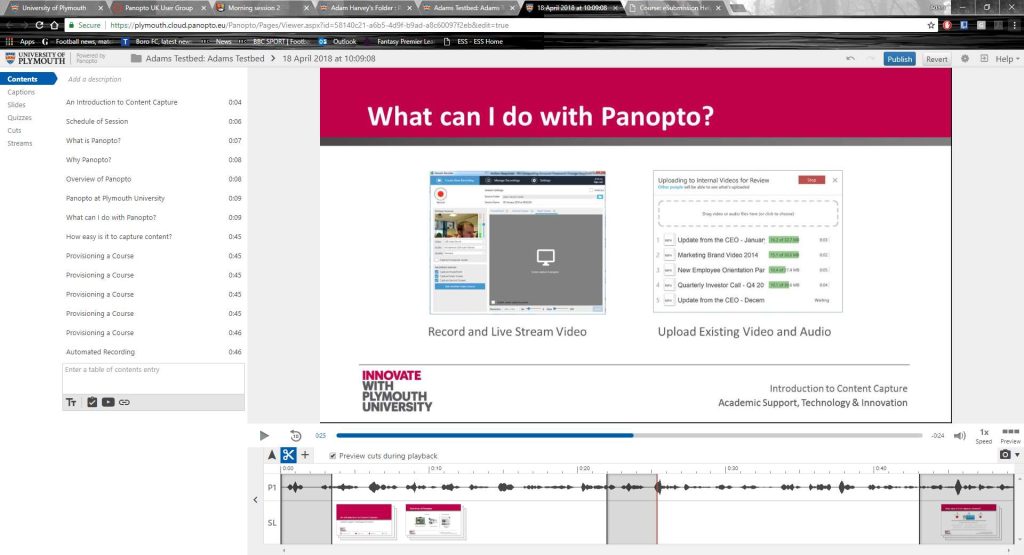
Click the Apply button to save these edits.
Clicking the Revert button will reset the video to the starting point of the editing session
Once Apply has been selected the video, Panopto will begin processing the video to make it viewable by students. You will receive an email when the video is ready to be authorised.
Other information
Clicking on the text fields to the left of the screen allows you to edit the text
You can add addition text by adding them via the dialog box at the bottom of this section, these will be timestamped to appear where the red line is in the time line (this can be changed be clicking along the top of the timeline.
Removing a webcam (or other stream) from your recording
Sometimes you’d rather the Panopto lecture you just created focus on the presentation and not yourself. The below steps show you how to remove feeds as you require.
Please note if you only wish to cut out only a part of the stream, you can skip step 5, which applies the cut to the whole video rather than the part you’ve selected.
The editing stage
1. Open the editor on the video you wish to adjust.

2. Once in the editor select the scissors icon.
3. Hover you cursor over the layer with the webcam content. (A grey line, as highlighted below).

4. Hold the left mouse button and drag the cursor left or right to create a cut and release the mouse button.
Note: If you wish to cut only a specific part of a feed, follow the above step making sure to only get the parts you wish to cut in the shaded area.
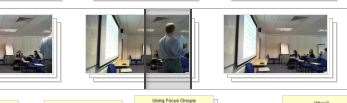
5. Next hover over each of the darker lines at either end of the cut you have just made and drag the one on the left to the start of the video and the one on the right to the end, this will leave that layer greyed out.

6. Do any other editing you need to and when finished, click the Save button at the top to save the edits.