Books in Moodle allow teachers to create multi-page resources in a book-like format. Books can have media files (Images, videos, sound and H5P) embedded into them, as well as text, and they may be printed entirely or by chapter.
(Note that embedded H5P content doesn’t connect to the gradebook.)
How is it set up?
- Firstly, navigate to a course and turn editing on. Then choose ‘Book’ from the activity chooser.
- Give it a name and, if required a description (which will appear on all chapters of the book). Check the box, if you want the description displayed on the course page.
- In Appearance, decide on the chapter formatting, and whether you want custom titles. Use the help icon for more information.
- Expand the other settings to configure the resource as you desire, and then click ‘Save and display’.
- Add content to your first chapter and save the changes. (Note: Moodle ‘chapters’ are what some might prefer to call ‘pages.’
- From the Table of Contents (at the right hand side of the screen) click the + icon to add another chapter and repeat the process.
How does it work?
Student view
Students access the Book resource by clicking on the icon on the course page. They then navigate through the pages either by clicking on the ‘Next’ or ‘Previous’ button, text link, or simply via the Table of Contents.

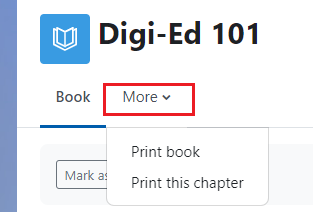
Students can print books or chapters (as PDF) by through the ‘More’ function.

Teacher view
Teachers can edit books from the Table of contents when editing is turned on. If they hide a page, it will still be visible to teachers, but students will not see it.
