Overview
Moodle ‘Scheduler’ can be used for scheduling events and appointments with your students. Once you have defined the periods during which you are available to see the students and the length of each appointment, they can then pick a time slot.
How to add a Scheduler activity to your Moodle course
To add a ‘Scheduler’ activity to your Moodle course, please follow the steps below:
- Sign in to your Moodle account and select the course where you would like to add a ‘Scheduler’ activity.
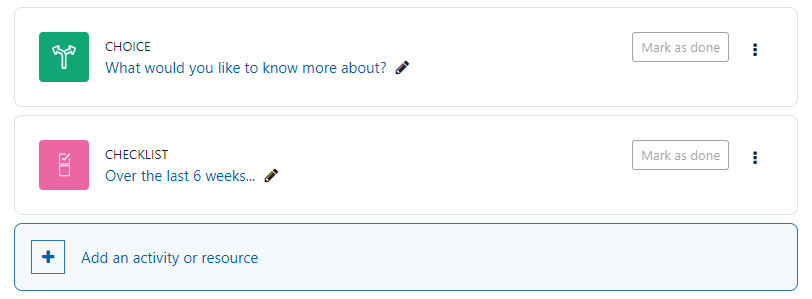
- Click on the ‘Turn editing on’ button and then select a section where you like it to be located.

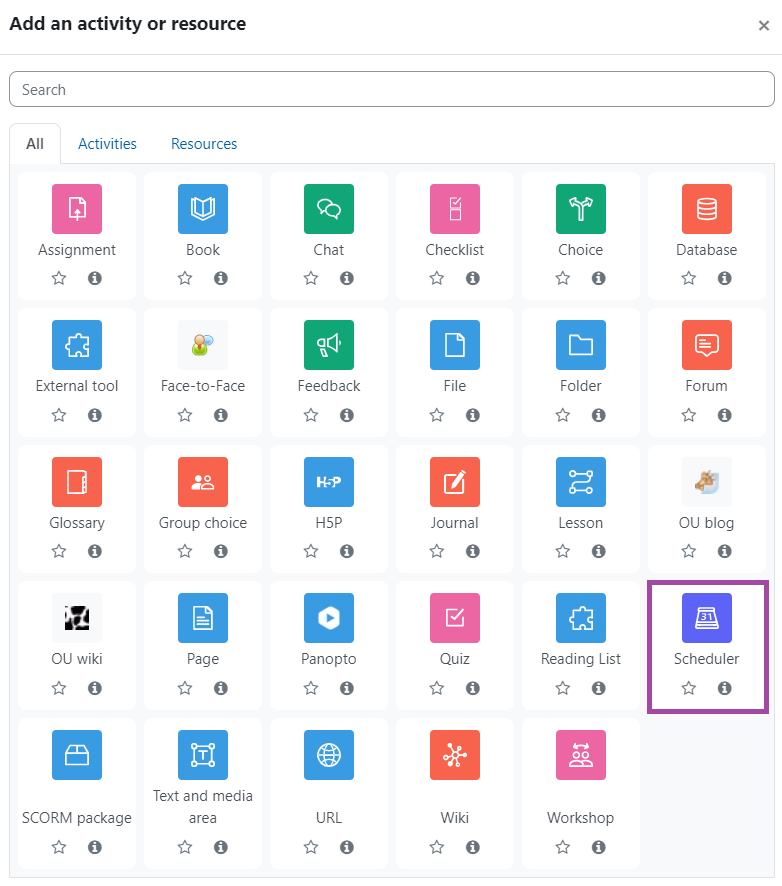
- Click on the ‘Add an activity or resource’ button and then choose ‘Scheduler’ from the popping-up window.
- A new page will be shown where you can customise the settings of this particular activity.
How to set up a Scheduler activity:
In terms of the setup of a Moodle ‘Scheduler’ activity, please follow the steps below.
General
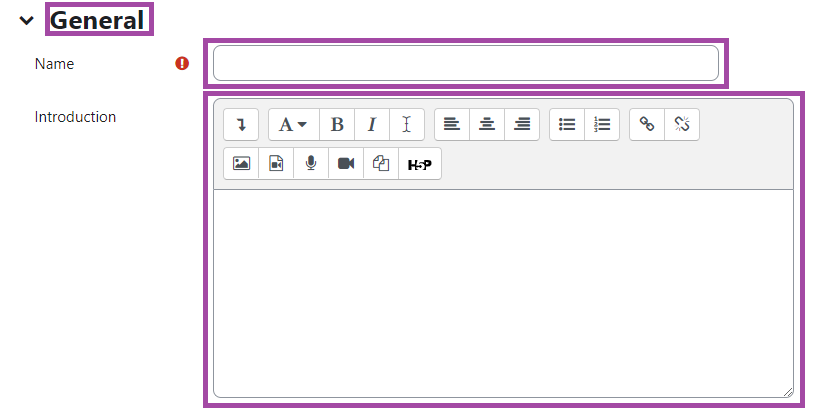
In the ‘General’ section, you can give a useful name and description/introduction to the activity.
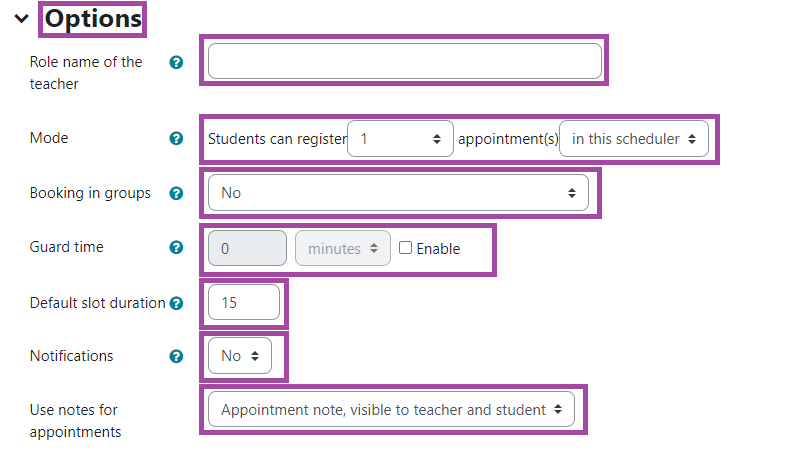
Options
In the ‘Options’ section, you can have the following settings:
- ‘Role name of the teacher’ – with this setting, you can provide, for example, your or the event name, so the students will know what and with who they will attend. If multiple tutors would be included, then we would recommend naming this setting ‘Teacher’ or ‘Tutor’, for example.
- ‘Mode’ – with this setting, you can define how many slots the students can book, which can be one if it is based on the whole activity or can be multiple, once the first meeting has been completed and the tutor has marked the students as seen – they can then book another appointment.
- ‘Booking in groups’ – with this setting, you can define whether it is a group or an individual event. If it is group work, then only one member of the group has to book time slots, as the rest of the members will be automatically allocated.
- ‘Guard time’ – with this setting, you can define a deadline after which the students can no longer modify the time slots they have booked, for example, 2 hours before the appointment.
- ‘Default slot duration’ – with this setting, you can define the default length of the time slots in minutes.
- ‘Notifications’ – with this setting, you can decide whether you and the students should receive notifications when a time slot has been booked by them or you.
- ‘Use notes for appointments’ – with this setting, you can decide whether you would like to use notes for the appointments.
Grade
In the ‘Grade’ section, you can decide whether you would like to add grades to these appointments. The setup of these settings works the same way as for a Moodle ‘Assignment’, however, we would not recommend using this Grade feature for this type of activity.

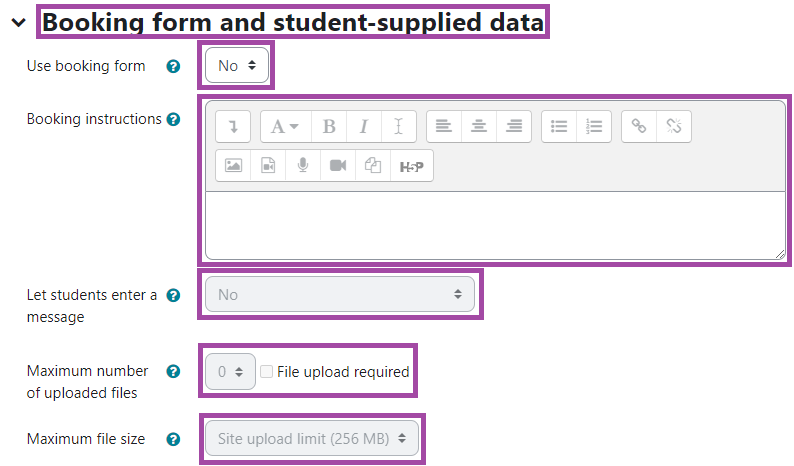
Booking form and student-supplied data
In the ‘Booking form and student-supplied data’ section, you can decide whether you would like to use a booking form for the students. If yes, then you can also provide instructions for them, decide whether they can enter messages, and upload files with a defined maximum file size limit.
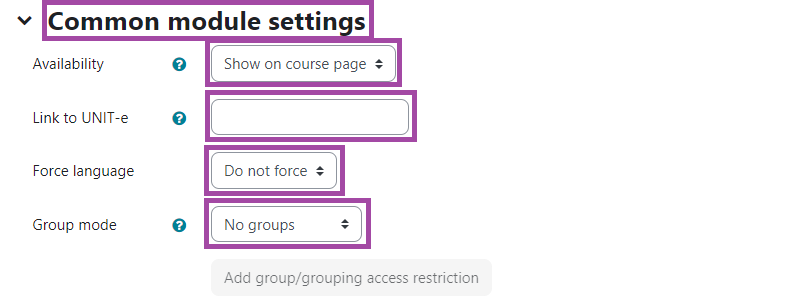
Common module settings
In the ‘Common module settings’ section, you can decide whether the activity should be shown or hidden from the students, whether it should be linked to UNIT-e, to ‘Force language’ if you want to chose a language instead of the browser default and whether group mode should be turned on. We would recommend leaving everything on default if it is not group work.
Restrict access
In the ‘Restrict Access’ section, you can add restrictions in terms of accessing the scheduler as a student which can be based on date, grade, group, grouping, or user profile, however, we recommend leaving this option on default.

Last step
As the last step, please make sure you click on the ‘Save and display’ or on the ‘Save and return to course’ button to save the settings.

How to add slots to a Scheduler activity in your Moodle course
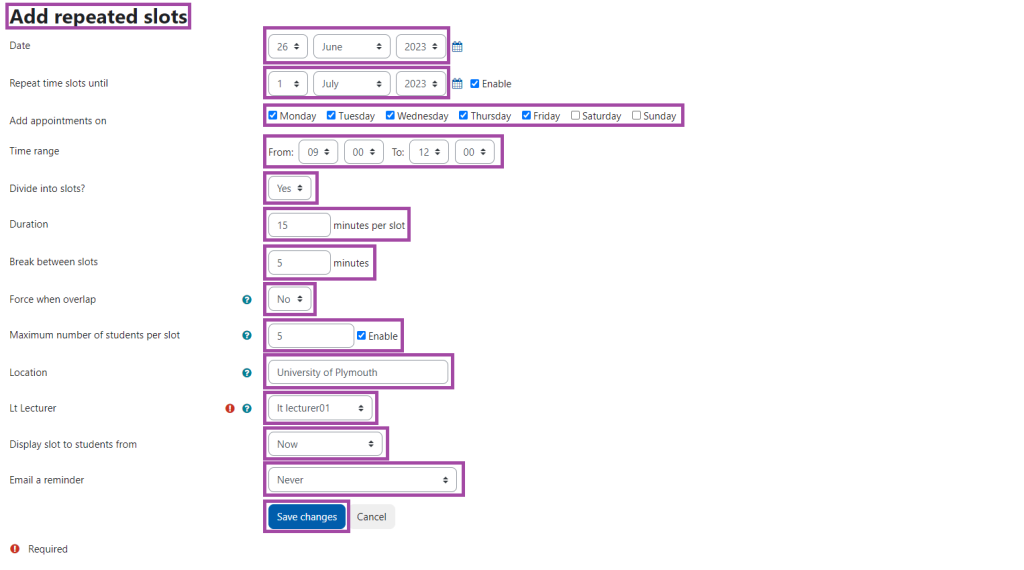
- Once you have set up the activity, you will then need to click on the ‘Add slots’ button to create appointments for your students. You can add repeated slots or a single one. In this case, we will create repeated slots, however, the setup is the same.

- You will be directed to a new page, where you can change the following settings.
- ‘Date’ – with this setting, you can define the open date for the activity.
- ‘Repeat time slots until’ – with this setting, you can define the due date for the activity.
- ‘Add appointments on’ – with this setting, you can define the days when the time slots will be available.
- ‘Time range’ – with this setting, you can define the time range for the activity.
- ‘Divide into slots?’ – with this setting, you can divide the appointments into time slots. Please leave this option on default.
- ‘Duration’ – with this setting, you can define the duration of each time slot.
- ‘Break between slots’ – with this setting, you can define the breaks between the time slots.
- ‘Force when overlap’ – with this setting, you can decide whether the overlap between two slots should be excluded from the activity. Please leave this option on default.
- ‘Maximum number of students per slot’ – with this setting, you can decide how many students can book the same time slot. Please keep in mind that even if it is a group ‘Scheduler’, you still need to provide the maximum number of members, for example, if the maximum number of your group members is 6, then you would need to enter that numerical value.
- ‘Location’ – with this setting, you can enter a location for the time slots.
- [Name of the tutor] (in this case, ‘Lt Lecturer01’) – with this setting, you can select your name from the drop-down list. Please keep in mind that if multiple tutors will take place in this activity, then for each you would need to add repeated slots. In that case, we would recommend naming this setting ‘Teacher’ or ‘Tutor’. For more information, please go back to the settings of the activity, and under the ‘Options’ section, enter the name at the setting where it says ‘Role name of the teacher’.
- ‘Display slots for students’ – with this setting, you can decide when the time slots should be visible for your students, so they can book them.
- ‘E-mail reminder’ – with this setting, you can decide whether you would like e-mail reminders to be sent out to the students.
- Lastly, please click on the ‘Save changes’ button to save the settings.
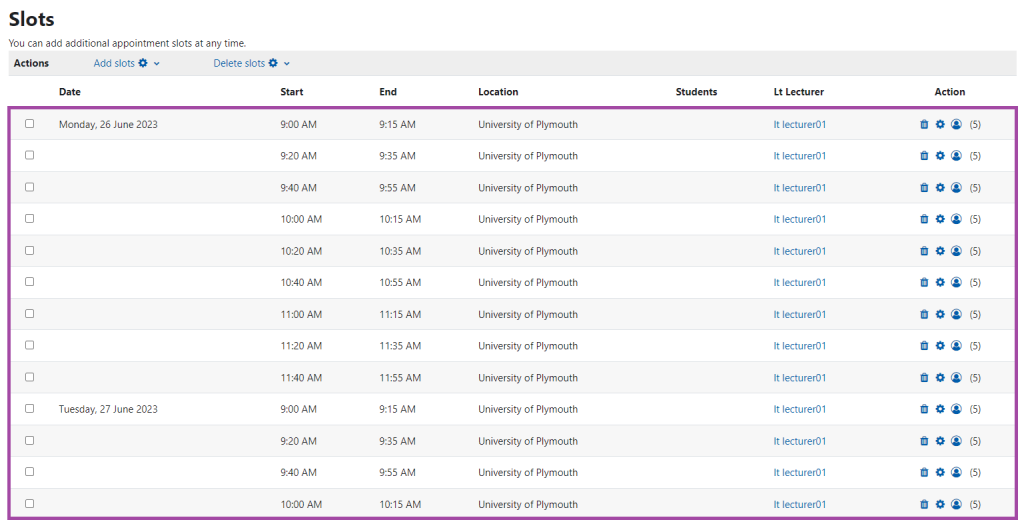
- You will be directed back to the appointment page, where you would be able to see the added time slots. You can always go back and change the settings, lock them from the students or remove them completely. Once the students have booked time slots, their names would be shown under the column ‘Students’.
