Overview
This article provides a guide on how to save a Microsoft PowerPoint presentation as an accessible PDF. This process will ensure that the content is accessible to all users, including those with disabilities.
Preparing your presentation
Before saving your PowerPoint as a PDF, you should ensure that you have run an accessibility check against the content. This will ensure you have accessible features such as; alt text for images, slide layouts which are sequenced clearly, and descriptive hyperlinks.
The fastest and easiest way to make sure your PDF is accessible is to run the Accessibility Checker to identify and fix any accessibility issues.
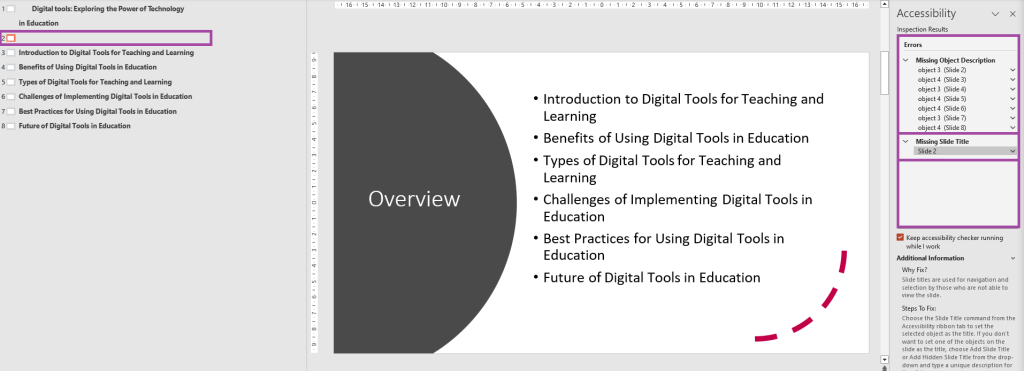
- To run the Accessibility Checker select ‘Review’ in the top toolbar, then ‘Check Accessibility’ in the ribbon.

- This will display an accessibility drawer on the right hand side displaying the ‘Inspection Results’.

- From here any changes be made directly to the PowerPoint, for example ‘Missing Slide Title’.

- Once you have run the Accessibility Checker and resolved the ‘Inspection Results’ you are now able to save the PowerPoint as a PDF.
Saving a PowerPoint as a PDF
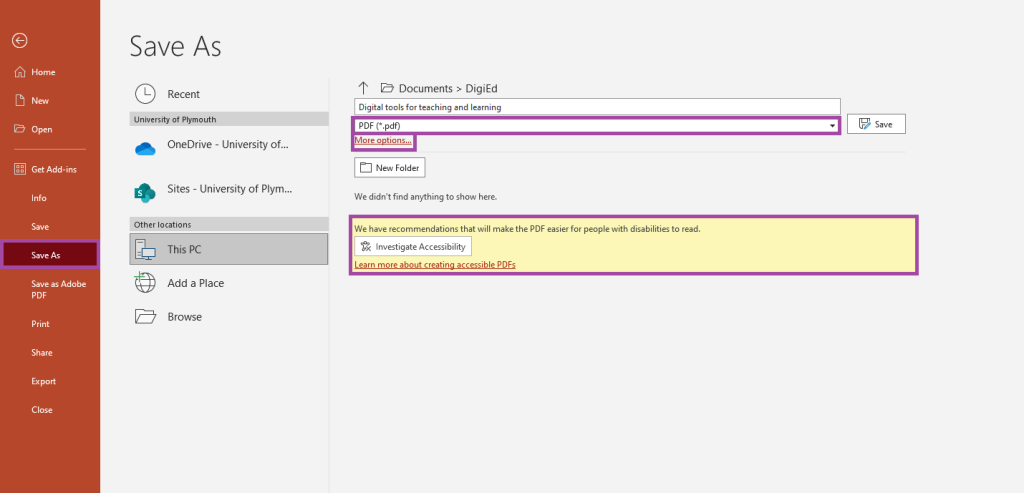
- Now that the accessibility issues have been address you are able to save your document as a PDF. To do so navigate to ‘File’ in the top toolbar.

- Then ‘Save as’ or ‘Save a copy’, select the directory that you would like to save the PDF and also the file name. In the file type drop down select PDF (*.pdf). A box may appear if there are any accessibility recommendations. Then select ‘More options…’

- In the pop up ‘Save As’ dialog box, select ‘Options’

- Then select the ‘Document structure tags for accessibility’ checkbox, and then select ‘OK’. Structure tags are a crucial part of how assistive technology navigates, accesses, and understands the information within a document.

- And finally select ‘Save’. This will now create an accessible PDF of your PowerPoint.

