Account creation
A nominated person in the school would need to do the account creation
To get an account, start here https://miro.com/contact/education/
- Enter your own information into First name, Last Name and Email boxes, using your University account for the email.
- For Educational Institution, use ‘University of Plymouth’ or ‘Plymouth University’
- Reason for Application will be Remote education or similar.
Supporting documents:
- Employment status: Take a screenshot of the UoP staff page showing your employment status (you do not need to include your contact details at the bottom and can grey out your picture should you wish. Digital Education can help with this if needed).
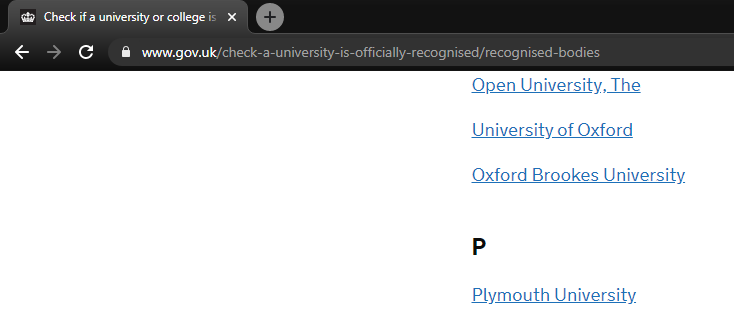
- Accreditation: Either take a screenshot of this page yourself (https://www.gov.uk/check-a-university-is-officially-recognised/recognised-bodies), or send the below:
Once those steps are done, just wait for your license to appear!
Account administration
Renaming account
Once you have had your account confirmed it will need to be set up.
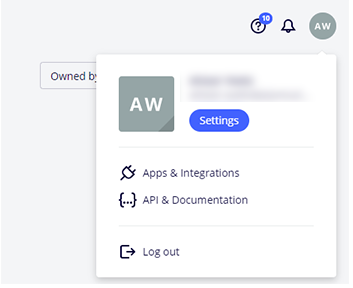
- Click on your initials in the top right corner to bring up the Menu, then click Settings.
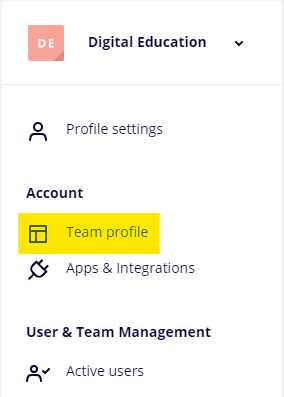
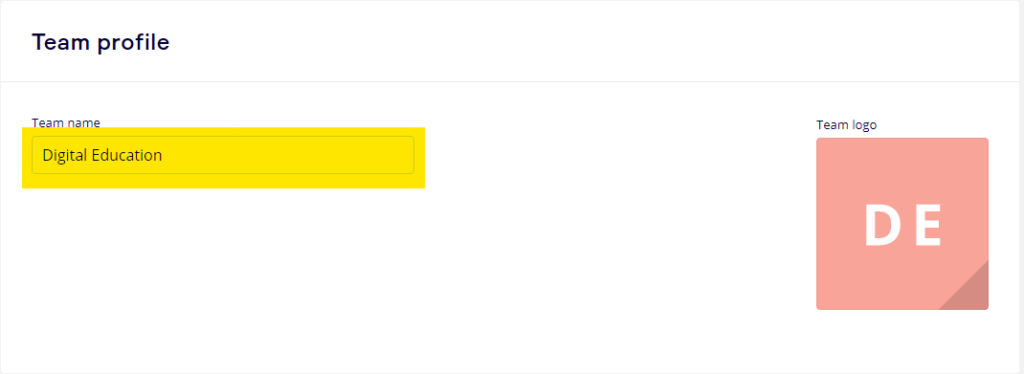
2. Click on the Team profile link from the box on the left.
3. Click in the box to change the name to the faculty or department it will be for. You can also add a logo if you’d like.
How to add a person
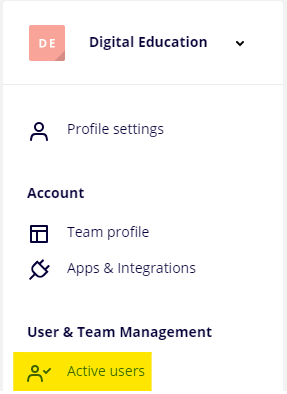
- Click on your initials in the top right corner to bring up the Menu, then click Settings

2. Click on the Active users link from the box on the left.
3. Click Invite new members in the top right of the middle box.

4. Enter the email addresses of people you wish to add to the Miro board.

They will then receive an email asking them to sign up. If they already have an account (whether free or in a different team) they may not get an email, in which case get them to log in and check their teams in the top left.
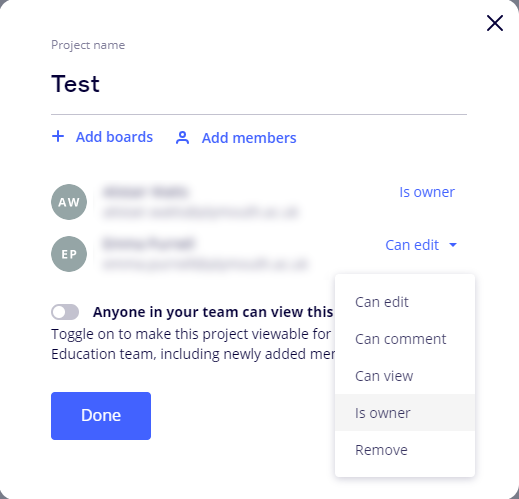
How to create a project for the person you are adding
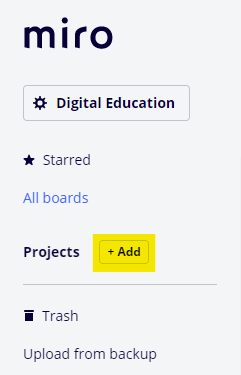
To help keep your Miro team organised it is good practice to give every module its own Project.
- To do this, start by clicking the +Add button to the right of Projects on the left of the page.
2. That will bring up the Project information window. You should change the name from New project to a more relevant name. Add the team members that should be associated by clicking the Add members link and selecting from the list.
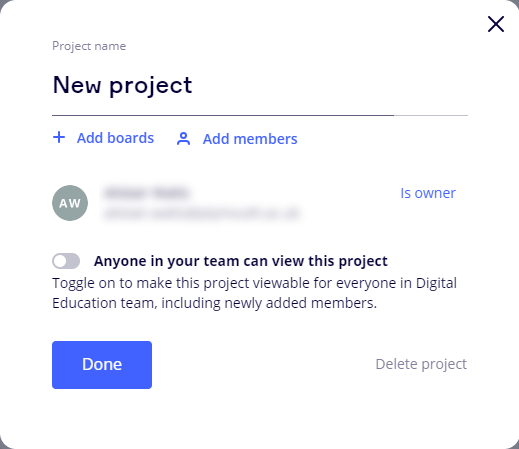

You can then make the newly added member the owner of the project, giving them full rights to add further people to the project.